Saturday, 11 January 2025

Working with dictionaries in Python

 Background

In this post, we will see how we can use dictionaries and specifically how we can enable a custom class in Python to be used as a dict key. I am originally from a Java background and have written posts before on how HashMap/HashTable works in Java (See Related links section towards the end of this post). 

If someone is new
  • Dictionaries are data structures that store data of format key: value pairs
  • Data stored in dict is unique (does not allow duplicate keys), mutable (can edit), and ordered
NOTE: As of Python version 3.7, dictionaries are ordered. In Python 3.6 and earlier, dictionaries are unordered.

Dictionaries in Python

You can initialize a dictionary in Python using {} or dict keyword

  • my_dict = {}
  • my_dict_1 = {"Name": "Aniket", "Country": "India"}
  • my_dict_2 = dict(name="Aniket")
You can print these and see the dictionary. It will print
{}
{'Name': 'Aniket', 'Country': 'India'}
{'name': 'Aniket'}


A normal dict like above is unordered which means the order in which you insert data in dict is not maintained, when you iterate over items in dict it may give you a different order. This is the same as HashMap in Java. However, similar to LinkedHashMap we have OrderedDict in Python (Please note that as of Python version 3.7, dictionaries are ordered. In Python 3.6 and earlier, dictionaries are unordered).

You can also merge one map to another using the update method. Remember key's of a dict are unique and similar to HashMap if you try to insert a key that is already present in the dict then it is going to override the key data with the new value (See below code).
my_dict = {}
my_dict["name"] = "Aniket"
my_dict["Country"] = "India"
for key in my_dict:
    print(f"{key} : {my_dict[key]}")
print("--------------")
others_dict = {}
others_dict["name"] = "John"
others_dict["State"] = "NYC"
for key in others_dict:
    print(f"{key} : {others_dict[key]}")
print("--------------")
my_dict.update(others_dict)
for key in my_dict:
    print(f"{key} : {my_dict[key]}")


Output is:
name : Aniket
Country : India
--------------
name : John
State : NYC
--------------
name : John
Country : India
State : NYC


See how name key value was overridden by new dict key, Country key was not overridden so it stated the same and finally a new key called State was added.

Using a custom class as a key in dict

In Java for a new class, you would typically override equals and hashcode method to make it work, in Python we have to do something similar as well.

Let's create an Employee class with just name and age, try to create objects out of it, push to dict and print it.

class Employee:
    def __init__(self, name, age):
        self.name = name
        self.age = age

    def __str__(self):
        return f"Employee with name: {self.name} & age: {self.age}"


my_dict = {}
e1 = Employee("Aniket", 30)
e2 = Employee("Aniket", 30)
my_dict[e1] = 1
my_dict[e2] = 2
for key, value in my_dict.items():
    print(f"{key} : {value}")

Output is:
Employee with name: Aniket & age: 30 : 1
Employee with name: Aniket & age: 30 : 2


As you see from output it took the same key as different keys in dict and added separate entries. Since the employee (uniquely defined by name and age) is same we want just one entry in dict corresponding to a unique name and age. In this case it should have overridden value from 1 to 2 and just printed single entry with value 2. Let's see how we do that.


For the above to work similarly to Java (where we override equals and hashcode), in Python we override the two methods below
  • __eq__()
  • __hasg__()

So your code will now look like

class Employee:
    def __init__(self, name, age):
        self.name = name
        self.age = age

    def __str__(self):
        return f"Employee with name: {self.name} & age: {self.age}"

    def __eq__(self, other):
        return (self.name, self.age) == (other.name, other.age)

    def __hash__(self):
        return hash((self.name, self.age))

my_dict = {}
e1 = Employee("Aniket", 30)
e2 = Employee("Aniket", 30)
my_dict[e1] = 1
my_dict[e2] = 2
for key, value in my_dict.items():
    print(f"{key} : {value}")


This now prints:
Employee with name: Aniket & age: 30 : 2

 which is in line with our expectations.

See the below diagram for all methods supported by Python dict


Related Links

Wednesday, 8 January 2025

Different ways to iterate over a list in Python

 Background

In this post, we will see the different ways to iterate over a list in Python.

Different ways to iterate over a list in Python

Using for loop


A simple way to iterate over a list is to use a for loop.
  
names = ["A", "B", "C"]
for name in names:
    print(name)

This prints
A
B
C

Using for loop with range

You can also use a for loop with range if you want to access the list with it's index
  
names = ["A", "B", "C"]
for i in range(len(names)):
    print(names[i])

This also prints
A
B
C

Using enumerate

If you want index and value both then you can use enumerate as follows
  
names = ["A", "B", "C"]
for idx, name in enumerate(names):
    print(f"{name} at index {idx}")

This prints
A at index 0
B at index 1
C at index 2

Using while loop

You can also use a while loop for iterating over a list as follows
  
names = ["A", "B", "C"]
i=0
while i<len(names):
    print(names[i])
    i = i + 1

This prints:
A
B
C

List Comprehension

List comprehension is a more concise way to iterate over a list.
  
names = ["A", "B", "C"]
[print(name) for name in names]
This prints:
A
B
C

If you print above list it will print [None, None, None] as you are not creating any new element for storing in new list on iterating the original list

NOTE: This creates a new list and is not a recommended way to iterate over a list. You can use this if you have a usecase to create a new list from existing one with filtering or modifying the original list.

Related Links

Tuesday, 7 January 2025

Slicing strings in Python

 Background

Working with string is very common in any programming language and what comes in handy in Python is slicing. In this post, we will try to understand how slicing works for strings in Python.

Slicing in Python

The syntax for slicing is : Object [start:stop:step] where
  • "start" specifies the starting index of a slice 
  • "stop" specifies the ending element of a slice (not included)
  • "step" specifies the number of elements to jump/step on between start and stop.
Slicing can be done with negative indexes as well and if start/stop is negative that the indexes are counted from the end backward (See diagram below to understand the indexes - positive & negative).

See a few examples below
  
text = "ABCDE"
print(text[0:3])
print(text[0:3:2])
print(text[-4:-1])
print(text[-4:-1:2])

This prints:
ABC
AC
BCD
BD

You can also have the step as a negative number which will essentially consider elements backwards (reversing the data structure). See the following examples (more details on using this to reverse data structure are added in a later section).
  
text = "ABCDE"
print(text[3:0:-1])
print(text[3:0:-2])
print(text[::-1])
print(text[-1:-5:-1])

This prints:
DCB
DB
EDCBA
EDCB

NOTE: text[::] or text[:] is going to create a copy of the existing data structure.

Reversing Elements of Data Structure

You can use a negative step to reverse the elements of the following data structures

  
# list
l = ["a", "b", "c"]
print(l)
print(l[::-1])

# string
s = "abc"
print(s)
print(s[::-1])

# tuple
t = ("a", "b", "c")
print(t)
print(t[::-1])


This prints:
['a', 'b', 'c']
['c', 'b', 'a']
abc
cba
('a', 'b', 'c')
('c', 'b', 'a')

Cheat Sheet

  • a[start:stop]  # items start through stop-1
  • a[start:]      # items start through the rest of the array
  • a[:stop]       # items from the beginning through stop-1
  • a[:]           # a copy of the whole array
We can also pass step to the slicing which determines how many steps to jump for slicing
  • a[start:stop:step] # start through not past stop, by step
Step can also be a negative number
  • a[::-1]    # all items in the array, reversed
  • a[1::-1]   # the first two items, reversed
  • a[:-3:-1]  # the last two items, reversed
  • a[-3::-1]  # everything except the last two items, reversed

Related Links

Monday, 10 June 2024

Creating a simple Counter React application using Redux

 Background

In this post, we will see how to create a simple Counter React.js application. This post assumes you have an understanding of React, Redux and can use IDE like Visual Studio or Webstorm to create React applications. You should have npm installed as well.

Creating a simple Skeleton React application

Let's start by creating a React App using the following command
  • npx create-react-app my-app


You will see final output like above screenshot when the command is completed.
This will create a default app skeleton for you. If you want to see more details you can visit the official GitHub documentation. Once you have the app you can go into the app directory and execute below command to start the React app on local server.
  • npm start


You should be able to access it via browser using some localhost URL. The URL will get printed in the console when you run the above command. (For me it's http://localhost:3000/)

The default application in the browser will look something like the below:


You can now open the project in any IDE you are comfortable working with. I am using Visual Studio for this demo. Your project structure should look something like below:


Note details about some of the main project files:
  • index.js - This is your file that has your application's root component added to the actual DOM. This is the starting point of your application.
  • App.js - This has your main custom root component defined. This has the code for the UI that you see when your application starts.
  • *.css - These are CSS files that add styling to your application.
  • package.json - package.json and the corresponding lock file is where your project npm dependencies are stored.

Creating a Counter application using Redux

Now we are going to use the above skeleton to create a simple counter application which supports the functionality of incrementing and decrementing the counter and the state is maintained via Redux.

  1. Firstly you need to install the redux package to be able to use it. Inside your project directory you can install the redux package using the following command:
    • npm install @reduxjs/toolkit react-redux
  2. Then you need to define a store that your react application is going to use. Create a file store.js and add the following code to it
      
    import { configureStore } from '@reduxjs/toolkit'
    import counterReducer from './reducer/CounterReducer'
    
    export default configureStore({
        reducer: {
          counter: counterReducer,
        },
      })  


    This essentially does
    1. Sets redux store using configureStore imported from @reduxjs/toolkit.
    2. It provides a reducer that will be used to maintain the state (More on this later)
  3. Once you have stored configured the store you need to provide it to the React application. For this go to the starting application file - index.js make the following changes


    1. Put a React Redux <Provider> component around your <App />
    2. Pass the Redux store as <Provider store={store}>
  4. Now you need to define how your state stored in the store actually looks like, what are the actions that will be needed to update that state (the reducer methods). You can do that by creating a new file for reducer and add following code to it.


    import { createSlice } from '@reduxjs/toolkit'
    
    export const counterSlice = createSlice({
        name: 'counter',
        initialState: {
          value: 0,
        },
        reducers: {
            increment: (state) => {
                state.value += 1
            },
            decrement: (state) => {
                state.value -= 1
            }
            
        }
    })
    
    export const { increment, decrement, incrementByAmount } = counterSlice.actions
    export default counterSlice.reducer
    

    1. Note how we have used createSlice method from @reduxjs/toolkit to achieve this functionality.
    2. This method takes the reducer name, initial state - in our case, we have simply called it value and set it to 0, reducer methods - increment and decrement methods that update the state to increase our counter value by + or -1.


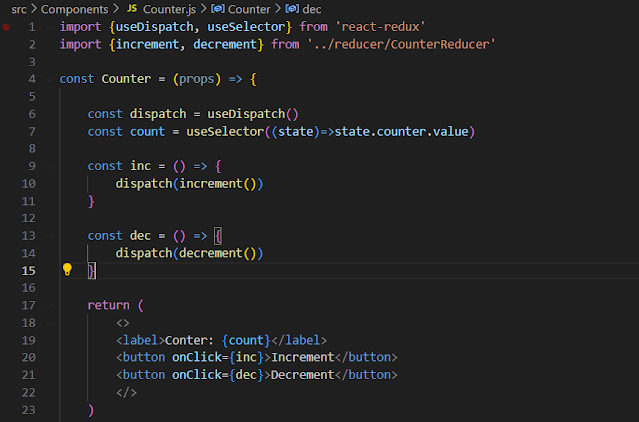
  5. Lastly, you need to create your Counter component to use the the redux store, the state we define and the reducer methods to update the state. See following code for counter component

        
    import {useDispatch, useSelector} from 'react-redux'
    import {increment, decrement} from '../reducer/CounterReducer'
    
    const Counter = (props) => {
    
        const dispatch = useDispatch()
        const count = useSelector((state)=>state.counter.value)
    
        const inc = () => {
            dispatch(increment())
        }
    
        const dec = () => {
            dispatch(decrement())
        }
    
        return (
            <>
            <label>Conter: {count}</label>
            <button onClick={inc}>Increment</button>
            <button onClick={dec}>Decrement</button>
            </>
        )
    
    }
    export default Counter


    1. Note how we are importing reducer methods increment and decrement and calling them on click of respective buttons.
    2. Also note how we are using two new hooks - useDispatch for dispatching reducer actions and useSelector to select from the state.
    3. Redux state is immutable and the reducer provides a way to mutate the state to create a new immutable state.


  6. You can then plug this Counter component in your App.js by importing it and then opening the URL in the browser to see the result. It should look something like below


You can install redux dev tools in Chrome to inspect what's happening in your redux state, what actions are getting dispatched, etc.


Related links


Wednesday, 5 June 2024

Install Node and NPM on Windows using fnm version manager

 Background

In previous posts, we saw how to install node directly using the installer in Windows and on Linux using apt-get command. In this post, we will see how to use a package manager called fnm (Fast Node manager) on Windows.

Install Node and NPM on Windows using fnm package manager

  1. Open your PowerShell window
  2. Run command : winget install Schniz.fnm
    1. This will install the fnm version manager
  3. Before you use fnm you need to do a few terminal settings
    1. Run the command "new-item -type file -path $profile -force" to create your profile file.
    2. Then run the command "notepad $profile" to open your profile file.
    3. Add the below line to the opened Notepad file and save it
      1. fnm env --use-on-cd | Out-String | Invoke-Expression
  4. Once done you can install the node using the following command
    1. fnm use --install-if-missing 20
  5. Once run you can check the installation by running the following commands
    1. node -v
    2. npm -v


Related Links

t> UA-39527780-1 back to top