Background
I recently started using Windows 11 and noticed there is no way to move windows TaskBar around. It is permanently fixed toward the bottom of the screen. I personally need the TaskBar towards the left or right of the screen and here's why - Our screen (Desktop or Laptop has more horizontal space than vertical space, hence it's only logical to keep TaskBar on the left or right of the screen so that it takes only horizontal space). Though there is no good way to move the TaskBar around there is a registry edit hack that does the trick.
NOTE: If you are a normal windows user (Have not worked on programming and Windows internals before), I would recommend not to do the below but just live with TaskBar being on the bottom. Follow the below steps only if you know what you are doing and your own risk.
How to move TaskBar to the top or side in Windows 11
- Open "Windows Start" and search for "regedit" OR
- Go to "Run" (using ⊞ Win+R) and type "regedit" and press enter.
- You will get a prompt asking if you want to let the current user make changes to "Registry Editor". Press Ok.
- Next from the left hierarchy panel, you need to go to the following entry:
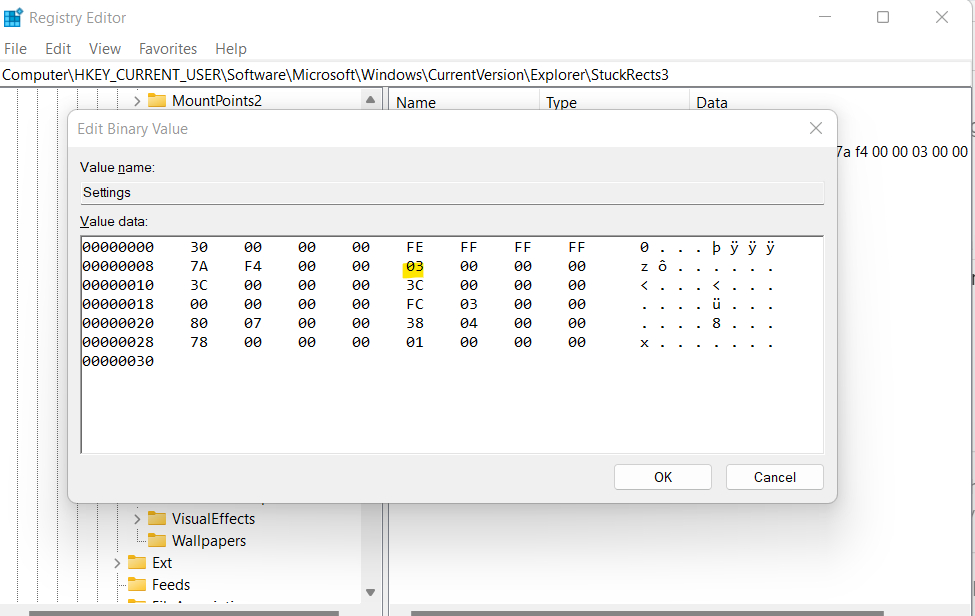
HKEY_CURRENT_USER\Software\Microsoft\Windows\CurrentVersion\Explorer\StuckRects3
- Double-click the Settings binary key.
- Under "Value data" section click on the entry with the 2nd row and the 6th column (The default value would be 03).
- Press the delete key and replace it with the 01 value to move the taskbar to the top. Press ok.
- You can replace them with the following values as you desire
- 00: Move the Taskbar to the left
- 01: Move the Taskbar to the top
- 02: Move the Taskbar to the right
- 03: Move the Taskbar to the bottom
- For changes to take effect you need to restart the "Windows Explorer" process.
- You can go to "Task Manager" and restart the "Windows explorer" process. OR
- Do it via "Command prompt" via the following commands.
- Open the command prompt from the start menu or from the run menu(⊞ Win+R) and "cmd" command.
- "taskkill /f /im explorer.exe"
- "start explorer.exe"
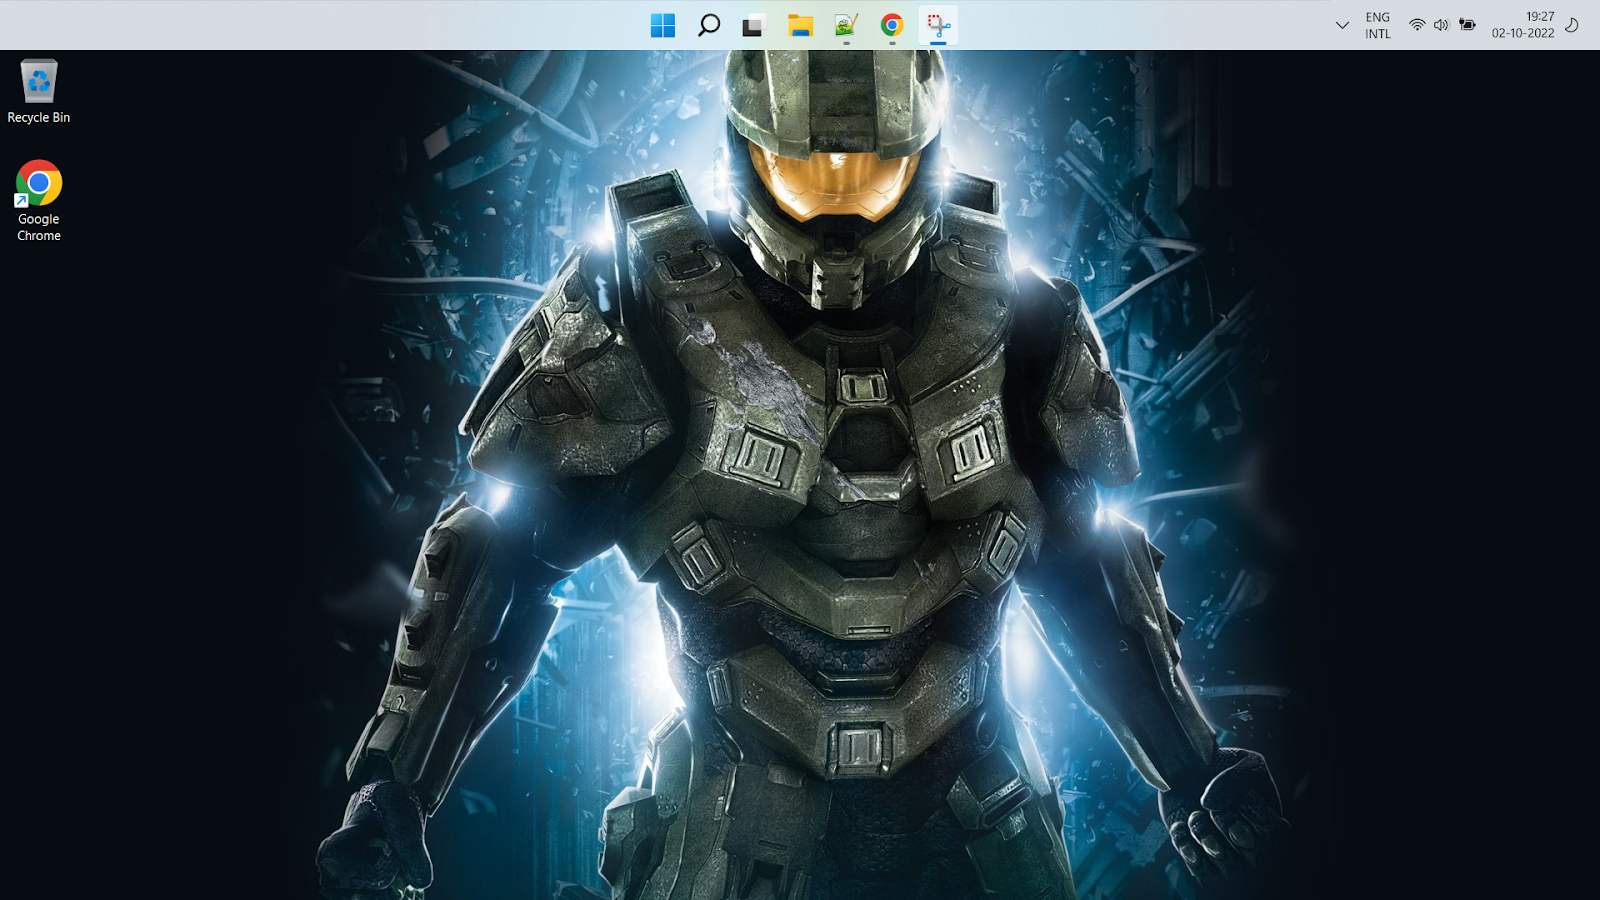
You will then see Taskbar move to the top of the screen.
NOTE: With the above steps, you can move the TaskBar to the right or left as well, but it's useless (It does not work as expected). Hopefully, Windows 11 team fixes this sooner but we have to live with it for now. I personally am not happy with the above as I really want my TaskBar on the right due to the reasons mentioned in the "Background section" at the top.