
Background
In this post we will see how we can create a new user using IAM in AWS. We will also see couple of things around IAM as well. But the goal is to create a new user and see how we can use it to connect to AWS from command line.
IAM is Identity access management. IAM is service used to create and manage access to AWS. This includes user and group management.
IAM - Identity access management
Once you land on IAM dashboard you should be able to see a summary of what you have already in place - users, groups , roles etc.
NOTE : IAM is global. There is no region associated to it. You can notice this in top right corner where you see region selected for various AWS services.

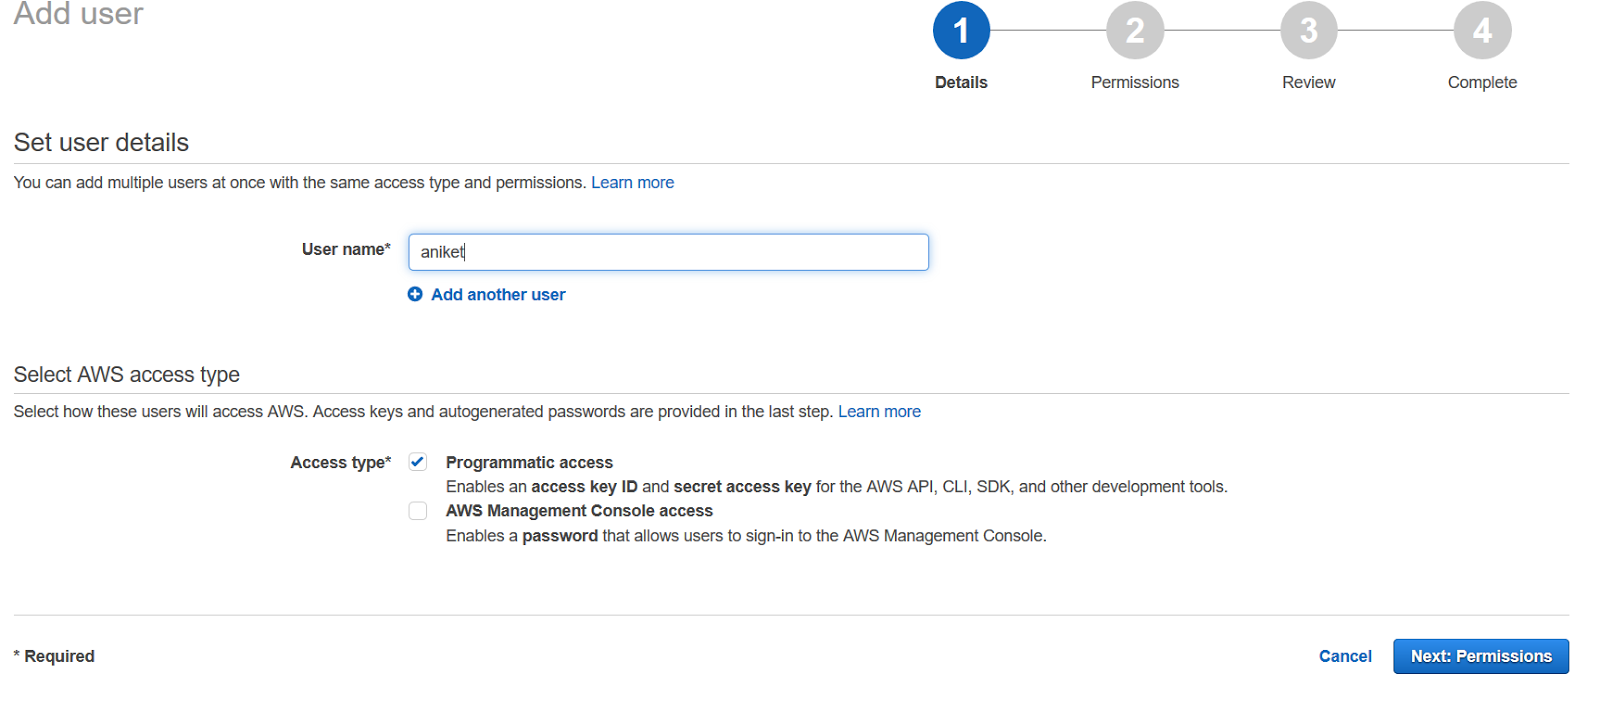
Now go to Users tab. Now click on Add users. Next select the username and then select the access type -
Programmatic access : Enables an access key ID and secret access key for the AWS API, CLI, SDK, and other development tools.
AWS Management Console access : Enables a password that allows users to sign-in to the AWS Management Console.
AWS Management Console access : Enables a password that allows users to sign-in to the AWS Management Console.
You can select both as well. Console access is associated with an username and password where as programmatic access corresponds to access key id and secret access key.
NOTE : you cannot use accesskey id and secret access key to log into console and you cannot use username and password to programmatically access AWS. Also by default user created will have no permissions.
For now let's create a user with just programmatic access. I am using username as aniket which is my name.
Next step is to add permissions. This essentially tells what is the intent of this user. You can
- Either assign user to a group (which has set of permissions)
- Copy permissions from existing user
- or assign one of the predefined permissions

Finally review and create your user. You should now see your access key and secret key. Note it down somewhere. You can also download it as CSV - there is an option to do so on top left corner.

NOTE : These credentials are shown only once on creation. So you can download and store the csv in secure location. If you loose then you will have to regenerate these.
That's it now lets see how we can use this to access AWS. If it was console access you could directly go to AWS console , use username password from csv and log in. Since this is programmatic we need to use AWS CLI (command line interface.)
As you can see in above link AWS cli is program you need to download and configure it on your local machine. I am going to use my EC2 instance running Amazon Linuz AMI. It has AWS Cli integrated.
Try running
- aws s3 ls
So type
- aws configure
You need to provide access key, secret key as we had downloaded it from IAM console in the csv file.

NOTE : Please don't use above creds. I have already deleted those. You can generate creds specific to your user and use it there.
These creds are stored in path ~/.aws/credentials file.

These creds are stored in path ~/.aws/credentials file.

You can view all the AWS region names here -
Since I am based out of Mumbai, India I am going to use - "ap-south-1". As you can see athakur is a bucket created in my S3.
NOTE : Though this is an option it is not recommended. what if you have this across 10 EC2 instances and one of it is compromised. You will generate new creds and apply to all? Definitely not a good way. You need to use IAM roles for this. You need to create a role for EC2 that provides access only to S3.
NOTE : Though this is an option it is not recommended. what if you have this across 10 EC2 instances and one of it is compromised. You will generate new creds and apply to all? Definitely not a good way. You need to use IAM roles for this. You need to create a role for EC2 that provides access only to S3.
NOTE : IAM can integrate with AD to add SSO functionality.


