Showing posts with label PL/SQL. Show all posts

Saturday, 5 August 2017

Select top N records from each category in PL/SQL

Background

Lets say you have 2 tables -
  1. EMPLOYEE
  2. EMPLOYEE_SALARY
EMPLOYEE table has employee id which is a primary key and his name.  EMPLOYEE_SALARY has employee id which is foreign key to id in EMPLOYEE table. This table has employee department and salary. You need to write a query that returns top 2 employees from each department that has highest salary.

Tables creation and data insertion

Table Queries :

create table schema8.EMPLOYEE(ID int, name varchar2(255));
alter table schema8.EMPLOYEE ADD CONSTRAINT PRIMARY_KEY PRIMARY KEY (ID);
create table schema8.EMPLOYEE_SALARY(EMPLOYEE_ID int, department varchar2(255), salary int);
alter table schema8.EMPLOYEE_SALARY ADD CONSTRAINT FK_EMP_ID FOREIGN KEY (EMPLOYEE_ID) REFERENCES schema8.EMPLOYEE(ID);

Data Queries for  EMPLOYEE table:

insert into schema8.EMPLOYEE values(1,'Aniket');
insert into schema8.EMPLOYEE values(2,'John');
insert into schema8.EMPLOYEE values(3,'Sam');
insert into schema8.EMPLOYEE values(4,'Ron');
insert into schema8.EMPLOYEE values(5,'Sky');
insert into schema8.EMPLOYEE values(6,'Paul');
insert into schema8.EMPLOYEE values(7,'Dan');
insert into schema8.EMPLOYEE values(8,'Jess');
insert into schema8.EMPLOYEE values(9,'Troy');
insert into schema8.EMPLOYEE values(10,'Mike');

 Data Queries for EMPLOYEE_SALARY table:

insert into schema8.EMPLOYEE_SALARY values(1,'IT',10000);
insert into schema8.EMPLOYEE_SALARY values(2,'Admin',500);
insert into schema8.EMPLOYEE_SALARY values(3,'Sales',1200);
insert into schema8.EMPLOYEE_SALARY values(4,'Sales',1500);
insert into schema8.EMPLOYEE_SALARY values(5,'IT',9000);
insert into schema8.EMPLOYEE_SALARY values(6,'Admin',4000);
insert into schema8.EMPLOYEE_SALARY values(7,'Admin',5000);
insert into schema8.EMPLOYEE_SALARY values(8,'IT',9500);
insert into schema8.EMPLOYEE_SALARY values(9,'Sales',1000);
insert into schema8.EMPLOYEE_SALARY values(10,'Admin',6000);

Final data :
select * from schema8.EMPLOYEE;
select * from schema8.EMPLOYEE_SALARY;


Solution

We are going to use RANK to partition by department and order by salary - 

select * from (
select id , name, department, salary, RANK() over (partition by department order by salary desc) as rank from(
select e.id, e.name, es.department,es.salary from schema8.EMPLOYEE e left OUTER join schema8.EMPLOYEE_SALARY es on (e.id=es.employee_id))
) where rank <= 2;


First we have done a left outer join so that we capture all employee records with their respective salaries and departments. In outer query we have ranked it based on their salaries in respective department. Finally we select all records that have rank <=2 i.e top 2 records.


Related Links


Monday, 31 July 2017

Install Oracle instant client and sqlplus using Homebrew

Background

 In one of the previous posts we say how to install and run sql plus  and Oracle instant client  on Ubuntu operating system -
In this post we will see the same for a Mac.

This post expects you have homebrew installed. If not please refer -

 Install Oracle instant client and sqlplus using Homebrew

For this you need to download following two files -
  1. instantclient-basic-macos.x64-12.1.0.2.0.zip 
  2. instantclient-sqlplus-macos.x64-12.1.0.2.0.zip 
You can download these files from oracle site - http://www.oracle.com/technetwork/topics/intel-macsoft-096467.html

Once download copy these files into following folder-
  •  ~/Library/Caches/Homebrew 
 Once done run following commands -
  • brew tap InstantClientTap/instantclient
  • brew install instantclient-basic
  • brew install instantclient-sqlplus
 This should install sqlplus for you.


Related Links

Thursday, 9 June 2016

Remove duplicate rows from table in Oracle

Background

This is classic database question to check candidates knowledge about SQL queries. You have a table where lets say you have duplicate entries (lets also say column1 and column2 can form a candidate key). Now you need to remove duplicates from then table. That is all rows in the table should be distinct. How would you do this?

 Query to remove duplicate rows from table in Oracle

You can execute following query to remove duplicates - 

DELETE FROM your_table
WHERE rowid not in
(SELECT MIN(rowid)
FROM your_table
GROUP BY column1, column2);

column 1 and column2 as I mentioned for candidate keys. You can very well add all columns in it.

Example

Queries :
create table schema8.EMPLOYEE(ID int, name varchar2(255));
insert into schema8.EMPLOYEE values(1,'Aniket');
insert into schema8.EMPLOYEE values(2,'John');
insert into schema8.EMPLOYEE values(3,'Sam');


ROWID Pseudocolumn  in Oracle

For each row in the database, the ROWID pseudocolumn returns the address of the row. Oracle Database rowid values contain information necessary to locate a row.

Rowid values have several important uses:
  • They are the fastest way to access a single row.
  • They can show you how the rows in a table are stored.
  • They are unique identifiers for rows in a table.
NOTE : You should not use ROWID as the primary key of a table. If you delete and reinsert a row with the Import and Export utilities, for example, then its rowid may change. If you delete a row, then Oracle may reassign its rowid to a new row inserted later.

NOTE : Although you can use the ROWID pseudocolumn in the SELECT and WHERE clause of a query, these pseudocolumn values are not actually stored in the database. You cannot insert, update, or delete a value of the ROWID pseudocolumn.

Related Links

Saturday, 5 December 2015

Declare variables in PL/SQL

Background

In this post we will see how to declare and initialize variables in PL/SQL block.

Syntax

General syntax to declare variable in PL/SQL is
var_nm datatype [NOT NULL := var_value ];
  • var_nn is the name of the variable.
  • datatype is a valid PL/SQL datatype.
  • NOT NULL is an optional specification on the variable which this variable cannot be assigned null value.
  • var_value or DEFAULT value is also an optional specification, where you can initialize a variable with some specific value.
  • Each variable declaration is a separate statement and must be terminated by a semicolon.
We can assign value to variables in one of the following two ways -
  1. direct assignment (Eg. var_nm:= var_value;)
  2. Using select from (Eg. SELECT col_nm INTO var_nm FROM tbl_nm [WHERE clause];)

 Usage Examples

keeping above syntax in mind you can define variables as follows -


DECLARE 
 id number; 
BEGIN
 SELECT 1000 into id from dual;
 dbms_output.put_line('id : '|| id ); 
END; 
/
OR
DECLARE 
 id number := 1000; 
BEGIN
 dbms_output.put_line('id : '|| id ); 
END; 
/

Thursday, 3 September 2015

Installing Oracle instant database client in Ubuntu

Background

In this post I am going to show how to install oracle instant client (database client) on your ubuntu machine. After this you should be able to connect to your oracle server and execute queries on it from your machine using sqlplus.

Prerequisites

 Firstly find out whether your system is 32 bit or 64 bit. Easiest way to find out is to execute
  • uname - a
If your machine is 64 bit you should notice something like x64 in the output. If you don't see it 32 bit like in my case (refer screenshot below)


Next make sure you have alien command installed. We will need to to convert rpm packages to deb. To install simply run
  • sudo apt-get install alien 


 Installing Oracle instant database client

  1. Download instant client files from oracle site.Select correct files depending on your operating system and architecture. For me it is Ubuntu and 32 bit. So I have downloaded following files
    1. oracle-instantclient12.1-basic-12.1.0.2.0-1.i386.rpm
    2. oracle-instantclient12.1-sqlplus-12.1.0.2.0-1.i386.rpm
    3. oracle-instantclient12.1-devel-12.1.0.2.0-1.i386.rpm
  2. Since only rpm files are available and Ubuntu works with debian we need to convert rpm packages to deb packages.
    1. alien -k  oracle-instantclient12.1-basic-12.1.0.2.0-1.i386.rpm
    2. alien -k oracle-instantclient12.1-sqlplus-12.1.0.2.0-1.i386.rpm
    3. alien -k oracle-instantclient12.1-devel-12.1.0.2.0-1.i386.rpm
  3. Now to install .deb packages use dpkg -i packageName
    1. dpkg -i oracle-instantclient12.1-basic-12.1.0.2.0-1.i386
    2. dpkg -i oracle-instantclient12.1-sqlplus-12.1.0.2.0-1.i386.rpm
    3. dpkg -i oracle-instantclient12.1-devel-12.1.0.2.0-1.i386.rpm  
  4. Now you need to set some environment variables. Open ~/.bashrc file and add export following environment variables (add following line to file)
    1. export ORACLE_HOME=/usr/lib/oracle/12.1/client
    2. export LD_LIBRARY_PATH=/usr/lib/oracle/12.1/client/lib/
    3. export PATH=$PATH:$ORACLE_HOME/bin
  5. To make source your changes are reflected in same terminal execute
    1. source ~/.bashrc
And  you should be good to go. Verify your env variables.


Resolving errors

sometimes you may get following error

"sqlplus: error while loading shared libraries: libsqlplus.so: cannot open shared object file: No such file or directory"


in this case double check you have added LD_LIBRARY_PATH environment variable and it is pointing to write directory. Quick way to check is 
  • echo $LD_LIBRARY_PATH
  • cd <output_of_above_command>
Sqlplus should now be recognized and work as expected


If you see errors related to libaio.so.1 missing then install it using
  • sudo apt-get install libaio1

Related Links


Friday, 3 October 2014

Basic PL/SQL syntax and query executions on Oracle 11g R2 database

Background

Today has been all about databases. Some posts written earlier today - 

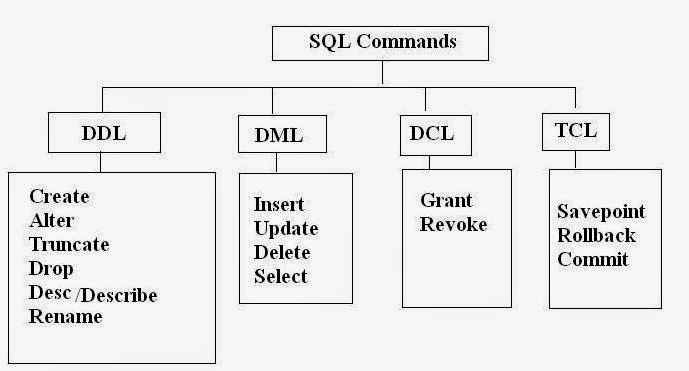
In this post we will write and execute actual SQL code. Lets start from very basics and move onto some advance stuff.

Note : This SQL queries are in fact PL/SQL and will be executed on oracle database 11g R2. I am using sqlfiddle site to test the queries. You can also do so.


Table Creation

Lets first create a database to work on. I am going to create a database named EXPENDITURE with columns as NAME representing the name of person whose expense is and the column AMOUNT which is the amount due for a person.

create table EXPENDITURE (NAME varchar(255), AMOUNT int);


Add Primary key constraint and Insert operation


Now lets go ahead and set constraints of primary key on our table . Primary key is a column of set of columns that uniquely define a row. In our case it will be column NAME. So there cannot be two rows in the table with same entry for NAME. Also lets add some dummy values to our table - 

alter table EXPENDITURE ADD CONSTRAINT PRIMARY_KEY PRIMARY KEY (NAME);
insert into EXPENDITURE values ('JOHN',25);
insert into EXPENDITURE values ('SAM',127);
insert into EXPENDITURE values ('EDWARD',12);
insert into EXPENDITURE values ('PENNY',1024);

Now lets print the values in the database - 

select * from EXPENDITURE;


|   NAME | AMOUNT |
|--------|--------|
|   JOHN |     25 |
|    SAM |    127 |
| EDWARD |     12 |
|  PENNY |   1024 |

Add Secondary key constrain

Eg.
create table schema8.EMPLOYEE(ID int, name varchar2(255));
alter table schema8.EMPLOYEE ADD CONSTRAINT PRIMARY_KEY PRIMARY KEY (ID);
create table schema8.EMPLOYEE_SALARY(EMPLOYEE_ID int, department varchar2(255), salary int);
alter table schema8.EMPLOYEE_SALARY ADD CONSTRAINT FK_EMP_ID FOREIGN KEY (EMPLOYEE_ID) REFERENCES schema8.EMPLOYEE(ID);

Delete operation


Now lets perform a delete for entry with name ='SAM' and and check the table again.

delete from EXPENDITURE where NAME='SAM';


|   NAME | AMOUNT |
|--------|--------|
|   JOHN |     25 |
| EDWARD |     12 |
|  PENNY |   1024 |


Yup entry is deleted. You can also do a truncate which will remove all entries from the table or you can do drop  which will drop the entire table including all the entries in it.


Renaming and modifying column


Now lets rename the column AMOUNT to EXPENSE and modify the column NAME from varchar(255) to varchar(128) and say it can never be null. Finally lets describe the table to see the changes -


ALTER TABLE EXPENDITURE RENAME COLUMN AMOUNT to EXPENSE;

ALTER TABLE EXPENDITURE MODIFY NAME varchar(128) not null;

DESCRIBE EXPENDITURE;


Note : Unfortunately DESCRIBE does not seem to work on JSFiddle. It's because "describe" is not a part of SQL. It is something that Oracle's sqlplus shell implements, not the server. So as an alternative we can do  -

ALTER TABLE EXPENDITURE RENAME COLUMN AMOUNT to EXPENSE;

ALTER TABLE EXPENDITURE MODIFY NAME varchar(128) not null;

select column_name, data_type, data_length, nullable from all_tab_columns where table_name = 'EXPENDITURE';

| COLUMN_NAME | DATA_TYPE | DATA_LENGTH | NULLABLE |
|-------------|-----------|-------------|----------|
|        NAME |  VARCHAR2 |         128 |        N |
|     EXPENSE |    NUMBER |          22 |        Y |


GROUP BY AND ORDER BY statements

select * from EXPENDITURE order by EXPENSE;


|   NAME | EXPENSE |
|--------|---------|
| EDWARD |      12 |
|   JOHN |      25 |
|  PENNY |    1024 |


select * from EXPENDITURE order by EXPENSE DESC;


|   NAME | EXPENSE |
|--------|---------|
|  PENNY |    1024 |
|   JOHN |      25 |
| EDWARD |      12 |


select NAME, max(EXPENSE) from EXPENDITURE group by NAME;


|   NAME | MAX(EXPENSE) |
|--------|--------------|
| EDWARD |           12 |
|   JOHN |           25 |
|  PENNY |         1024 |

Note : Since we have unique names (NAME being the primary key) each group is infact a row. So you would see the same result selecting all rows from a database.

NOTE : You cannot use aggregate functions in where clause.

Counting number of rows in a Table

You can do something like - 

SELECT COUNT(NAME) FROM EXPENDITURE;
| COUNT(NAME) |
|-------------|
|           3 |


Note : Use the primary key in the argument of COUNT() function. As primary key guarantees unique row output of above query will give you total number of rows in the table.

Lets move on to something more advance...

Packages, Procedures and Functions....

Consider following code - 


-- create table

create table EXPENDITURE (NAME varchar(255), AMOUNT int)

//


--add primary key

alter table EXPENDITURE ADD CONSTRAINT PRIMARY_KEY PRIMARY KEY (NAME)

//


-- insert data

insert into EXPENDITURE values ('JOHN',25)

//

insert into EXPENDITURE values ('EDWARD',12)

//

insert into EXPENDITURE values ('PENNY',1024)

//

-- rename column

ALTER TABLE EXPENDITURE RENAME COLUMN AMOUNT to EXPENSE

//

-- change data type

ALTER TABLE EXPENDITURE MODIFY NAME varchar(128) not null

//


-- create package spec

create or replace package PKG_EXPENDITURE

is

    -- define one public procedure

    procedure ADD_EXPENSE(p_name in varchar, p_expense in int);

end;

//


-- create package body

create or replace package body PKG_EXPENDITURE

is

    -- private DOUBLE EXPENSE procedure

    procedure DOUBLE_EXPENSE(p_name in varchar, p_expense in int)

    is

    begin

        insert into EXPENDITURE values (p_name, p_expense);

    end;


    -- private function to return twice the input

    function double(p_number in int)

    return int

    is

    begin

        return 2 * p_number;

    end;


    procedure ADD_EXPENSE(p_name in varchar, p_expense in int)

    is

    begin

        DOUBLE_EXPENSE(p_name, double(p_expense));

    end;


end;

//


and now execute it as -

-- execute the public procedure of the package

begin

    PKG_EXPENDITURE.ADD_EXPENSE('Aniket',111);

end;

//


select * from EXPENDITURE

//


and you should see the output - 

|   NAME | EXPENSE |
|--------|---------|
|   JOHN |      25 |
| EDWARD |      12 |
|  PENNY |    1024 |
| Aniket |     222 |


Explanation - In above code we have first defined a public procedure ADD_EXPENSE. From this procedure we are calling a private procedure DOUBLE_EXPENSE which doubling the expense amount using a private function called double. Finally in DOUBLE_EXPENSE procedure we are simply inserting the value into the EXPENDITURE table. To check the output we are calling this public proc ADD_EXPENSE  and then printing the table.

Note : I have used "//" as a query terminator. You can use ';'. You have a list of options in SQLFiddle.


Difference between DML and DDL statements in SQL

Background

SQL as we all know stands for structured Query language. SQL Statements can be categorized as -

  1. DDL (Data definition language)
  2. DML (Data manipulation language) 
  3. DCL (Data Control Language)
  4.  TCL (Transaction Control)

In this post we will see what these statements are and what are the differences between the. This post is written in the context of PL/SQL which is scripting language for oracle DB. So some of the statements may be different or just related to oracle DB.


Definitions

  • DDL (Data definition language): As the name suggests these statements  are used define database structure or schema.

    Example -

    1. CREATE - to create objects in the database
    2. ALTER - alters the structure of the database
    3. DROP - delete objects from the database
    4. TRUNCATE - remove all records from a table, including all spaces allocated for the records are removed
    5. COMMENT - add comments to the data dictionary
    6. RENAME - rename an object.

  • DML (Data manipulation language): These statements are used to change or alter data with the database or schema.

    Example -

    1. SELECT - retrieve data from the a database
    2. INSERT - insert data into a table
    3. UPDATE - updates existing data within a table
    4. DELETE - deletes all records from a table, the space for the records remain
    5. MERGE - UPSERT operation (insert or update)
    6. CALL - call a PL/SQL or Java subprogram
    7. EXPLAIN PLAN - explain access path to data
    8. LOCK TABLE - control concurrency

  • DCL (Data Control Language) : These statements are use to control access or priveledges.

    Example-

    1. GRANT - gives user's access privileges to database
    2. REVOKE - withdraw access privileges given with the GRANT command

  • TCL (Transaction Control) : These statements control transactions like Commit and rollback.

    Example-

    1. COMMIT - save work done
    2. SAVEPOINT - identify a point in a transaction to which you can later roll back
    3. ROLLBACK - restore database to original since the last COMMIT
    4. SET TRANSACTION - Change transaction options like isolation level and what rollback segment to use
     

Differences

  1. As the name and definition suggests DDL statements are for defining the schema or database where as DML statements are of manipulating the database data.
  2. We can use where clause with DML statements but not with DDL statements.
  3. DDL statements are auto commit meaning they cannot be rolled back where as DML statements can be rolled back.
  4. During the execution of DDL command. DDL command would not copy the actual content to rollback tablespace, hence it is fast compared to DML command.


Difference between delete and truncate command ? - Interview Q

This is a very famous database interview question. If you know these commands truncate and delete - both are used to clean the data in the table. 
  • Notice delete is a DML statement where as truncate is a DDL statement. 
  • Hence with truncate you cannot use where clause and rollback is not possible. Delete will remove all row entries which will satisfy the where clause. 
  • Also truncate is faster than delete as no entries are logged into rollback space. 
  • Lastly delete will trigger all the DML triggers associated with delete which will not be the case with truncate.
  • Delete will lock each row for deletion whereas truncate locks the entire table.
Note : drop statement will drop the entire table including all of it's row entries.
t> UA-39527780-1 back to top