
Background
A while ago I had written a post explaining difference between SaaS, PaaS and IaaS.
For more details on why you should use IBM bluemix, what are the benefits you can refer to following slideshare PPT -
Getting Started
You can sign in into Bluemix portal with following URL -
You will need an IBM ID for the same. If you don't have you can create one. Once you login you should see following dashboard section -

Once you have the Dashboard you are all set to create and deploy App of your own. Go ahead and Click on Create An App.
Creating an App
- Click on Create An App

- You will be prompted to choose what type of App are you creating ? Is it a web app or a mobile App? For this demo tutorial lets select web app.
- Next on selecting WEB you will get options to select from various runtimes like Java, NodeJS etc...

- For this demo I am choosing NodeJS as it will be easier to demonstrate final outputs. Choose SDK for Node js and click continue.
- You will then be asked to enter App Name. This will for unique root to your Application. So if some name is already taken you have to give another one (just like domain names :) )

- Put some name. I had put DemoWebApp but unfortunately it was taken. So I have put it as DemoTestWebApp. We will see it is next screenshots. Anyway click on finish and your template App should be created, built and deployed.
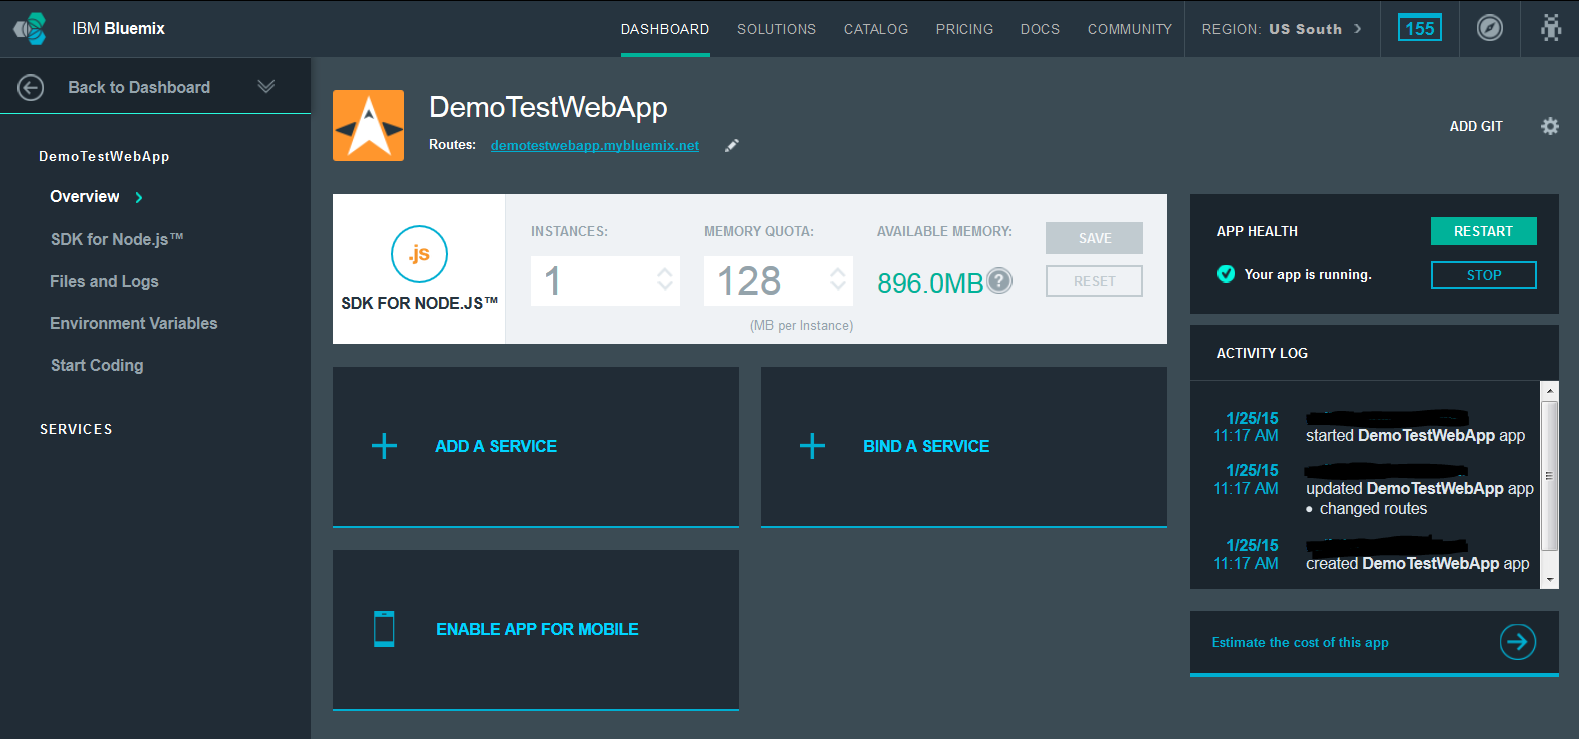
- Let see how it looks like, shall we?
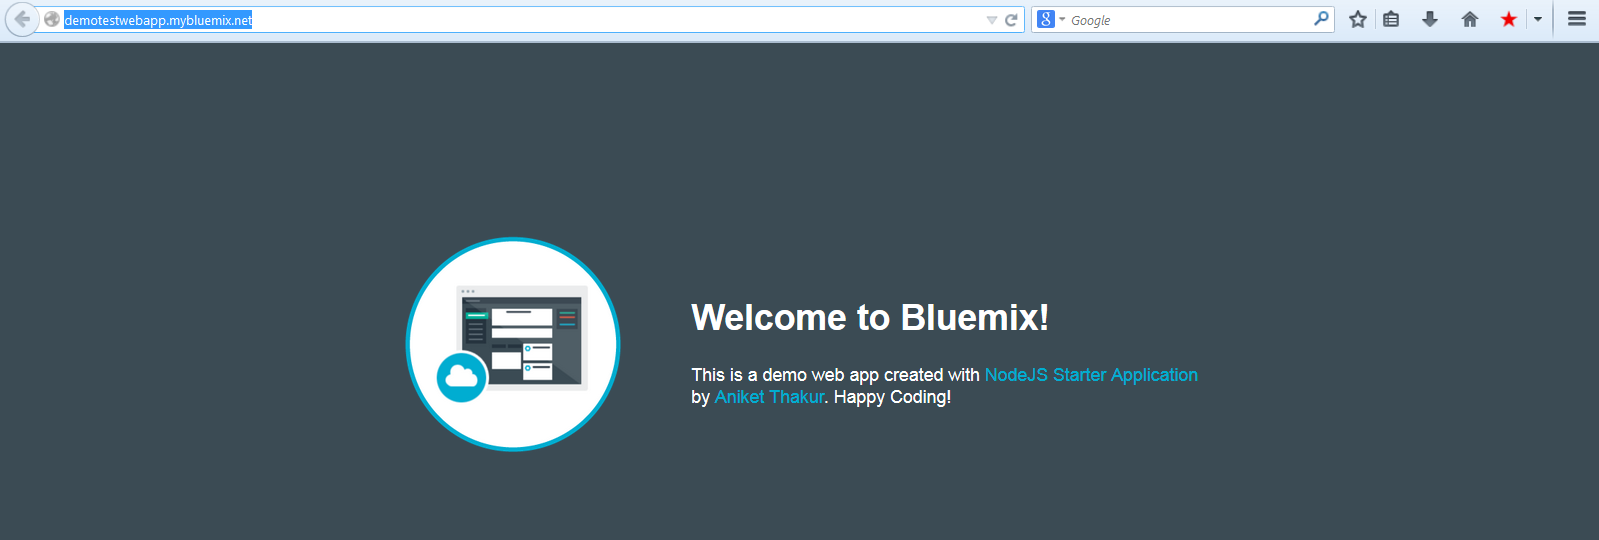
See the Route field in above screenshot? That is unique url that points to your App. Go ahead click on it or copy paste it in the URL of your favorite browser. You should see following -

- Yeah we create our template App...big deal? What the fun unless we modify it and give it our flavor :)
Modifying and deploying your own code
If you see start coding section under dashboard you should see various methods in which you can build your code.

- Yes it provides seamless integration with GIT. Fell free to try out any/all methods. For this demo I am going to use the CF (Cloud foundry) CLI(command line interface). This section gives you list of exact steps that you need to do for creating a local copy of code, changing it and deploying it. But will re do them for better understanding -
- Download and install CF CLI from here. I am using Windows. You can choose installer which suits your requirement.... Debian, Redhat, Mac OS X, Windows etc.
- To verify that it is correctly installed you can simple type cf -v in your command line and it should print you the version. For me it gives -
C:\Users\athakur>cf -v
cf version 6.9.0-620f841-2015-01-20T18:01:40+00:00 - Next Download the template code. Link to it should be in the same CF CLI section of Start coding section. Go ahead and download the zip file (DemoTestWebApp.zip in my case) and extract it.
- Lets make some changes to the code now. Example code makes use of Jade Node template engine. The pages that are rendered are in views folder of extracted folder.
- I have changed some line of code in body.jade file. For the changes that I made and how can we deploy these changes see following screenshots -
body.jade File Content
//- body.jade
//- This file provides the HTML body part.


body
  table
    tr
      td(style= "width:30%;" )
        img(src="/images/newapp-icon.png")
      td
        h1 Welcome to Bluemix!
        p This is a demo web app created with <span class = "blue">NodeJS Starter Application</span> by <span class = "blue">Aniket Thakur</span>. Happy Coding!
Now lets deploy our code -
- Navigate to App directoru -> cd C:\Users\athakur\Sources\WebTestAppDemo
- Next connect to bluemix -> cf api https://api.ng.bluemix.net
- Login -> cf login -u yourUserName
- Setup target -> cf target -o yourOrganization -s yourSpace
- Finally push your code -> cf push DemoTestWebApp
Finally you should see something like -
1 of 1 instances running

App started


OK

App DemoTestWebApp was started using this command `node app.js`

Showing health and status for app DemoTestWebApp in org *********** / space at
hakur as *************...
OK

requested state: started
instances: 1/1
usage: 128M x 1 instances
urls: demotestwebapp.mybluemix.net
last uploaded: Sun Jan 25 06:28:12 +0000 2015

     state     since                    cpu    memory          disk
#0   running   2015-01-25 11:59:01 AM   0.0%   18.1M of 128M   35.9M of 1G
This means your code is deployed and your app is restarted. All you have to do now is revisit your App URL and test out the changes.
Lastly I would say it always fun to try new technologies. So do give this a try. It will surely make your life easier (it terms of app deployment and maintenance ofcourse :) )
Related Links
- Difference between SaaS, PaaS and IaaS explained
- IBM Cloud Application Development Platform(Slideshare)

No comments:
Post a Comment