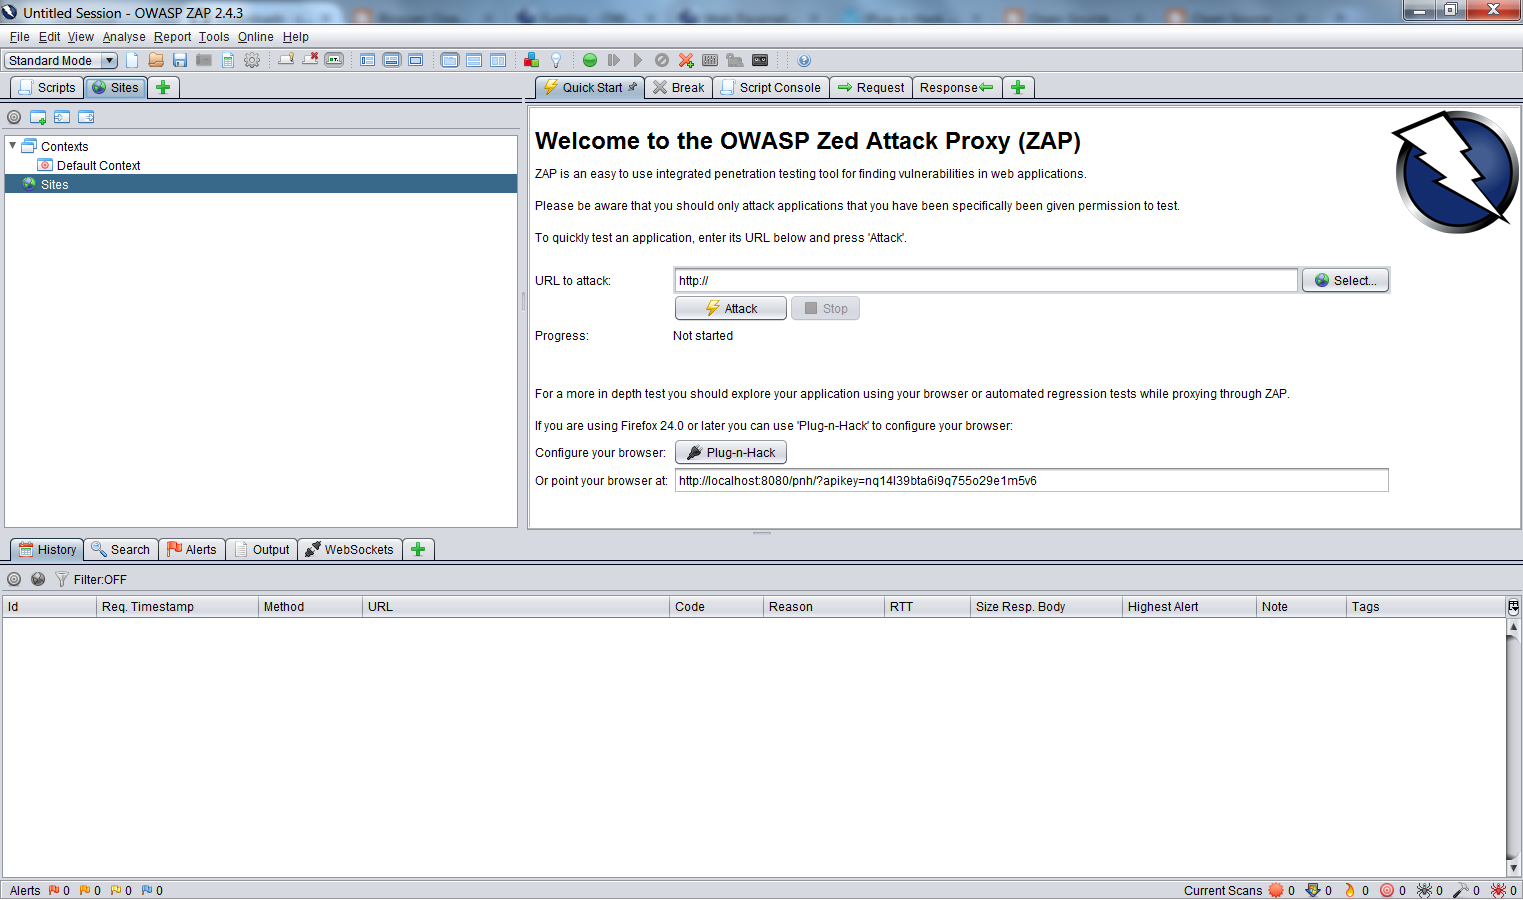
In this post I will show you some of the features of ZAP proxy that I have explored so far.
Spider And Active Scan
Whenever you decide to attack an URL that you see in ZAP's home page ZAP will crawl the page, find out other relevant links that the base URL may refer to in response. It also figures out GET/POST requests applicable. This is basically spider attack.
For demo purposes I am going to attack following URL -
http://ch01.mybluemix.net/ch01/
It' a simple problem where you have to exploit few vulnerabilities to guess the password :)
Next ZAP will scan all the relevant applicable URL with test request params. It shows various attributes like response code, response bytes etc. You can also see the raw request/response with right click the request entry in Active scan. You can also see list of applicable URLs in the left panel.
NOTE : One good trick to inspect irregular behavior is to inspect the size of response and inspect further the ones you see fishy.
Resend Request
Another useful feature is "Resend" . Just right click the request on left panel and select resend. You can then edit the request as per your wish (edit request params, headers add cookies etc) and send.
Encode/Decode/Hash
This is a very handy feature that I loved in ZAP. Input a String and it will give you it's Encoding/Decoding/Hash whatever you need -
You can access this from Tools -> Encode/Decode/Hash
Fuzzer
If you don't know what fuzzing is -
"Fuzz testing or Fuzzing is a Black Box software testing technique, which basically consists in finding implementation bugs using malformed/semi-malformed data injection in an automated fashion. "
ZAP has an in build fuzzer that you can use. Simply select the URL you want to fuzz -> Right click -> Attack -> Fuzz
You will need to highlight the area you want to fuzz and select add payload. The highlighted area can be anything - request parameter, cookie value, header etc. Also payload can be anything list of strings, scripts to be injected random values , alphabets etc.
Sample example is screenshot below -
In above example I have highlighted "ZAP" which is the password. So I am going to fuzz various values of passwords. Next click Add to add payloads. You can define your own sets of string as well. I am using inbuilt file fuzzer that provided pre defined sets of strings. Finally click "Start Fuzzer" to start fuzzing.
NOTE : Again as I mentioned before it is always advantageous to sort response size to check unusual response to exploit :)
So far I have explored these. Will keep you updated :)
Stay tuned!
Recently I came across a more powerful proxy tool called OWASP Zed Attack Proxy or ZAP . It's not just a proxy tool. It is a tool used for ethical hacking. You can use it to attack sites and find vulnerabilities. Using ZAP you can do various things like -
In this post we will see how to do a SSH key based authentication where you do not need to enter your password. For demo purpose I am going to start a SSH server on my Linux Ubuntu machine and then connect to it from my same linux machine without password.
Starting SSH server
First lets install openssh server.
sudo apt-get install openssh-server
Now lets take a backup of config file so that we have a good config too look at later (in case we mess things up ;) ) -
NOTE : sshd_config is the configuration file for the OpenSSH server. ssh_config is the configuration file for the OpenSSH client. Make sure not to get them mixed up.
Now simply restart ssh server -
sudo restart ssh
You can ssh into same machine using localhost just to test your ssh server setup -
Sure you can do the same from any other machine using password
But in this we want to do this without password -
Configuring ssh connection without Password
You need to execute following commands -
ssh-keygen
ssh-copy-id -i ~/.ssh/id_rsa.pub aniket@localhost
1st step creates a new public private key pair on your local machine. 2ms step copies your public key to the remote machine (localhost in this case) and from then on remote machine will remember your identity.
As you can see post copying the public key to servers authorized keys you no longer need password to connect to your SSH server.
we saw how to install node and npm on widows and also saw running a demo program. In windows it is as simple as downloading the installer and running it. In this post we will see how to install the same in Linux using command line.
Installing Node and NPM on your Linux machine
I am using Ubuntu so I am going to use apt-get to install software’s. You can do the same using yum if you are using fedora or alike.
First install some of the dependencies that are requied with following command-
sudo apt-get install python-software-properties python g++ make
Next you will need to add repository to install node and npm from -
sudo add-apt-repository ppa:chris-lea/node.js
Next get an update
sudo apt-get update
Now finally install nodejs
sudo apt-get install nodejs
This should install both node and npm for you. You can print their version to confirm they are installed -
NOTE : If you see nodejs module installed instead of node then resolve as follows (May differ across various Ubuntu versions)-
You need to manually create a symlink /usr/bin/node. Shortcut for bash compatible shells:
sudo ln -s `which nodejs` /usr/bin/node
Or if you use non-standard shells, just hardcode the path you find with which nodejs:
sudo ln -s /usr/bin/nodejs /usr/bin/node
Now lets quickly test it. Create a file called server.js and following contents in it -
 var http = require('http');
 http.createServer(function (req, res) {
    res.writeHead(200, {'Content-Type': 'text/plain'});
    res.end('Hello World\n');
 }).listen(1337, "127.0.0.1");
 console.log('Server running at http://127.0.0.1:1337/');
Now save it as run it -
You should see following in command promt -
aniket@aniket-Compaq-610:~/programs$ node server.js Server running at http://127.0.0.1:1337
Now go to browser and hit following url -
http://127.0.0.1:1337
You should see - Hello World
That means our server is up and running
Updating Node.Js version
You can use a module called n to upgrade you node package in Mac/Ubuntu
sudo npm install -g n
sudo n stable
This will install latest stable node package. You can run
node --version
If you are still seeing old version it might be directory issues where new package is installed. I had to create a symlink to make it work-
and create your free account. Note you will have to provide your credit card details and as a part of the verification process, they will cut 2/- rs from your account. But don't worry it will get refunded to your account within 3-4 business days. I am going to skip this part where you create your account - it is very straightforward after you visit above URL. In this post, we will see how to get the EC2 instance which is the basic free tier up and running.
EC2 stands for Elastic compute cloud and it is essentially virtual machines in the cloud.
Launching EC2 instance
Once you log in your dashboard should look as below -
Click on the EC2 (Virtual server in the cloud). You should see EC2 dashboard
Click on "Launch Instance" to start the launch configuration. Note the "instances" link on the left. We will visit it once our EC2 instance is up and running.
Next, you will have to choose which OS to boot up. I am selecting Ubuntu server 14.04 LTS which is a part of the free tier. You can choose the OS you want.
Next, you will have to select the instance type. Select t2.micro with 1 CPU and 1GB mem.
NOTE: t2.micro is eligible for free tier. You can try others as well but they will incur you some cost. So if you are experimenting with free tire stick to t2.micro. They can be of following families -
Family Speciality Use case
D2 Desne storage File servers/Data warehousing/Hadoop
R4 Memory optimized Memory intensive apps/DBS
M4 General purpose Application servers
C4 Compute optimized CPU intensive apps/DBs
G2 Graphics intensive Video encoding/3d Application streaming
I2 High speed storage No sql dbs/data warehousing
F1 Field programmable gate array Hardware acceleration for your code
T2 Lowest cost general purpose web servers/small dbs
P2 Graphics/General purpose GPU Machine learning
X1 Memory optimized SAP hana/ apache spark
Now click on Configure Instance Details.
Keep number if instances to 1 as we just need 1 instance. There are multiple EC2 payment options available -
On demand - Fixed rate by hour (by the second only for Linux)
Reserved - Same as On demand but for 1 year or 3 year terms so that you get some discount
Standard RIs (Up to 75% off on demand)
Convertible RIs (Up to 54% off on demand)
Scheduled RIs
spot - Enables you to bid whatever price you want if your start and end times are flexible. If the cost goes below your bid price your EC2 instances are provisioned and when it goes above they are canceled.
If you terminate the instance you pay for the hour
If AWS terminates the SPOT instance you get the hour it was terminated for free
Dedicated host - Physical EC2 server dedicated for use. Can reduce cost by allowing to use our existing server bound software license like Oracle or VMware.
Purchase option shows an option to go for spot option. This may not be available in your region so check that out. You can also go to tenancy and choose between shared and dedicated host.
We saw on demand, Spot and dedicated host. For reserved instances, you can see under instances section in your EC2 dashboard.
If you see network a default VPC (virtual private cloud is selected for you. You can create one if you need). Don't worry if you don't understand these terminologies. We don't require these to run our EC2. Just keep defaults. Also, you can see a subnet assigned to you. This is basically an IP range. Subnet is per availability zone -
Also, select the option to auto-assign IP (It should be checked by default). To select static IP refer -
Keep the defaults you see and proceed to storage settings.
Here you can select the type of EBS volume. General types of EBS volumes are -
General purpose SSD (GP2)
Up to 10000 IOPS (I/O per second)
Provisioned IOPS SSD (IO1)
Designed for IO intensive applications like large relational DB or No Sql db.
10000 IOPS ~ 20000 IOPS
Throughput optimized HDD (ST1)
Use cases Eg. Big data, Data warehousing
Cannot be a boot volume
Frequently accessed workloads
Cold HDD (SC1)
Lowest cost storage for infrequently accessed workloads
Cannot be a boot volume
Use case Eg. File server
Magnetic (standard)
Lowest cost per GB
Bootable
As you can probably see from above types only types that are available for booting and hence qualified for root EBS volume are -
GP2
IO1
Magnetic
You can also add new volumes (Other that Root which is bootable volume). Here you can see all types of EBS instances.
NOTE: Your EBS volume will get deleted by default on termination your EC2 instance. This is a setting under Add storage section while configuring your EC2 instance.
Next, go to Tag Instance. This is where you name your EC2 instance.
I have named it athakur-webserver. You can name it whatever you want. You will see this in instances tab later.
Next, go to configure security groups. Here you can configure which IPs can access the EC2 instance. The default group is 0.0.0.0 which mean all IPs can access it. I am going to keep it as such. Also, not this settings are per Protocol/Port. By default port 22 is allowed which is your SSH.
If you want to host your site and be able to access it you can open HTTP or HTTPS types as well.
Next click on "Review And Launch". You will get a screen with details of all configurations you have done so far. Review it and select Launch.
Before your instance is actually launched you will need to create a pair of the public and the private key that will enable you to connect to your EC2 instance. Basically, you will have the private key (used on the machine you use to connect remotely to your EC2 server) and EC2 server has the public key. You can download your private key (it will be a .pem file) and save it on your local machine.
So create your key and "Download Key Pair" and finally launch your instance.
It may take some time for your EC2 instance. Once it is up you are good to go. You can go to dashboard and select the instances link I referred to in 2nd screenshot.
You should see your instance details here. You can also note the public DNS that is basically your hostname.
Connecting to your EC2 instance
Now you can SSH to your EC2 instance from your local machine. To know the steps right click on your running instance and select connect. You should see steps to connect via ssh.
to connect to your EC2 instance via putty. You will have to convert your pem file to ppk file and give it as input to putty for connecting. PuTTY has a tool named PuTTYgen, which can convert keys to the required PuTTY format (.ppk). You must convert your private key into this format (.ppk) before attempting to connect to your instance using PuTTY.
Once you are done you should be able to connect -
For windows use putty and in auth section give this new private key create -
NOTE: Your public DNS or your hostname will change every time you reboot your instance. To get a permanent IP address, click Elastic IPs in the AWS Management Console (left navigation bar), allocate a new IP address and associate it with your instance.