Sunday, 9 November 2014

Strategy Design pattern in Java

Background

In my previous post on Introduction to Design Patterns  we saw there are various types of Design patterns. They are mainly categorized into three types - 
  1. Creational
  2. Structural
  3. Behavioral
 In this post we will lean about Strategy Design pattern. This design pattern comes under behavioral type. This design patterns lets you  
  • define family of algorithms or class behaviors that can change at runtime depending on the context involved. To put it in other words 
  • it lets you choose your strategy from a list of predefined ones depending on what would suit your current runtime context.

Class Diagram


 Above class diagram represents the program that I will be using to demonstrate Strategy pattern. Points to note here -

  1. Both concrete type of Strategies i.e AdditionStrategy and SubtractionStrategy implement the interface Strategy that has a common method performOperation() that each implementing class implement.
  2. Also note the composition relationship between Strategy class and Calculator class. It simply means Calculator class owns Strategy class and that Strategy class cannot exist meaningfully without Calculator class.

To the Code

Lets first write own interface class - 

 Strategy.java

/**
 * 
 * @author athakur
 *
 */
public interface Strategy {
    
    public int performOperation(int a, int b);

}


Now lets write our concrete classes that implement above class -

AdditionStrategy.java


/**
 * 
 * @author athakur
 *
 */
public class AdditionStrategy implements Strategy {

    @Override
    public int performOperation(int a, int b) {
        // TODO Auto-generated method stub
        return a+b;
    }

}

SubtractionStrategy.java

/**
 * 
 * @author athakur
 *
 */
public class SubtractionStrategy implements Strategy {

    @Override
    public int performOperation(int a, int b) {
        // TODO Auto-generated method stub
        return a-b;
    }

}

and finally our Calculator class - Calculator.java


/**
 * 
 * @author athakur
 *
 */
public class Calculator {
    
    Strategy strategy;

    public Strategy getStrategy() {
        return strategy;
    }

    public void setStrategy(Strategy strategy) {
        this.strategy = strategy;
    }
    
    public int calculate(int a, int b) {
        return strategy.performOperation(a, b);
    }

}

Now lets test our code. Create a class Test.java

/**

 * 

 * @author athakur

 *

 */

public class Test {

    public static void main(String args[]) {

        Calculator calc = new Calculator();

        calc.setStrategy(new AdditionStrategy());

        System.out.println("Additition : " + calc.calculate(5, 2));

        calc.setStrategy(new SubtractionStrategy());

        System.out.println("Subtraction : " + calc.calculate(5, 2));

    }

}

and the output will be as expected - 

Additition : 7
Subtraction : 3

Understanding the pattern via code

 See how we could change the operation using a particular strategy depending on the requirement. Calculator here is own context. When we needed addition we use the Addition Strategy and when we needed Subtraction we used the Subtraction strategy. Note how the context or the Calculator remains the same but the strategy used changes. We are simply using different strategies depending on the requirement at runtime. This type of design is called Strategy pattern.

To sum up -

In Strategy pattern, objects representing various strategies are created and a context object behavior changes depending on these strategies at runtime.

Related Links

Sunday, 26 October 2014

Things to do after installing Ubuntu 14.04 LTS


  1. Setting -> Appearances ->  Behavior -> Enable Workspaces

  2. Settings -> Security & Privacy ->Search -> Include online results : Set this to off if you don't want online results like the Amazon results in your Unity Dashboard. You can remove it altogether with

    • sudo apt-get remove unity-lens-shopping

  3. Install "nautilus-open-terminal" and "nautilus-terminal" plugins for nautilus file manager so that it would be easier to open terminal directly from specific directories and embed terminal directly in explorer. Refer Enabling "open command prompt" from folder and embed terminal in explorer in ubuntu
  4. vi or vim editor may sometime give different characters in pressing arrow keys. To resolve that follow -

    If you dont already have a .vimrc file in your home directory, create one using this:

    vi $HOME/.vimrc

    Add then add following line to the top of the file:

    set nocompatible

    save the file and exit. This should fix the issue.

    How to display or hide line numbers in vi or vim text editor

  5. Installing Java (Oracle JDK)


    • sudo apt-get install python-software-properties
    • sudo add-apt-repository ppa:webupd8team/java
    • sudo apt-get update
    • sudo apt-get install oracle-java7-installer
    • Add line JAVA_HOME="/usr/lib/jvm/java-7-oracle" to /etc/environment file. Then reload the file using source /etc/environment. You can verify this setup with echo $JAVA_HOME  and java -version

  6. Install and configure Compiz (For proper Cube Set Horizontal Virtual size to 4 and Vertical Virtual Size to 1 in General Options -> Desktop Size) (I also like wobbly windows effect)

    • sudo apt-get install compiz compizconfig-settings-manager compiz-plugins


  7. Install latest Eclipse
    • Download Eclipse from its official site
    • Run the following commands -
      • cd /opt/
      • sudo tar -zxvf ~/Downloads/eclipse-*.tar.gz
      • sudo gedit /usr/share/applications/eclipse.desktop
        Add the following content -

        [Desktop Entry]
        Name=Eclipse 4
        Type=Application
        Exec=/opt/eclipse/eclipse
        Terminal=false
        Icon=/opt/eclipse/icon.xpm
        Comment=Integrated Development Environment
        NoDisplay=false
        Categories=Development;IDE;
        Name[en]=Eclipse

    • You can then launch eclipse from unity dashboard. 
    • Also see Configuring Intellij IDEA
     
     
  8. Install Gimp : sudo apt-get install gimp . It is an image editing software like photoshop.

  9. Configure pidgin -
    1. How to configure Pidgin for Google Talk in Ubuntu
    2. How to disable Pidgin Notifications in Ubuntu? 

  10. Install Skype :
    • sudo add-apt-repository "deb http://archive.canonical.com/ $(lsb_release -sc) partner"
    • sudo apt-get update && sudo apt-get install skype

  11.  Install Maven
    1. How to install maven on Ubuntu?

  12.  Install Google Chrome
    1. How to install Google chrome on Ubuntu ?

  13.  Install Intellij Idea IDE
    1.  Install Intellij Idea in Ubuntu
  14.  How to delete recently opened files history in ubuntu 14.04

  15. Installing Gradle.
    1.  Gradle ships with it's own groovy library so no need to explicitly install groovy.
    2. To install Gradle open a command prompt and execute following commands - 
      1. sudo add-apt-repository ppa:cwchien/gradle
      2. sudo apt-get update
      3. sudo apt-get install gradle
      4. gradle -v (or which gradle) - to verify installation

Note : I am going to keep updating this List as an when I find something useful. If you want to add something to this list do post it in comments.


Related Links

Saturday, 25 October 2014

Enabling "open command prompt" from folder and embed terminal in explorer in ubuntu

Background

I have faced this issue for quite some time now. I always install a new version of Ubuntu and the "Open in Terminal" option from right click menu is gone. I am not sure what changes but it used to be default in 10.10 (Maverick) as far as I remember and I hate to just open the terminal and navigate to the desired directory using cd command.


Anyway no matter what user interface you use (Like gnome or unity which is default now a days) it uses nautilus as it's default file manager and nautilus has this plugin in it. So let's see how can we install this plugin. BTW the plugin is called nautilus-open-terminal.

Installing "nautilus-open-terminal" plugin

You can very well install it from the Synaptic Package manager or Ubuntu software center but the quickest way would be command line. Execute the following command - 


  • sudo apt-get install nautilus-open-terminal

after installation is complete you will have to restart nautilus. For that you can execute

  • killall nautilus
or
  • nautilus -q


Next time you open your file manager you can use this feature.


To Embed Terminal To Nautilus File Browser (explorer)

Another good nautilus plugin is the nautilus-terminal. It enabled the terminal to be embedded in the explorer. Step to install the plugin -

  • sudo add-apt-repository ppa:flozz/flozz
  • sudo apt-get update
  • sudo apt-get install nautilus-terminal
  • nautilus -q


Automating a web page button click using HtmlUnit

Background

HtmlUnit is a "GUI-Less browser for Java programs". It models HTML documents and provides an API that allows you to invoke pages, fill out forms, click links, etc... just like you do in your "normal" browser.

It has fairly good JavaScript support (which is constantly improving) and is able to work even with quite complex AJAX libraries, simulating either Firefox or Internet Explorer depending on the configuration you want to use. 


So in this post I am going to host a simple HTML page on a server and use HtmlUnit to get that page and perform click action on the button on that fetched page.


Setting up the server

I am going to use NodeJS to setup the server that renders our simple page with a button. It's a simple fastest way to host a server. You need to have NodeJS installed on your machine for it. I had written a post earlier on it - installation and printing response on server request. You can go through that to setup and go through the basic workflow -


In a directory create two file index.html and server.js and put in the following contents in it.


index.html - 

<html>
<head>
<title>Hello World!</title>
<script>
function displayHelloWorld()
{
    alert("Hello World");
}
</script>
</head>
<body>
<center>
<h3>Hello World Demo by Open Source for Geeks</h3>
<button type="button" id="buttonId" onclick="alert('Hello world!')">Click Me!</button>
</center>
</body>
</html>


server.js -

var http = require('http'),
fs = require('fs');

fs.readFile('./index.html', function (err, html) {
    if (err) {
        throw err; 
    }       
    http.createServer(function(request, response) {  
        response.writeHeader(200, {"Content-Type": "text/html"});  
        response.write(html);  
        response.end();  
    }).listen(8000);
    console.log('Server running at http://127.0.0.1:8000/');
});


and that's it you can start the server by executing node server.js


you can then view the page from your browser - http://localhost:8000/


Go ahead click on the button. You should be able to see "Hello World" alert.


Our server is now ready. We are basically trying to automate this click by using HtmlUnit.

Getting Started with HtmlUnit

As usual I am going to use Ivy as my dependency manager and Eclipse as my IDE. You are free to choose yours. I am using 2.15 version (latest) of HtmlUnit [ Link To Maven Repo ].

My Ivy file structure looks something like - 

<ivy-module version="2.0" xmlns:xsi="http://www.w3.org/2001/XMLSchema-instance"
       xsi:noNamespaceSchemaLocation="http://ant.apache.org/ivy/schemas/ivy.xsd">
    <info
        organisation="OpenSourceForGeeks"
        module="HtmlUnitDemo"
        status="integration">
    </info>
    
    <dependencies>
        <dependency org="net.sourceforge.htmlunit" name="htmlunit" rev="2.15"/>        
    </dependencies>
</ivy-module>

Lets get to the code now - 

Lets create a class called WebpageButtonClicker.java and add our code in it.

import java.io.IOException;
import java.net.MalformedURLException;

import com.gargoylesoftware.htmlunit.AlertHandler;
import com.gargoylesoftware.htmlunit.FailingHttpStatusCodeException;
import com.gargoylesoftware.htmlunit.Page;
import com.gargoylesoftware.htmlunit.WebClient;
import com.gargoylesoftware.htmlunit.html.HtmlButton;
import com.gargoylesoftware.htmlunit.html.HtmlPage;


public class WebpageButtonClicker {
    
    public static void main(String args[]) throws FailingHttpStatusCodeException, MalformedURLException, IOException {
        WebClient webClient = new WebClient();
        webClient.setAlertHandler(new AlertHandler() {
            
            @Override
            public void handleAlert(Page page, String message) {
                System.out.println("Alert was : " + message);
                
            }
        });
        HtmlPage currentPage = webClient.getPage("http://localhost:8000/");
        HtmlButton button = (HtmlButton) currentPage.getElementById("buttonId");
        button.click();
    }
    

}


that's it. Now run the Java code. You should see the following output.

Alert was : Hello world!

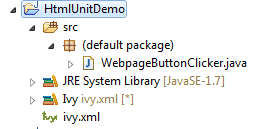
For the reference project structure looks like

Note : See how we have registered a Alert handler in above code. It is a callback that is received on any alert that is triggered. Similarly you can have handlers registered for multiple events like prompt and refresh.

Related Links


Wednesday, 22 October 2014

understanding Zipalign command in Android SDK

Documentation

Documentation states it clearly

zipalign is an archive alignment tool that provides important optimization to Android application (.apk) files. The purpose is to ensure that all uncompressed data starts with a particular alignment relative to the start of the file. Specifically, it causes all uncompressed data within the .apk, such as images or raw files, to be aligned on 4-byte boundaries. This allows all portions to be accessed directly with mmap() even if they contain binary data with alignment restrictions. The benefit is a reduction in the amount of RAM consumed when running the application.

This tool should always be used to align your .apk file before distributing it to end-users. The Android build tools can handle this for you. When using Eclipse with the ADT plugin, the Export Wizard will automatically zipalign your .apk after it signs it with your private key . The build scripts used when compiling your application with Ant will also zipalign your .apk, as long as you have provided the path to your keystore and the key alias in your project ant.properties file, so that the build tools can sign the package first.

Cautious Note: zipalign must only be performed after the .apk file has been signed with your private key. If you perform zipalign before signing, then the signing procedure will undo the alignment. Also, do not make alterations to the aligned package. Alterations to the archive, such as renaming or deleting entries, will potentially disrupt the alignment of the modified entry and all later entries. And any files added to an "aligned" archive will not be aligned.


Command Syntax / Usage

To align your apk file (HelloWorld.apk in my case) we can use following comment -

zipalign -f -v 4 HelloWorld.apk HelloWorldOut.apk

To conform that the alignment is done we can use

zipalign -c -v 4 HelloWorldOut.apk

General syntax is

zipalign [-f] [-v] <alignment> infile.apk outfile.apk
zipalign -c -v <alignment> existing.apk

The <alignment> is an integer that defines the byte-alignment boundaries. This must always be 4 (which provides 32-bit alignment) or else it effectively does nothing.

Flags:

    -f : overwrite existing outfile.zip
    -v : verbose output
    -c : confirm the alignment of the given file


Note : In my case if you had see the previous post on exporting the apk from Eclipse by signing it then the apk exported is already aligned. Quoting from documentation "When using Eclipse with the ADT plugin, the Export Wizard will automatically zipalign your .apk after it signs it with your private key". you can easily verify that by running -
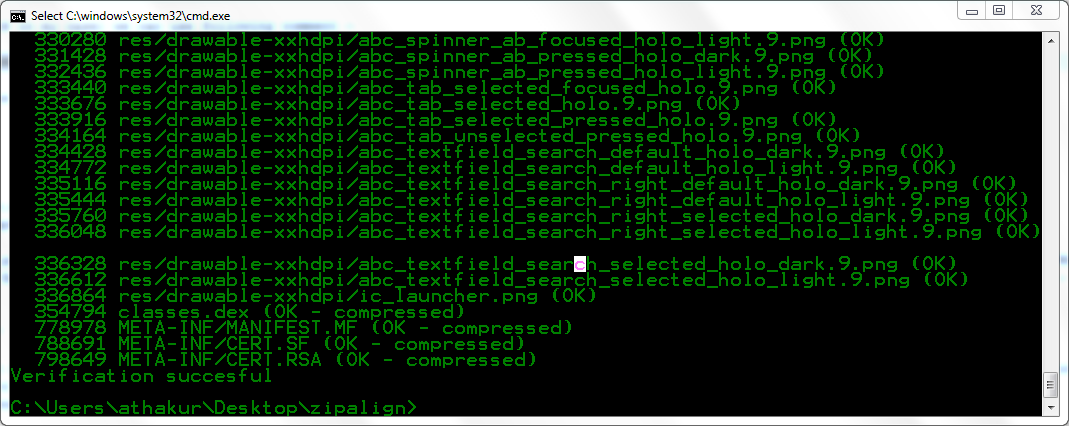
zipalign -c -v 4 HelloWorldOut.apk


Not able to find zipalign command?

I could not find zipalign.exe file in sdk/tools. I had to copy the file from sdk\build-tools\android-4.4W\zipalign.exe to sdk\tools. I have not tried it but upgrading your SDK Build-tools to version 20 seems to fix this issue. Refer cannot find zip-align when publishing app.


Understanding why memory alignment is so important

Aligned access is faster because the external bus to memory is not a single byte wide - it is typically 4 or 8 bytes wide (or even wider). This means that the CPU doesn't fetch a single byte at a time - it fetches 4 or 8 bytes starting at the requested address. As a consequence of this, the 2 or 3 least significant bits of the memory address are not actually sent by the CPU - the external memory can only be read or written at addresses that are a multiple of the bus width. If you requested a byte at address "9", the CPU would actually ask the memory for the block of bytes beginning at address 8, and load the second one into your register (discarding the others).

This implies that a misaligned access can require two reads from memory: If you ask for 8 bytes beginning at address 9, the CPU must fetch the 8 bytes beginning at address 8 as well as the 8 bytes beginning at address 16, then mask out the bytes you wanted. On the other hand, if you ask for the 8 bytes beginning at address 8, then only a single fetch is needed. Some CPUs will not even perform such a misaligned load - they will simply raise an exception (or even silently load the wrong data!).

Reference - what is mean by “memory is 8 bytes aligned”?

In general cases (bus size) it is 4 bytes (32 bits). So we use 4 as the value in zipalign command. So when we do zipalign on an apk some padding is added so that each data is 4 bytes aligned. In this case data can be accessed directly by memory map and no redundant data needs to be loaded into the memory thereby saving RAM.

Related Links

t> UA-39527780-1 back to top