Wednesday, 25 June 2014

How to display processing during Ajax request processing using jQuery

Goal

User interaction is very crucial. When you are making ajax calls to the server and response takes some time your webpage looks like hanged and user is clueless so as to what is happening. So it is a good approach to show some animated icon on the page during the request processing so that user can understand that the precessing is in progress.


On to the code.....

First, create an Ajax icon using the AjaxLoad site.

Then add the following to your HTML:

<img src="/images/loading.gif" id="loading-indicator" style="display:none" />

And the following to your CSS file:
#loading-indicator {
  position: absolute;
  left: 10px;
  top: 10px;
}


Lastly, you need to hook into the Ajax events that jQuery provides; one event handler for when the Ajax request begins, and one for when it ends:

$(document).ajaxSend(function(event, request, settings) {
  $('#loading-indicator').show();
});

$(document).ajaxComplete(function(event, request, settings) {
  $('#loading-indicator').hide();
});

Taken from source.

How to Use JSON Objects With Twitter Bootstrap Typeahead

Background

Bootstrap is a free collection of tools for creating websites and web applications. It contains HTML and CSS-based design templates for typography, forms, buttons, navigation and other interface components, as well as optional JavaScript extensions. (More on Wiki).

You can visit their official site for more details. You need to download it and add the css file and javascript file to your project. In this post i am going to cover how can we use JSON Object to autocomplete text fields.


To the Code.....

Add the following in your java script. You can put all typeahead calls in a single function and then call that function from your javascript in the HTML (or JSP) page.

var states = [];
var    map = {};
$('#search').typeahead({

    minLength: 0,

    source : function(query, process) {        

        states = [];

        map = {};
        //hardcoding this JSON but this would technically come from server
        var data = [
        {"stateCode": "CA", "stateName": "California"},
        {"stateCode": "AZ", "stateName": "Arizona"},
        {"stateCode": "NY", "stateName": "New York"},
        {"stateCode": "NV", "stateName": "Nevada"},
        {"stateCode": "OH", "stateName": "Ohio"}
    ];

    $.each(data, function (i, state) {
        map[state.stateName] = state;
        states.push(state.stateName);
    });

    process(states);
    },
    matcher: function (item) {
        //If user enters * show all possible entries
        if(this.query.trim().toLowerCase() == "*") {
            return true;
        }
        if (item.toLowerCase().indexOf(this.query.trim().toLowerCase()) != -1) {
            return true;
        }
    },
    updater: function (item) {
        //If you want to do something prior to updating value 
        selectedState = map[item].stateCode;
        return item;
    },
    sorter: function (items) {
        return items.sort();
    },
    highlighter: function (item) {
       // implementation
    },

});

Also you can override your typeahead class as follows for better looks

.typeahead {
max-height: 200px;
overflow-y: auto;
overflow-x: hidden;
}


Thats it for the autocomplete feature of twitter bootstrap. You can make ajax call to get the JSON data as follows

function getData(url, data, successCallback, errorCallback) {
    var requestType = "POST";
    var dataType = "json";
    make_ajax_call(url, data, requestType, dataType, successCallback, errorCallback);
}

function make_ajax_call(url, data, requestType, dataType, successCallback, errorCallback) {
    
    var request = {
        url : url,
        type : requestType,
        data : data,
        dataType : dataType,
        success : successCallback,
        error : errorCallback,
        async : false
    };
    jQuery.ajax(request);

}
You can import jquery using

<script src="http://code.jquery.com/jquery.js"></script>

Monday, 23 June 2014

NodeJS Hello World Example

Background

As Wiki says

“Node.js is a packaged compilation of Google’s V8 JavaScript engine, the libuv platform abstraction layer, and a core library, which is itself primarily written in JavaScript.”

Node.js applications are designed to maximize throughput and efficiency, using non-blocking I/O and asynchronous events. Node.js applications run single-threaded, although Node.js uses multiple threads for file and network events. Node.js is commonly used for real time applications due to its asynchronous nature, allowing applications to display information faster for users without the need for refreshing.

How it Works?

Node.js is a platform built on Chrome's JavaScript runtime for easily building fast, scalable network applications. 

Node.js uses an event-driven, non-blocking I/O model that makes it lightweight and efficient, perfect for data-intensive real-time applications that run across distributed devices.

Getting Started

  1. First step would be to download the Node.js application. You can download the installer from the official site. Add the executable to the class path. If in windows add it to the %PATH% environment variable. If using linux you can set in your .profile file and export it.
  2. To test whether it is properly added to the PATH you can simply open the command prompt and type node -v  : It should give you the version you are using.

  3. Next lets get directly to the code. Open your favorite text editor (Notepad, gedit, vi, emacs .. whatever you like) and paste in the following code

        var http = require('http');
        http.createServer(function (req, res) {
          res.writeHead(200, {'Content-Type': 'text/plain'});
          res.end('Hello World\n');
        }).listen(1337, "127.0.0.1");
        console.log('Server running at http://127.0.0.1:1337/');


    Then save the file  with .js extension. I am saving it as hw.js (representing helloworld.js).
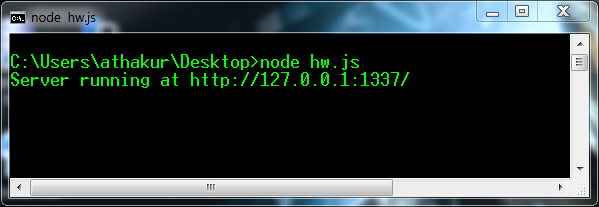
  4. And that's it. Lets execute our code. Again open command prompt where your hw.js file is located and run command `node hw.js`. This would start your server.

  5. Finally you can check in your browser by typing the URL http://localhost:1337. You should see "Hello World!"

It is that simple to write applications in NodeJS.

Node.js modules

Node.js has lots of built in modules that you can use. Like on above example we used http module to create a server.

To include a module you need to use the require() function with the name of the module. Eg.
  • var http = require('http'); 

You can even write your own modules and use. Eg. consider following module definition -

exports.getCurrentDate= function () {
    return Date();
}; 


save it as dateModule.js and then you can use it as -

var dM = require('./dateModule');
console.log(dM.getCurrentDate());


assuming the main file is in same directory as module file  dateModule.js

NOTE : You need to use exports keyword to make methods and properties available outside the it's module file.

Installing NPM

NPM is Node Package manager. You will need this too for installing different modules.  So download the NPM zip file from node.js site  . Extract it in the same folder as that of node installer . Also remember we had added that directory in the PATH env variable so even npm command should be valid in console. You can try that out by typing npm in the cmd. You should see the usage. You can also try installing a package.

npm install express -g


You can see the module installed in NodeJS\node_modules where NodeJS is the directory which has the node installer in it.

Important Links

Sunday, 22 June 2014

Supporting https URLs on your Tomcat server.

Goal

Couple of posts back we saw how we can write a normal server in Spring MVC ( Spring MVC Hello Wold Example  ). If you notice the URL was something like "http://localhost:8080/GreeterProject/welcome.htm". Notice the protocol used is http. But you must have seen some sites using a more secure protocol called https. Specially sites which have payment transactions. In this post we will see how can we support those. So by the end of this post we should be able to hit URL like "https://localhost/GreeterProject/welcome.htm".

Prerequisite

For this post I am assuming you have the setup equivalent to how the setup at the end of post Spring MVC Hello Wold Example  . Also you should have Java SDK with you. We will need it ti create a self signed certificate which is essential for SSL connections (https). Do not worry about it as of now. Just make sure you have Java SDK installed.

Basics

SSL (and its successor, TLS) is a protocol that operates directly on top of TCP (although there are also implementations for datagram based protocols such as UDP). This way, protocols on higher layers (such as HTTP) can be left unchanged while still providing a secure connection. Underneath the SSL layer, HTTP is identical to HTTPS.

When using SSL/TLS correctly, all an attacker can see on the cable is which IP and domain you are connected to, roughly how much data you are sending, and what encryption and compression is used. He can also terminate the connection, but both sides will know that the connection has been interrupted by a third party.

Getting Started

So lets get started. First lets edit the configuration for the Apache tomcat server so that it can now support SSL(https) connections.

Go to server.xml file . If you are using Eclipse IDE then there should be a separate folder created for servers in the projects directory. In that you will have multiple servers (you have configured) configurations. If you see the previous post on how to create a simple Hello World Spring MVC project we create a new server instance to run it on. That would be present in that servers folder. If not when you run your project by selecting run as -> Run on server Eclipse will ask you to configure one. 

If you are using plain Apache tomcat installation i.e no eclipse then you can find this file in path TomcatInstallation/conf/server.xml . Here TomcatInstallation is the folder where you have installed tomcat.

In this file you would see a commented line like

<Connector SSLEnabled="true" clientAuth="false"  maxThreads="150" port="8443" protocol="HTTP/1.1" scheme="https" secure="true" sslProtocol="TLS"/>

It would be commented. You can see <!-- --> tags. Remove them i.e un-comment it. You need to add some more properties like keystoreFile and keystorePass. The line should now look like

<Connector SSLEnabled="true" clientAuth="false" keystoreFile="${user.home}/.keystore" keystorePass="mypasswd" maxThreads="150" port="443" protocol="HTTP/1.1" scheme="https" secure="true" sslProtocol="TLS"/>

Do not worry about keystoreFile and keystorePass. I will come to it. Notice other than that I have changed the port from 8443 to 443. You can leave it at 8443 but 443 is the default port for SSL. So I used it. If you change this you don't have to explicitly add a port in your URL.

You can view your server config from Eclispe itself. Double click your server in servers tab.


Understanding and Creating a keystore

For secure connection between server and client (browser in this case) server needs to send a certificate signed by some trusted authority. Client must trust the authority who has signed this certificate. What are the contents of the certificate, how client knows that the certificate comes from the proper server etc questions are out of scope for this discussion. If interested you can go through the Important links section at the bottom of this post. 

Important point is we need a certificate on server. For demonstration purpose i am going to create a self signed certificate and use it. Yes when browser hits this URL it would not be something broweser automatically trusts so we would have to give permission to the browser to trust it. But we can see that later. Create a self signed certificate. You can go through my earlier post on it ( Creating a self signed certificate for SSL using java keytool ) .  This will be created in your root folder with name .keystore. Now if you looks back at the configuration changes we made in tomcat server.xml file keystoreFile is the path to this certificate and keystorePass is the password you used while creating the certificate.


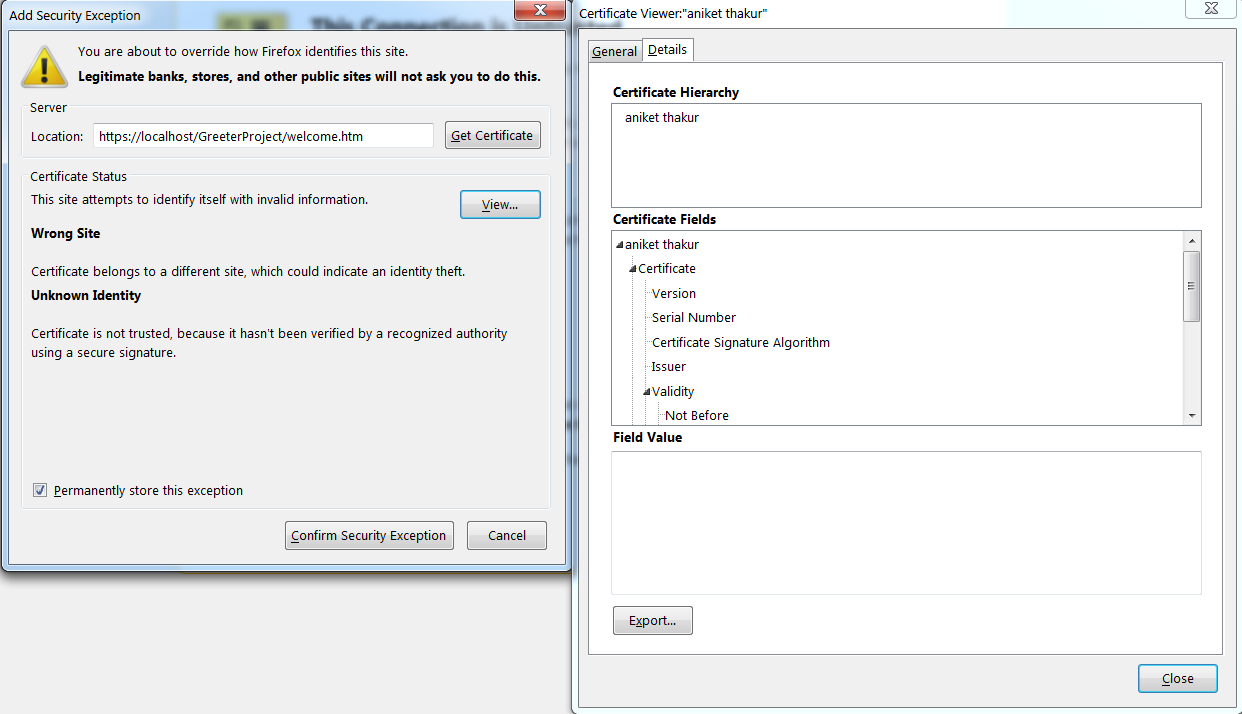
That's it start the server now. You should get screen like below.


Go ahead select "I Understand the Risks" and select "Add Exception". You will again get a popup screen to conform security Exception. You can also View the details of the certificate by clicking View Details.


After you select conform security Exception you can see your webpage with https.


And you are done :) Let me know if you still have any question.

Important Links

Creating a self signed certificate for SSL using java keytool

Goal

In this post we will see how to create a self signed certificate using keytool  utility provided in java SDK. You should have Java SDK installed for this and set it in the classpath.  Simplesway to check if it is added in the classpath is to open command prompt and type java -version. It should show you which java version you are using.


Getting Started

So lets get started.

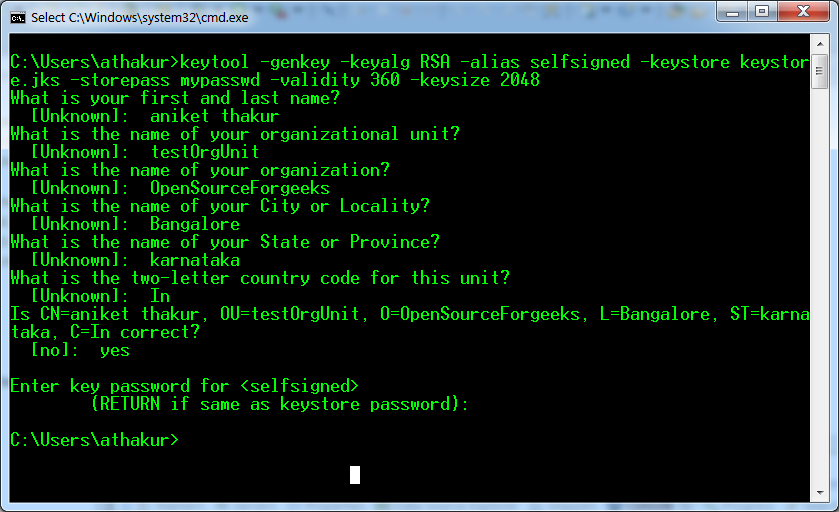
  1. Run the following command from the command line -

    keytool -genkey -keyalg RSA -alias selfsigned -keystore keystore.jks -storepass mypasswd -validity 360 -keysize 2048
    
  2. You will be asked to enter some details. Enter your first and last name (same line).
  3. Then enter your organizational unit name.
  4. Then name of your city / locality.
  5. Name of your state / province.
  6. Two letter country code.
  7. And finally the key password. Hit enter if it is same as keystore password.

 Your keystore.jks should be create in your root folder or the PATH (if you have explicitly provided one).


More Details...


To create a new keystore from scratch, containing a single self-signed Certificate, execute the following from a terminal command line:

Windows:
%JAVA_HOME%\bin\keytool -genkey -alias tomcat -keyalg RSA   

Unix:
$JAVA_HOME/bin/keytool -genkey -alias tomcat -keyalg RSA


Note 1 : The RSA algorithm should be preferred as a secure algorithm, and this also ensures general compatibility with other servers and components.

Note 2 : This command will create a new file, in the home directory of the user under which you run it, named ".keystore". To specify a different location or filename, add the -keystore parameter, followed by the complete pathname to your keystore file, to the keytool command shown above.

For detailed post on how to configure and support https on your tomcat refer following -

Important Links

t> UA-39527780-1 back to top