Goal
Couple of posts back we saw how we can write a normal server in Spring MVC ( Spring MVC Hello Wold Example ). If you notice the URL was something like "http://localhost:8080/GreeterProject/welcome.htm". Notice the protocol used is http. But you must have seen some sites using a more secure protocol called https. Specially sites which have payment transactions. In this post we will see how can we support those. So by the end of this post we should be able to hit URL like "https://localhost/GreeterProject/welcome.htm".
Prerequisite
For this post I am assuming you have the setup equivalent to how the setup at the end of post Spring MVC Hello Wold Example . Also you should have Java SDK with you. We will need it ti create a self signed certificate which is essential for SSL connections (https). Do not worry about it as of now. Just make sure you have Java SDK installed.
Basics
SSL (and its successor, TLS) is a protocol that operates directly on top of TCP (although there are also implementations for datagram based protocols such as UDP). This way, protocols on higher layers (such as HTTP) can be left unchanged while still providing a secure connection. Underneath the SSL layer, HTTP is identical to HTTPS.
When using SSL/TLS correctly, all an attacker can see on the cable is which IP and domain you are connected to, roughly how much data you are sending, and what encryption and compression is used. He can also terminate the connection, but both sides will know that the connection has been interrupted by a third party.
When using SSL/TLS correctly, all an attacker can see on the cable is which IP and domain you are connected to, roughly how much data you are sending, and what encryption and compression is used. He can also terminate the connection, but both sides will know that the connection has been interrupted by a third party.
Getting Started
So lets get started. First lets edit the configuration for the Apache tomcat server so that it can now support SSL(https) connections.
Go to server.xml file . If you are using Eclipse IDE then there should be a separate folder created for servers in the projects directory. In that you will have multiple servers (you have configured) configurations. If you see the previous post on how to create a simple Hello World Spring MVC project we create a new server instance to run it on. That would be present in that servers folder. If not when you run your project by selecting run as -> Run on server Eclipse will ask you to configure one.
If you are using plain Apache tomcat installation i.e no eclipse then you can find this file in path TomcatInstallation/conf/server.xml . Here TomcatInstallation is the folder where you have installed tomcat.
In this file you would see a commented line like
<Connector SSLEnabled="true" clientAuth="false" maxThreads="150" port="8443" protocol="HTTP/1.1" scheme="https" secure="true" sslProtocol="TLS"/>
It would be commented. You can see <!-- --> tags. Remove them i.e un-comment it. You need to add some more properties like keystoreFile and keystorePass. The line should now look like
<Connector SSLEnabled="true" clientAuth="false" keystoreFile="${user.home}/.keystore" keystorePass="mypasswd" maxThreads="150" port="443" protocol="HTTP/1.1" scheme="https" secure="true" sslProtocol="TLS"/>
Do not worry about keystoreFile and keystorePass. I will come to it. Notice other than that I have changed the port from 8443 to 443. You can leave it at 8443 but 443 is the default port for SSL. So I used it. If you change this you don't have to explicitly add a port in your URL.
You can view your server config from Eclispe itself. Double click your server in servers tab.

You can view your server config from Eclispe itself. Double click your server in servers tab.
Understanding and Creating a keystore
For secure connection between server and client (browser in this case) server needs to send a certificate signed by some trusted authority. Client must trust the authority who has signed this certificate. What are the contents of the certificate, how client knows that the certificate comes from the proper server etc questions are out of scope for this discussion. If interested you can go through the Important links section at the bottom of this post.
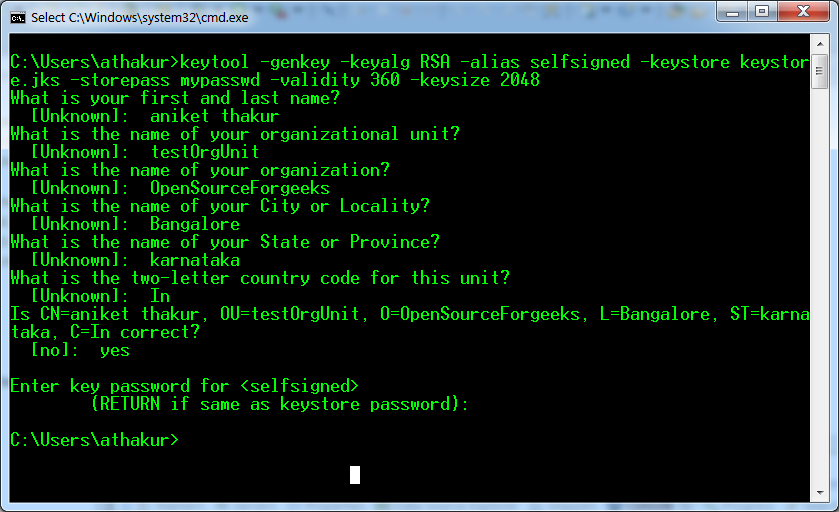
Important point is we need a certificate on server. For demonstration purpose i am going to create a self signed certificate and use it. Yes when browser hits this URL it would not be something broweser automatically trusts so we would have to give permission to the browser to trust it. But we can see that later. Create a self signed certificate. You can go through my earlier post on it ( Creating a self signed certificate for SSL using java keytool ) . This will be created in your root folder with name .keystore. Now if you looks back at the configuration changes we made in tomcat server.xml file keystoreFile is the path to this certificate and keystorePass is the password you used while creating the certificate.
That's it start the server now. You should get screen like below.

Go ahead select "I Understand the Risks" and select "Add Exception". You will again get a popup screen to conform security Exception. You can also View the details of the certificate by clicking View Details.
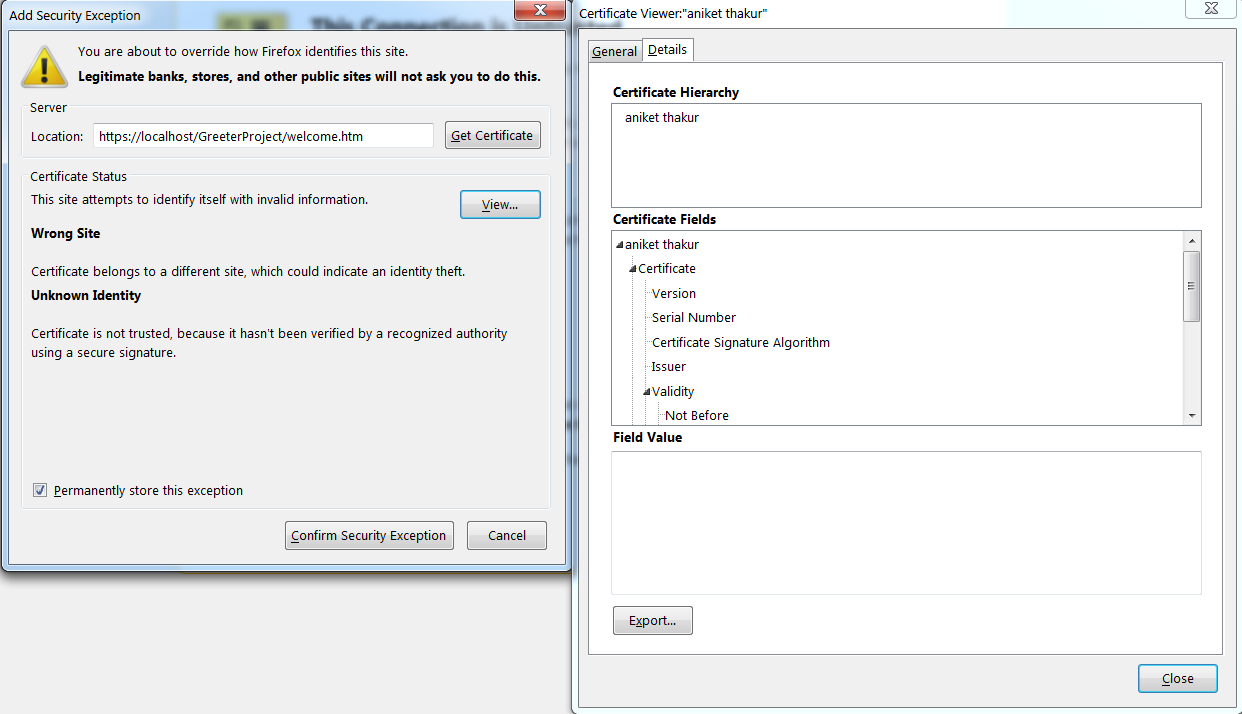
After you select conform security Exception you can see your webpage with https.

And you are done :) Let me know if you still have any question.
And you are done :) Let me know if you still have any question.