Sunday, 13 November 2016

Common Functional interfaces introduced in Java 8

Background

In series of previous posts on Java 8 features we saw Lambda expressions and how to used them.
 We saw basis of a Lambda expression is a functional interface. And then we saw a few functional interfaces as part of introduction to method references -
In this post well see some common functional interfaces that Java provides that you can use at your disposal.


Common Functional interfaces

A new package is introduced since Java 8 that holds all such common functional interfaces. This package is
  • java.util.function
 If you are using JDK 8 in your IDE do check out these classes. You can also find all these in oracle documentation -
 For now lets go over some commonly used functional interfaces from this package.

NOTE : The convention used here is generic type T for type parameter, for second type parameter the next letter U and for a distinct return type R is used as the generic type.


Predicate : Takes a single paramter of any type and returns a boolean [boolean test(T t)]

Predicate functional interface looks like - 

@FunctionalInterface
public interface Predicate<T> {
    /**
     * Evaluates this predicate on the given argument.
     *
     * @param t the input argument
     * @return {@code true} if the input argument matches the predicate,
     * otherwise {@code false}
     */
    boolean test(T t);
    //other methods
}

It accepts a parameter of type T and returns a boolean.

Note I have skipped other methods in the interface like default and static methods (Remember default methods and static methods do not affect the functional status of an interface)

Eg.

Predicate<String> emptyPredicate = x -> x.isEmpty();
System.out.println(emptyPredicate.test(""));
System.out.println(emptyPredicate.test("abc"));

Output :
true
false

Consumer : Takes a single paramter of any type and has a void return type [void accept(T t)]

Consumer looks like below -

@FunctionalInterface
public interface Consumer<T> {
    /**
     * Performs this operation on the given argument.
     *
     * @param t the input argument
     */
    void accept(T t);
}

It accepts an input parameter of type T and does does not return anything (has a void return type). It consumes the input.

Eg.

Consumer<String> printFunc = x -> System.out.println(x);
printFunc.accept("Hello World!"); 

Output :
Hello World!

Supplier : Does not take any parameter and returns any type [ T get()]

Supplier looks like -

@FunctionalInterface
public interface Supplier<T> {
    /**
     * Gets a result.
     *
     * @return a result
     */
    T get();
}
 
Eg.
Supplier<String> strSupplier = () -> "SOME_CONSTANT";
System.out.println(strSupplier.get());

Output :
SOME_CONSTANT

I know that a lame example :) You can simple define and use a constant. Have used this to help you understand how it works. All constructor references in method references are essentially variants of supplier.

UnaryOperator : Takes a single paramter of any type and returns of same type. [R apply(T t)]

UnaryOperator actually extends Function functional interface. Function looks like below -

public interface Function<T, R> {
    /**
     * Applies this function to the given argument.
     *
     * @param t the function argument
     * @return the function result
     */
    R apply(T t);
}

So as you see it take input parameter of type T and returns a parameter of type R. UnaryOperator is a special kind of Function where T and R are same. So it take input and returns output of same type.

Eg.

UnaryOperator<String> prefixOp = (name) -> "Mr. " + name; 
System.out.println(prefixOp.apply("Aniket"));

Output :
Mr. Aniket


That's some common functional interface. Now there are "Bi" versions of above interfaces that take in 2 inputs. For eg.
  • BiConsumer<T, U> : Similar to Consumer<T> but takes two inputs of type T and consumes them i.e void return type.
  • BiPredicate<T, U> : Similar to Predicate<T> but takes 2 inputs of type T and U and returns a boolean.
  • BiFunction<T, U, R> : Similar to Function<T, R> but takes 2 inputs of type T and U and returns a parameter of type R.
  • BinaryOperator<T> :  Similar to UnaryOperator<T> but takes 2 parameters of type T and returns parameter of type T.
These functional interfaces are summarized below -

Summary


Related Links 


Sunday, 6 November 2016

How to set date and time in your Raspberry Pi

Background

If you have internet connection in your Raspberry Pi then all you need to do is set your timezone and you are all set. In this post we will see how.

How to set date and time in your Raspberry Pi

  • First open your raspi-config. To do that execute following command in your command line - 
    • sudo raspi-config
  • Once the config open select "Internationalization Options"
  • Next select "Change Timezone"

  • Next select your "Geographic Area"
  • Finally Select your "Time zone"
  • Save and Exit


And that's it your date and time should be set.

How to take screenshots in Raspberry Pi

How to take screenshots in Raspberry Pi

Raspberry Pi does not seem to have a default screenshot application like screenshot or snip. I will explain what worked for me. I am using scrot command line utility to take the screenshots.

To install scrot execute following command -
  • sudo apt-get install scrot

As you can see from screenshot above you can enter
  • scrot -s
and select the window you want to take screenshot of. If you want to take a complete screenshot with with some delay you can do -
  • sudo scrot -d5
You even have a -c option to show a countdown. You can see various options available with man command -
  • man scrot


PS : This whole post is written on my Raspberry Pi 3 Model B and have used scrot command for above screenshots :)

Related Links

Saturday, 5 November 2016

Getting statrted with Raspberry pi

Background

The Raspberry Pi is a series of credit card-sized single-board computers developed in the United Kingdom by the Raspberry Pi Foundation to promote the teaching of basic computer science in schools and developing countries. More on Wiki.

So you can have your own computer with very little prior knowledge up and running in a very less time. And I am going to show you how.

Requirements

You need following things -
  • Raspberry pi (Link points to Raspberry pi 3 model b which I currently have)
  • A case to protect your pie (optional)
  • Monitor for external display
  • HDMI cable to connect your pi to the external display
  • A micro SD card to install your operating system
  • USB keyboard
  • USB mouse
  • micro usb charger to power your pi
  • Ethernet or lan cable if you want to connect your laptop to your pie (optional/you can use wifi)
This is how the pi looks like -

 Use cases for this are limitless. If you want to know what each component is and what does it do then refer the shot video I have created below -


Assemble and Deploy

  • Make sure you have all the components listed in the section above.
  • First thing you need to do is flash your micro SD card with some operating system. I am gong to use RASPBIAN but not directly. 
    • Go to https://www.raspberrypi.org/downloads/
    • Download NOOBS. It is New out of the box software. It will be a zip file.
    • Format your micro SD card
    • Copy the contents of the extracted zip file in your formatted micro sd card. Note content of the NOOBS folder must be copied not the top level directory. So there will be multiple files at top level.
    • Once you do that your micro sd card is all set up.
  • Next attach your micro SD card to your pi.
  • Connect USB keyboard and mouse to the pi.
  • Connect HDMI cable to PI and other end to your display.
  • Finally connect power supply. Once you connect power supply you should be able to see NOOBS getting loaded. It will promt you to install RASPBIAN which will take time to install.
  • Once the installation is complete your RASPBIAN will boot and you are all set to go.
Once it boots up it's same as any other computer you own. You can do all sorts of stuff.


Incase you missed in the youtube video above and wifi configuration point in deployment steps I would like to stress here that Raspberry pi 3 model b has inbuilt wifi and bluetooth module.

Connecting to your Pi


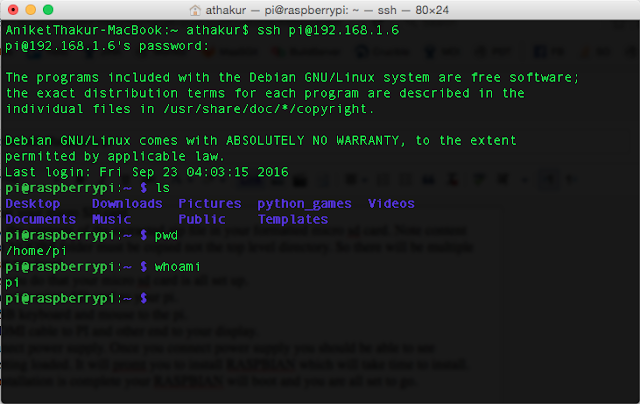
  • You can SSH into your machine.
  • SSH service is turned on bu default.


NOTE : Username is pi and password is raspberry.

  • You can do vnc too to remotely control your pi. Prior to that you need to enable it in the configuration. To do so go in
    • Menu -> Preferences -> Raspberry Pi configuration -> Interfaces
  • Here you will see lot of interfaces. Here SSH will already be enabled. You can enable vnc too.
  • Now from  your remote machine connect to your pi with vnc client.


References


  • You can open up raspi-config using command sudo raspi-config .You can use this to set varous thing like audi output to audio jack or hdmi.

Related Links


Sunday, 30 October 2016

How to Un-mount Android SD Card Before Removing it

Background

Many of us simply remove USB drive from the port without unmounting it which is wrong! But we still do. Perhaps in hurry or we just do not care. And there are a lot of memes around it -


In repeat it is wrong to do so! You might have seem prompt similar to below -


Well it's the OS way of warning you. Same goes for Android as well. After all it uses a Linux kernel.


 Lets understand why we should not be doing that.

Why you should not remove a USB drive without unmounting it

You might have already heard the answer - data loss, data corruption etc. Lets understand why this happens. 

  1. Normal case some read/write operation might be in progress and you simply disconnect the drive.  This will corrupt your data.
  2. Also most of the operating systems use caching feature which means OS holds on to the operations to be performed on external drive till a minimum threshold of operations is reached post which it execute all those operation. This is basically for performance. When you eject your drive it basically instructs OS to flush the cache and complete any pending operations. Now if you eject the disk and operations are not flushed your data is lost.

So always eject/unmount your drive before removing it. Same for Android as well. You can go to
  • Settings -> Storage -> Unmount SD card
Don't just remove it while your phone is on. There might be apps on your SD card, images or many other thing that might be in use. This also means you don't have to turn off your phone to remove SD card. Simply unmount it.  Adding screenshots below for better understanding -


It may take some time to unmount your SD card. Once it is unmounted you can plug it out. Also no restarts needed. Hope this helps!

t> UA-39527780-1 back to top