Background
The Raspberry Pi is a series of credit card-sized single-board computers developed in the United Kingdom by the Raspberry Pi Foundation to promote the teaching of basic computer science in schools and developing countries. More on Wiki.So you can have your own computer with very little prior knowledge up and running in a very less time. And I am going to show you how.
Requirements
You need following things -
- Raspberry pi (Link points to Raspberry pi 3 model b which I currently have)
- A case to protect your pie (optional)
- Monitor for external display
- HDMI cable to connect your pi to the external display
- A micro SD card to install your operating system
- USB keyboard
- USB mouse
- micro usb charger to power your pi
- Ethernet or lan cable if you want to connect your laptop to your pie (optional/you can use wifi)
Use cases for this are limitless. If you want to know what each component is and what does it do then refer the shot video I have created below -
Assemble and Deploy
- Make sure you have all the components listed in the section above.
- First thing you need to do is flash your micro SD card with some operating system. I am gong to use RASPBIAN but not directly.
- Go to https://www.raspberrypi.org/downloads/
- Download NOOBS. It is New out of the box software. It will be a zip file.
- Format your micro SD card
- Copy the contents of the extracted zip file in your formatted micro sd card. Note content of the NOOBS folder must be copied not the top level directory. So there will be multiple files at top level.
- Once you do that your micro sd card is all set up.
- Next attach your micro SD card to your pi.
- Connect USB keyboard and mouse to the pi.
- Connect HDMI cable to PI and other end to your display.
- Finally connect power supply. Once you connect power supply you should be able to see NOOBS getting loaded. It will promt you to install RASPBIAN which will take time to install.
- Once the installation is complete your RASPBIAN will boot and you are all set to go.
Incase you missed in the youtube video above and wifi configuration point in deployment steps I would like to stress here that Raspberry pi 3 model b has inbuilt wifi and bluetooth module.
Connecting to your Pi
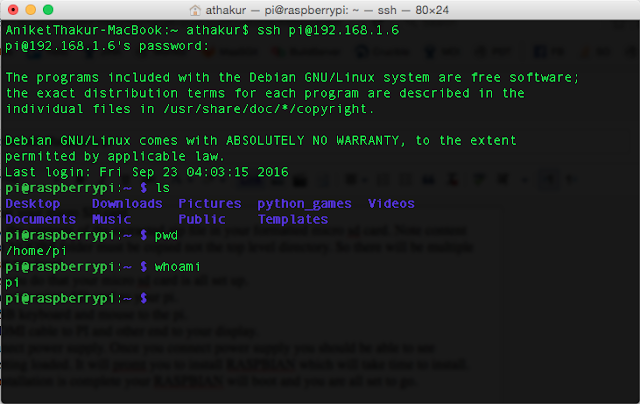
- You can SSH into your machine.
- SSH service is turned on bu default.
NOTE : Username is pi and password is raspberry.
- You can do vnc too to remotely control your pi. Prior to that you need to enable it in the configuration. To do so go in
- Menu -> Preferences -> Raspberry Pi configuration -> Interfaces
- Here you will see lot of interfaces. Here SSH will already be enabled. You can enable vnc too.
- Now from your remote machine connect to your pi with vnc client.
References
- You can open up raspi-config using command sudo raspi-config .You can use this to set varous thing like audi output to audio jack or hdmi.
Related Links
- Raspberry pi official site
- How to take screenshots in Raspberry Pi (OSFG)
- How to set date and time in your Raspberry Pi (OSFG)


