Saturday, 16 August 2014

Using Groovy to send Emails

Background

In this post we will see how can we write a groovy script to send emails. I am going to use javax.mail and javax.activation for this. To setup groovy environment you can refer to one of my earlier posts - 


Code

/**
 * @author athakur
 *
 */

@Grapes([
    @Grab(group='javax.mail', module='mail', version='1.4.7'),
    @Grab(group='javax.activation', module='activation', version='1.1.1'),
    @GrabConfig(systemClassLoader=true)
])

import javax.mail.internet.*;
import javax.mail.*
import javax.activation.*

class EmailSender {
    
    public static void main(def args){
        //to test the script
        EmailSender emailSender = new EmailSender();
        emailSender.sendmail();
    }
    
    def static message = "Test Message";
    def static subject = "Test Message Subject";
    def static toAddress = "test1@opensourceforgeeks.com";
    def static fromAddress = "test2@opensourceforgeeks.com";
    def static host = "test.email.opensourceforgeeks.com";
    def static port = "25";
    
    public EmailSender() {
        
    }

    def static sendmail() {
        sendmail(message, subject, toAddress, fromAddress, host, port);
    }
    
    def static sendmail(String message ,String subject, String toAddress, String fromAddress, String host, String port){
        Properties mprops = new Properties();
        mprops.setProperty("mail.transport.protocol","smtp");
        mprops.setProperty("mail.host",host);
        mprops.setProperty("mail.smtp.port",port);

        Session lSession = Session.getDefaultInstance(mprops,null);
        MimeMessage msg = new MimeMessage(lSession);

        StringTokenizer tok = new StringTokenizer(toAddress,";");
        ArrayList emailTos = new ArrayList();
        while(tok.hasMoreElements()){
            emailTos.add(new InternetAddress(tok.nextElement().toString()));
        }
        InternetAddress[] to = new InternetAddress[emailTos.size()];
        to = (InternetAddress[]) emailTos.toArray(to);
        msg.setRecipients(MimeMessage.RecipientType.TO,to);
        msg.setFrom(new InternetAddress(fromAddress));
        msg.setSubject(subject);
        msg.setText(message)

        Transport transporter = lSession.getTransport("smtp");
        transporter.connect();
        transporter.send(msg);
        
        println("Message sent");
    }
}


 Then you can simply run it with groovy EmailSender.groovy.

Note :  you can import all packages you need using the grab syntax mentioned in the top of the script.
 To know the group, module and version you can search the Maven repository.  In the link there is a separate tab for grape like there is for ivy, maven or gradle. So you can directly pick up the syntax from there. For example if you search for javax.activation you can see the following syntax under grape tab - 


@Grapes(

        @Grab(group='javax.mail', module='mailapi', version='1.4.3')

)


Friday, 15 August 2014

How to capture arguments passed to a Groovy script?

It is very much similar to Java and you can use the same java syntax. For eg.

class TestExecutor {

    public static void main(def args) {
        println("Printing arguments");
        for(String arguments : args) {
            println (arguments);
        }
    }
} 


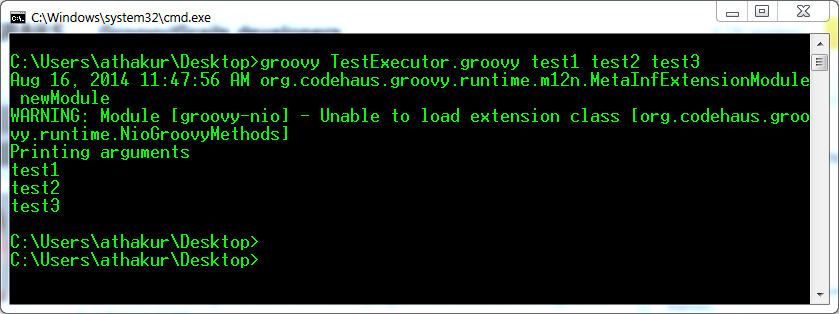
Run it and you should see the arguments printed


Also note if you do not provide main method or provide one like in above example then you can get arguments as args[i] but you can change the name of the array (again same as java). So you can have something like -

public static void main(def argsNew) {

    println("Printing arguments");

    for(String arguments : argsNew) {

        //using args in above for loop will throw error

        println (arguments);

    }

}


Point being it's not something that is hard-coded. Finally as suggested in other answer you can always use CliBuilder for smart parsing. But again in that too it internally used def options = cli.parse(args).

Finally there is always the hard way to do things (Just putting here for code coverage and additional information - no need to use this code for fetching arguments) -

import groovy.lang.Binding;
Binding binding = new Binding();
int x = 1
for (a in this.args) {
  println("arg$x: " + a)
  binding.setProperty("arg$x", a);
  x=x+1
}
println binding.getProperty("arg1")
println binding.getProperty("arg2")
println binding.getProperty("arg3") 

Important Links

Wednesday, 13 August 2014

Executing Shell commands in Groovy

Background

Groovy is a dynamic java language that runs on JVM. If you are familiar with Java that you will find it very easy to understand and code in Groovy. Will not go into much details now. You can refer to my earlier posts - 

Goal of this post is to show how easy it is to execute shell commands from Groovy. I am using Windows for demonstrating this but should be irrespective of OS you are using. All you have to do is make sure cURL is installed on your system which I will be using to demonstrate this example. You can refer to following posts on cURL


To the code....

 Put the following code in a file name GroovyTest.groovy and run it

class GroovyTest {
    public static void main(def args){
        def url = 'http://mail.google.com';
        println("Output : " + executeCurlCommand(url));
    }    
    
    def static executeCurlCommand(URL){
        
        def url = "curl " + URL;
        def proc = url.execute();
        def outputStream = new StringBuffer();
        proc.waitForProcessOutput(outputStream, System.err)
        return outputStream.toString();
        
        
    }
}

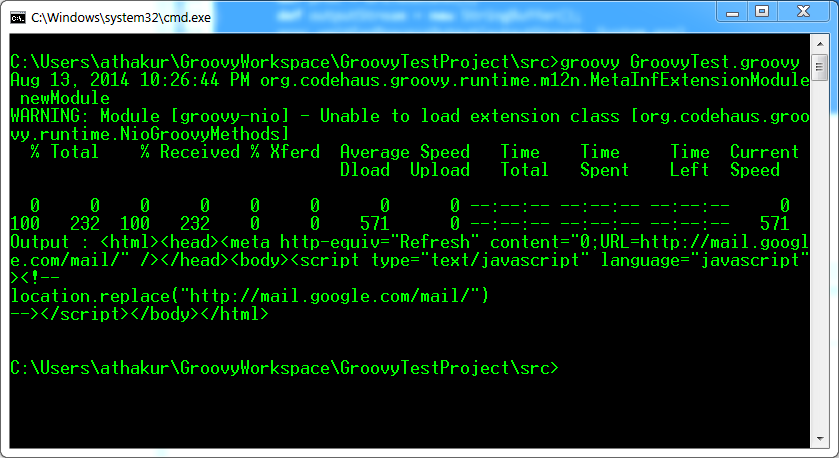
After running you can see the output same as executing the command on your console. If you need all outputs on standard output you can do

proc.waitForProcessOutput(System.out, System.err);


You can see the output by executing the same command in console

Using HTTP POST and GET using cURL

Background

cURL is a command line utility to perform GET and POST requests. It comes really handy for testing REST APIs. For debian based Linux systems you can simply install it

  • sudo apt-get install curl

But you can install  it in windows as well. You can use it from cygwin as well (select the appropriate package while installing). For installing cURL in windows I had written a post some time back. You can refer the same -


That's about installation. In this post we will see the usage if cURL command.


Using cURL command

As we know there are two majorly used REST APIs - GET and POST. Lets see how to perform these actions using cURL - 

GET

  1. With json :

    curl -i -H "Accept: application/json" -H "Content-Type: application/json" -X GET http://hostname/resource

  2. With XML :

    curl -H "Accept: application/xml" -H "Content-Type: application/xml" -X GET http://hostname/resource

POST


  1. For posting data :

    curl --data "param1=value1&param2=value2" http://hostname/resource

  2. For File Upload :

    curl --form "fileupload=@filename.txt" http://hostname/resource

  3. RESTful HTTP post :

    curl -X POST -d @filename http://hostname/resource

  4. For logging into a site (auth):

    curl -d "username=admin&password=admin&submit=Login" --dump-header headers http://localhost/Login
    curl -L -b headers http://localhost/

POST with some JSON data

You can use -H to set the header while using cURL command 

Example  - 
  • -H "Content-Type: application/json"
So your complete command would look something like -

curl -H "Content-Type: application/json" -d '{"username":"xyz","password":"xyz"}' http://localhost:3000/api/login

Difference between GET and POST


Related Links


Saturday, 2 August 2014

Installing Groovy plugin in Eclipse

Background

You may want to go through the previous post on what is groovy and how to set the environment required to run Groovy programs. In this post I will show how to install it's Eclipse plugin.


Getting Started

  1. In Eclipse go to Help -> Install new Software .


  2. For the plugin site refer to the Groovy page for Eclipse plugin. The site depends on which version on Eclipse you are using. I am using Juno. So link for me is http://dist.springsource.org/release/GRECLIPSE/e4.2/.


  3. Select "Groovy-Eclipse" and click on next.


  4. Check install Details and Click on Next. Accept the agreement and click install. It will take some time to install the plugin depending on your internet bandwidth. You can see the progress at the bottom of Eclipse or from Progress tab.

Create a new groovy Project

  1.  Create a new Groovy project named GroovyTestProject.


  2. Create a groovy class named GroovyTest.groovy. Enter the following code and then run it as Groovy Script.

    class GroovyTest {
        public static void main(def args){
            println("Hello World!")
        }
     }


  3.  You should see the output in console.

t> UA-39527780-1 back to top