Saturday, 16 May 2020

Understanding python closure

Background

In the last couple of posts, we saw how we can pass multiple arguments in Python functions and what are generators in Python. Next, I want to explain what decorators are in python. Decorator is a very powerful feature of python but in order to explain it, we need to understand closure in Python. You must have heard of Javascript closures, these are kind of similar. We will see this in detail now

Understanding python closure

Python closures are related to nested functions. Consider the following example:

def print_func(text):
    text_to_print = text
    
    def printer():
        print(text_to_print)
        
    return printer

print_function_reference = print_func("Hello World!")
print(print_function_reference)
print_function_reference()


What happens when you execute the above piece of code? It prints:
<function print_func.<locals>.printer at 0x7f21b16d1950>
Hello World!

So what's happening here?
We have defined a function called print_func which takes in a string argument which we like to print. Then this method returns a reference new method called printer() and when you invoke this method(reference) you see your value is printed.

But wait a second? I am good with the part where I get a reference of printer method as seen in output but when I invoke it how does it get the value of text_to_print? It does not seem to be in printer methods scope.
>> This is exactly what we call closure.

A couple of other pointers before we go to the definition of closure:

  • printer() function is called a nested function
  • A nested function has read-only access to variables defined in the outer scope. 'text_to_print' in this case.
  • Such variables are called "non-local" variables.
  • Everything in python is an object with set of attributes. Yes, even a function. They all have some common attributes like "__doc__".
So, Closure is a function object that is used to access variables from enclosing scope, even though they are not present in the memory(out of scope). Eg. 'text_to_print' in this case.

They are used to invoke functions not in scope. Eg. printer() in the above case. The scope for printer() function is inside print_func() function yet we can invoke it from outside.

NOTE: You can try deleting print_func() and then invoke print_function_reference(). It will still work, even though its closing function is deleted.


When and Why to use Closures?

As you can see closure helps with data hiding. You don't need to define global variables. That's exactly the primary use case of closures.

They are used in callbacks and decorators. We will have a detailed post on decorators (stay tuned!).

Typically when you have a few methods you can go with closure. However, if you have multiple methods you are better off with a class.

You can also see closure contents as follows:


Related Links

How to add code Syntax highlighting to your blogger blog?

Background

If you own a technical blog or a website you generally need to add code to illustrate your examples. In such cases highlighting the code becomes essential. You would have seen the code syntax highlighting in this blog itself.


In this post, I will show you how you can achieve this.


How to add code Syntax highlighting to your blogger blog?

For code syntax highlighting we will use SyntaxHighlighter. I will specifically tell you how to add this to your blogger blog.


  • Open your blogger blog dashboard
  • Go to Theme
  • Click on 3 dots beside "My theme" and click on  "Edit HTML"


  • In the panel which opens and shows some HTML code search and go to the line with </head> tag. This is where your head tag ends. We need to add some include CSS and js files here along with some custom javascript.
  • Inside the head tag (Just before </head> add following code)

    <!-- Syntax Highlighter START -->
    <link href="http://alexgorbatchev.com/pub/sh/current/styles/shCore.css" rel="stylesheet" type="text/css"></link>
    <link href="http://alexgorbatchev.com/pub/sh/current/styles/shThemeDefault.css" rel="stylesheet" type="text/css"></link>
    <script src="http://alexgorbatchev.com/pub/sh/current/scripts/shCore.js" type="text/javascript">
    <script src='http://alexgorbatchev.com/pub/sh/current/scripts/shBrushAS3.js' type='text/javascript'/>
    <script src='http://alexgorbatchev.com/pub/sh/current/scripts/shBrushBash.js' type='text/javascript'/>
    <script src='http://alexgorbatchev.com/pub/sh/current/scripts/shBrushColdFusion.js' type='text/javascript'/>
    <script src='http://alexgorbatchev.com/pub/sh/current/scripts/shBrushCSharp.js' type='text/javascript'/>
    <script src='http://alexgorbatchev.com/pub/sh/current/scripts/shBrushCpp.js' type='text/javascript'/>
    <script src='http://alexgorbatchev.com/pub/sh/current/scripts/shBrushCss.js' type='text/javascript'/>
    <script src='http://alexgorbatchev.com/pub/sh/current/scripts/shBrushDelphi.js' type='text/javascript'/>
    <script src='http://alexgorbatchev.com/pub/sh/current/scripts/shBrushDiff.js' type='text/javascript'/>
    <script src='http://alexgorbatchev.com/pub/sh/current/scripts/shBrushErlang.js' type='text/javascript'/>
    <script src='http://alexgorbatchev.com/pub/sh/current/scripts/shBrushGroovy.js' type='text/javascript'/>
    <script src='http://alexgorbatchev.com/pub/sh/current/scripts/shBrushJScript.js' type='text/javascript'/>
    <script src='http://alexgorbatchev.com/pub/sh/current/scripts/shBrushJava.js' type='text/javascript'/>
    <script src='http://alexgorbatchev.com/pub/sh/current/scripts/shBrushJavaFX.js' type='text/javascript'/>
    <script src='http://alexgorbatchev.com/pub/sh/current/scripts/shBrushPerl.js' type='text/javascript'/>
    <script src='http://alexgorbatchev.com/pub/sh/current/scripts/shBrushPhp.js' type='text/javascript'/>
    <script src='http://alexgorbatchev.com/pub/sh/current/scripts/shBrushPlain.js' type='text/javascript'/>
    <script src='http://alexgorbatchev.com/pub/sh/current/scripts/shBrushPowerShell.js' type='text/javascript'/>
    <script src='http://alexgorbatchev.com/pub/sh/current/scripts/shBrushPython.js' type='text/javascript'/>
    <script src='http://alexgorbatchev.com/pub/sh/current/scripts/shBrushRuby.js' type='text/javascript'/>
    <script src='http://alexgorbatchev.com/pub/sh/current/scripts/shBrushScala.js' type='text/javascript'/>
    <script src='http://alexgorbatchev.com/pub/sh/current/scripts/shBrushSql.js' type='text/javascript'/>
    <script src='http://alexgorbatchev.com/pub/sh/current/scripts/shBrushVb.js' type='text/javascript'/>
    <script src='http://alexgorbatchev.com/pub/sh/current/scripts/shBrushXml.js' type='text/javascript'/>
    <script language='javascript' type='text/javascript'>
    SyntaxHighlighter.config.bloggerMode = true;
    SyntaxHighlighter.all();
    </script>


  • Once done save the file and reload blog.


  • Now if you want any highlighting you can use the corresponding class in <pre> tag. Eg for Java you can do
    <pre class="brush:java">This will be highlighted</pre>
  • Instead of Java you can have other languages as well. Choices are: cpp, c, c++, c#, c-sharp, csharp, css, delphi, pascal, java, js, jscript, javascript, php, py, python, rb, ruby, rails, ror, sql, vb, vb.net, xml, html, xhtml, xslt. You can see the latest list of supported languages.
  • You can only add js files for brushes you need (See optimization below)

Optimizations

This is the good part! We would not call ourselves programmers if we did not have an optimization part :)


  • You can see above there are a bunch of js files added in the head tag. You might not need all and each page load with load these external JS code which can slow loading if your blog. So Add only those JS files which you need. In fact, if you see the screenshot above I have used just the Java brush JS. I just use the same for all types of codes.


  • If you do not want the code highlighting to work for your homepage (Just for the the posts you write), you can add all above code inside the following tags:

    <b:if cond='data:blog.pageType == "item"'>
    </b:if>
    
    
  • Lastly, you would have also noticed the link base path for JS and CSS files are different in my code that what I originally provided. That's because I have used the CDN path(https://cdnjs.com/libraries/SyntaxHighlighter). This is done primarily for 2 things:
    • First, it allows highlighting to work even on https. By default with the above code loading your blog site with https protocol will not show highlighting. That's because your include scripts are HTTP and not supported for https.
    • Secondly, if the HTTP links are down you are screwed. CDN caches the scripts and cs files. So you can always rely on it (rely is is a strong word but it's better than those HTTP links :) )

Configuration


  • Another thing you might have noticed is the change of theme file I have used. The original set of code I proposed uses a default theme shThemeDefault.css but I have changed this to use shThemeEmacs.css. You can use whichever theme you like - Just include the corresponding theme CSS file (and remove the default one).  Some of the available themes are: shThemeRDark, shThemeMidnight, shThemeMDUltra, shThemeFadeToGrey, shThemeEmacs, shThemeEclipse, shThemeDjango, shThemeDefault, shCoreRDark, shCoreMidnight, shCoreMDUltra, shCoreFadeToGrey, shCoreEmacs, shCoreEclipse, shCoreDjango, shCoreDefault


  • I already mentioned you should only include and use the JS files corresponding to language brushed you intent to use. This will reduce your page load time. You can also use the "b:if" tag I mentioned above so that these scripts load for your blog posts.

You can already see this blog using all of these customizations. Feel free to comment if you need any help. Thanks.

Related Links


Sunday, 10 May 2020

Difference between yield and return in python

Background

If you have been using Python you would have come across return and yield statements. Both are used to return something from a function. Though both of them are used to return something from the function both serve different purposes. In this post, I will try to explain what those are.

I use Jupyter notebook for running python code snippets. To see how you can install it refer to my earlier post (link in the Related Sections at the end of this post).

Understanding return in Python

Let's try to understand returns first as that's the simplest. The return keyword is used is a similar fashion in multiple programming languages. It is used to return a value to its caller.

A function can have multiple return statements but only the 1st one encountered during its execution flow will be executed and the corresponding value will be returned to the called. No code after the return statement will be executed (dead code) - the method with return statement exists. The return statement is generally the last statement in a function but it could be before as well if we want to skip subsequent code based on a certain condition. 

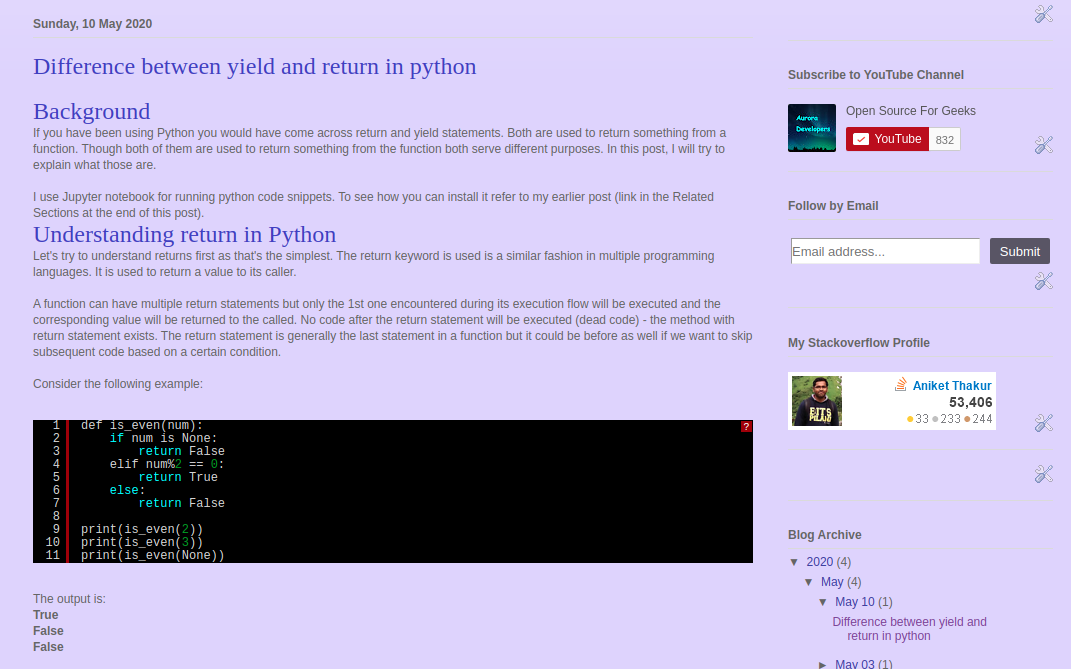
Consider the following example:

def is_even(num):
    if num is None:
        return False
    elif num%2 == 0:
        return True
    else:
        return False
    
print(is_even(2))
print(is_even(3))
print(is_even(None))

The output is:
True
False
False


As you can see the function is_even has multiple return statements and exactly one will get executed for a single execution call based on the conditions. You could also rewrite it as :

def is_even(num):
    is_even=True
    if num is None or num%2 != 0:
        is_even = False
    return is_even
    
print(is_even(2))
print(is_even(3))
print(is_even(None))


This is a slightly better version than the previous one. we just have one return statement and less code.


Understanding yield in Python


Yield statement also returns the value to the caller but it retains the state. When you call the function again it resumes where it left off (last yield statement). This enabled code to generate a series of data when needed without generating all at once.

Such structures that generate a series of data are called generators in python and yield keywords are used to create generators. Whenever generators need to produce a value they do it using the yield keyword. Consider the following example:
def get_even():
    i=0
    while True:
        i = i + 2
        yield i
    
test = get_even()
print(next(test))
print(next(test))
print(next(test))


This outputs:
2
4
6

As you can see this is a forever going generator. It will keep on generating the sequence. If you do something like below, it will go in an infinite loop:

def get_even():
    i=0
    while True:
        i = i + 2
        yield i
   
test = get_even()
for evennum in test:
    print(evennum)


This outputs an infinite series of even numbers starting from 2. You will have to manually kill the process as it goes into an infinite loop.

If there are limited field statements in the function, the generator will run that many times. If you try to run a generator after that it will raise an Exception.

def get_even():
    i=0
    i = i + 2
    yield i
    i = i + 2
    yield i 

test = get_even()
for evennum in test:
    print(evennum)
next(test)


Output:
2
4
---------------------------------------------------------------------------
StopIteration                             Traceback (most recent call last)
<ipython-input-40-ef2477e0fee5> in <module>
     10 for evennum in test:
     11     print(evennum)
---> 12 next(test)

StopIteration: 

You can have return statements in a generator as well which simply signifies the end of that generator. No yield statement after the return statement will be respected. Consider the following example:
def get_even():
    i=0
    i = i + 2
    yield i
    return
    i = i + 2
    yield i

    
test = get_even()
for evennum in test:
    print(evennum)
next(test)


This will print:

2
---------------------------------------------------------------------------
StopIteration                             Traceback (most recent call last)
<ipython-input-41-554cedfc9db7> in <module>
     11 for evennum in test:
     12     print(evennum)
---> 13 next(test)

StopIteration: 


As you can see it encountered 1st yield and returned back 2. In the next call, it saw a return statement and terminated the generator. So, calling it again is going to raise an Exception as we saw above. Having return and yield statement was not allowed in python2 but it's allowed in python3 and it simply means the end of the generator.


Summarizing the difference

  • Return statements terminate the execution of the method and return the value to the caller whereas yield returns the value to the caller but retains the current state so that the same method can be called again. 
  • The yield keyword is used in Python generators. A generator is a special function that returns a generator object to the caller instead of the actual value. 
  • Generators save memory as the new value is generated only when the generator is called. If the same thing you had to do with the return, you would need to compute the series, store all in an array and return the array once.
  • As generators with the yield keyword resume the execution all local variables are retained whereas in case of return they are destroyed.


Related Links


Sunday, 3 May 2020

How to pass variable arguments using *args and **kwargs in Python?

Background

If you are working with python you must have come across following notations:
  • *args
  • **kwargs
args and kwargs are just argument names. It can be replaced by any other variable name, but the important part is the syntax and how it is used. If you have come across this you would also know they are used to pass the variable number of arguments. In this post, I will try to explain how they work with some examples.

Note: If you have not installed Jupyter notebook for python, please refer to my earlier blog post: How to Install IPython Jupyter Notebook on Ubuntu

How to pass variable arguments using *args and **kwargs in Python?


Let's take cases of *args and **kwargs one at a time and then we will see some combined examples.

Understanding *args

  • *args is used to take a variable number of non-keyworded arguments that are not your formal arguments. 
  • arguments passed in *args become iterable. Think of this as a list.
We will understand "non-keyworded" meaning better when we go to **kwargs but for now, let's try to focus on *args.

Consider the following example:


def foo(param1, *param2):
    print("In foo:")
    print(param1)
    print(param2)


And now if you pass:
foo(1,2,3,4)

You will get the output:
In foo: 1 (2, 3, 4)

As you can see argument 1 got mapped to param1 (your formal argument) and the rest for mapped to *param2 (*param2 is your *args. As I mentioned before variable name does not matter). 

You can pass any number of params after 1 and they will be part of param2.

You can even iterate over param2 to print all variables.

def foo(param1, *param2):
    print("In foo:")
    print(param1)
    for no in param2:
        print(no)

Output:
In foo:
1
2
3
4

Understanding *kwargs

  • *kwargs is used to take a variable number of keyworded arguments that are not your formal arguments. When I say keyword it means that you pass arguments by providing a name to that variable
  • Think of this as a dictionary of variable name and value you passed as arguments to the function.
Consider the following example:

def bar(param1, **param2):
    print("In bar:")
    print(param1)
    print(param2)

And if you pass bar(1,a=2,b=3,c=4) it will output
In bar:
1
{'a': 2, 'b': 3, 'c': 4}

1 which is your formal parameter maps to param1 and rest named parameters go as dict in param2.
Obviously, you cannot pass bar(1, 2, 3, a=2,b=3,c=4)
as it does not know what to do with 2,3,4


Hopefully, now you understand what keyworded arguments are. They are basically named parameters passed in the function call.

You can also iterate it as a dictionary

def bar(param1, **param2):
    print("In bar:")
    print(param1)
    for key, value in param2.items():
        print("{}:{}".format(key,value))


Output:
In bar:
1
a:2
b:3
c:4

Your functions would actually have both *args and **kwargs. So let's try to see a combined example

def foobar(param0, *param1, **param2):
    print("In foobar:")
    print(param0)
    print(param1)
    print(param2)


And now if you call this as  foobar(1,2,3,4,a=1)
you will get the following output:
In foobar:
1
(2, 3, 4)
{'a': 1}

Again 1 is your formal parameter and maps to param0
2,3,4 are your non-keyword params that get mapped to param1
and a=1 is your keyword param that gets mapped to param2


  • Note the order is important. *args should always come before **kwargs. 
  • Also, there cannot be positional arguments after  **kwargs
  • Also, you cannot do something like foobar(1,2,3,4,a=1,5) as it will not know how to map 5.


Hopefully, this clarifies differences between *args and **kwargs. You can play around more in the Jupyter notebook or python terminal if you have installed it (See the link below if you haven't)


Related Links

Saturday, 2 May 2020

How to Install IPython Jupyter Notebook on Ubuntu

Background

Jupyter Notebook is an open-source and interactive web app that allows you to create and share documents that contain live code, equations, visualizations, and narrative text. We will use this to run python code but it can be used with other languages as well.

Prerequisites

Firstly make sure you have the following applications installed before installing Jupyter notebook:
  • python3
  • python3-pip
You can install these from default Ubuntu repositories by running the following commands:
  • sudo apt-get install python3
  • sudo apt-get install python3-pip
You can check that the versions are correct with -V option as shown in the screenshot below:


How to Install IPython Jupyter Notebook on Ubuntu

Now that dependencies are in place, let's install Jupyter notebook.

Install python and jupyter
  • pip3 install ipython
  • pip3 install jupyter
IPython (Interactive Python) is a command shell for interactive computing in multiple programming languages, originally developed for the Python programming language, that offers introspection, rich media, shell syntax, tab completion, and history (Wiki).


You can then start the jupyter notebook with the following command:
  • jupyter notebook


It should automatically open a browser window for you, if not you can fo to the URL from the command output, in my case:

  • http://127.0.0.1:8888/?token=f279cc86b6219e3312d623377a247ed4a686e140fac30153
Then you can create a new notebook with python3 kernel and write your code there.


Let me know in the comments if you face any issues.
We will do some more fun stuff and learn more about python. So stay tuned!

Related Links

t> UA-39527780-1 back to top