Sunday, 26 November 2017

How to connect to postgres RDS from AWS Lambda

Background

In one of the previous post we saw how serverless code works with AWS Lambda and API gateway.
 In this post we will see how we can configure Lambda function to connect to RDS instance and run queries on it. RDS is AWS service for Relational database service. It offers multiple databases like -
  • mysql
  • aurora
  • postgres
  • oracle etc
For this particular post we are going to use  postgres DB. This post is about the lambda function so this assumes you have postgres DB running in RDS and have it's endpoint. username and password handy.

https://www.pgadmin.org/ : If you want a GUI based client to test postgres on local try using pgAdmin.

 How to connect to postgres RDS from AWSa Lambda

Code for Lambda function to connect to RDS is as follows -

'use strict';

const pg = require('pg');
const async = require('async');

const databaseUser = process.env.DB_USER;
const databasePassword = process.env.DB_PASSWORD;
const databaseName = process.env.DB_DB_NAME;
const databaseHost = process.env.DB_HOST;
const databasePort = process.env.DB_PORT;
const databaseMaxCon = process.env.DB_MAX_CONNECTIONS;

exports.handler = (event, context) => {
    console.log('Received event : ' + JSON.stringify(event) + ' at ' + new Date());

    let dbConfig = {
        user: databaseUser,
        password: databasePassword,
        database: databaseName,
        host: databaseHost,
        port: databasePort,
        max: databaseMaxCon
    };

    let pool = new pg.Pool(dbConfig);
    pool.connect(function(err, client, done) {

        if (err) {
            console.error('Error connecting to pg server' + err.stack);
            callback(err);
        } else {
            console.log('Connection established with pg db server');

            client.query("select * from employee", (err, res) => {

                    if (err) {
                        console.error('Error executing query on pg db' + err.stack);
                        callback(err);
                    } else {
                        console.log('Got query results : ' + res.rows.length);
                        
                        
                       async.each(res.rows, function(empRecord) {   
                                console.log(empRecord.name);
                        });
                    }
                    client.release();
                    pool.end();
                    console.log('Ending lambda at ' + new Date());

                });
        }

    });    
    
};

    
}

Explanation 

Here we are using postgres library called pg. You can install this module using -
  • npm install pg

  1. In first part we create a pool of connection giving required parameters to connect to postgres DB. Notice how we are reading these parameters from environment variables. 
  2. Next we call connect on it and pass a callback to get the connection when successful
  3. In the callback we can execute client.query() and pass a callback to get rows of data we need for the employee table.
  4. Finally we iterate over each record using async and print the employee record name.
  5. Release the client when you are done with that particular connection
  6. You can end the pool when all the DB operations are done.


AWS specific notes

  • By default AWS Lambda has internet connection. So it can access web resources.
  • Lambda by default does not have to AWS services running in private subnet.
  • If you want to access services in private subnet eg. RDS running in private subnet then you need to configure the VPC, private subnet to run lambda in and security group is network section of Lambda.
  • However once you do this you will no longer have access to internet (since it is run in private subnet now). 
  • Now if you still need internet access then you need to spin up a NAT gateway or a NAT instance in public subnet and make a route from private subnet to this NAT.
  • Note if you are encrypting lambda environment variable using KMS you will require internet access (KMS needs that). So if your RDS is running in private subnet you need to follow above steps to make it work. Else you are going to get bunch of timeout exceptions.
  • Also note maximum run time of Lambda is 5 mins. So make sure your lambda execution completes withing that time. You should probably limit the queries returned by DB and process that much in one Lambda execution.
  • You can also run lambda as a batch job (using cron expression) from cloud watch.


Related Links

Saturday, 11 November 2017

Understanding Promises in javascript

Background

I am really new to nodejs and javascript for that matter. I have used these in past but mainly to manipulate DOM elements, post forms , handle event etc. We saw in last post on node.js working how node.js works on single threaded, non-blocking and asynchronous programming model.
This is achieved mainly using events. So lets say you want to read a file on the file system. You make a call to access this file and essentially provide a callback function which will be invoked on successful completion of file access and meanwhile program can carry on with it's next set of function.

Now sometime we do need to synchronise tasks. For example lets say we want to complete reading files json content which is required to make a network call. One possible way is to do the network call in the callback function of the file access function so that when we get a callback on file access completion we read the file and then make a network call. 

This sounds simple enough for a single function to be synchronised. Try to imagine multiple functions that need to be synchronised.   It can be a nightmare coding that - writing new function in each functions callback (cascading it). 

This is where promises come into picture.


Understanding Promises in javascript


It is literally what it means - a promise. It is an object that may produce a result in the future. Think of it like a Future object in Java (I come from a Java background, hence the reference. Ignore if you are not aware) -

 A promise of a function can be in either one of the following state -
  1. Fulfilled : Asynchronous operation corresponding to this promise is completed successfully. 
  2. Rejected : Asynchronous operation corresponding to this promise has failed. Promise will have the reason why it failed. 
  3. Pending : The asynchronous operation is still pending and is neither in fulfilled or rejected state.
  4. Settled : This is a generic state. Asynchronous operation is complete and can be in - Fulfilled or Rejected state.
A state will be in pending till the asynchronous operation is in progress. Once it is complete state can be fulfilled or rejected and from then state cannot change. 

NOTE : We are saying asynchronous operation because general processed are asynchronous for which promise are created. But it need not be. Promise may correspond to a synchronous operation as well.

Consider a simple promise as follows -


var testPromise = new Promise(function(resolve, reject){
        //your test operation - can be async
        let testSuccess  = true; // can be false depending on if your test async operation failed  
        if(testSuccess) {
                resolve("success");
        }
        else {
                reject("failure");
        }
});

testPromise.then(function(successResult){
        console.log("Test promise succeded with result : " + successResult);
}).catch(function(failureResult){
        console.log("Test promise failed with result : " + failureResult);


This prints output : Test promise succeded with result : success
You can change testSuccess to false and it will print : Test promise failed with result : failure

So let's see what happened here. 
  • First we created a new promise with constructor new Promise()
  • constructor takes an argument as function that basically defines what operation needs to be performed as part of that promise
  • This function takes two callbacks -
    • resolve()
    • reject()
  • You will call resolve() when your operation is successful and will call reject when it fails. resolve() will essentially put the promise in Fulfilled state where as reject will put it in Rejected state ww saw above.
  • Depending on result of our operation (can be asynchronous) we will call resolve() or reject()
  • Once promise object is created we can call it using then() method of promise object. then() method will be called when promise is fulfilled and catch() method will be called when it is rejected/failed.
  • You can toggle the value of testSuccess boolean and see for yourself.
  • Each then() and catch() take an argument which is nothing but variable passed by resolve() and reject() which in this case is success or failure

Now that we know what promise is and how it behaves lets see if this can solve our synchronisation problem. We have 3 asynchronous operations and we need to do it one after the other -


var test1 = new Promise(function(resolve,reject){
        resolve('test1');
});
var test2 = new Promise(function(resolve,reject){
        resolve('test2');
});
var test3 = new Promise(function(resolve,reject){
        resolve('test3');
});


test1.then(function(test1Result){
        console.log('completed : ' + test1Result);
        return test2;
}).then(function(test2Result){
        console.log('completed : ' + test2Result);
        return test3;
}).then(function(test3Result){
        console.log('completed : ' + test3Result);
});


This one outputs - 
completed : test1
completed : test2
completed : test3

Only difference here is in each then function we are returning next promise and calling then on it so that it is run sequentially.

Alternatively you can also do -

var test1Func = function() {
        return test1;
};
var test2Func = function() {
        return test2;
};
var test3Func = function() {
        return test1;
};
test1Func().then(function(test1Result){
        console.log('completed : ' + test1Result);
        return test2Func();
}).then(function(test2Result){
        console.log('completed : ' + test2Result);
        return test3Func();
}).then(function(test3Result){
        console.log('completed : ' + test3Result);
});

Now what if I want to do some task when all three promises are done. For that you can do -

Promise.all([test1Func(),test2Func(),test3Func()]).then(function(){
        console.log('All tests finished');
});


And this will output - All tests finished

Similarly if you want to do something if any one of the promise is complete you can do -


Promise.race([test1Func(),test2Func(),test3Func()]).then(function(){
        console.log('All tests finished');
});

and this will output - One of the tests finished

To sum it up promise looks like below -


Related Links

Wednesday, 1 November 2017

Understanding Node.js working

Background

As you might already know -
  1. Node.js is a JavaScript runtime built on Chrome's V8 JavaScript engine.
  2. Node.js uses an event-driven, non-blocking I/O model that makes it lightweight and efficient. 
  3. Node.js' package ecosystem, npm, is the largest ecosystem of open source libraries in the world.

Node.js runs single-threaded, non-blocking, asynchronously programming, which is very memory efficient. We will see this in a moment.

Understanding Node.js working

Traditional server client architecture is as below -


Server keeps a thread pool ready to server incoming client requests. As soon as a client request is received server takes one of the free threads and uses it to process the incoming request. This limits simultaneous client connections an server can have.Each thread will take up memory/RAM, processor/CPU eventually exhausting computational resources. Not to mention context switch happening. All of this limits the maximum connections and load a traditional server can take.


This is where Node.js differs.  As mentioned before Node.js runs single-threaded, non-blocking, asynchronously programming, which is very memory efficient. So it's just a single thread handling client requests. Only difference is programming is asynchronous and non blocking event driven. So when a client request is received single server thread starts processing it asynchronously. Immediately it is ready to get next client request. When processing for 1st request will be over main thread will get a callback and result will be returned to the client. Aync tasks are done by worker threads.


That being said Node.js is good for CPU intensive tasks given it is single threaded. So if your usecase is cpu intensive Node.js is probably not the way to go.


Related Links

Saturday, 28 October 2017

How to use Lambda function with API gateway

Background

We have seen some aspects of AWS before like using EC2, S3 , IAM. You can revisit those posts again with below filter -
In this post we will see some of the hot topics in AWS -
  1. Lambda functions(Compute) and 
  2. API gateways(Application services)
We have come a long way in terms of our code deployments. Below diagram shows it all -


 Big companies have their own data centers perhaps for security concerns. But if you think from a startup perspective it has become very simple now. All you need to worry about is your application code.After datacenters we had IaaS (Infrastructure as a service) where we had access to operating systems and we can use it as we see fit without worrying about the underlying hardware. For eg. using Virtual machines. Amazon EC2 is a good example if that. You spin up a Ubuntu and get to work. Next level of ease came with PaaS (Platform as a service) where you need not worry about the OS and just concentrate on your language runtime and application. Popular examples are Google app engine or IBM bluemix or Amazon Elastic Beanstalk. This is the age of serverless platforms where you don't even have to worry about language runtimes. You can concentrate in your business logic. This brings us to our topic of interest - Lambda functions.

In this post we will see how to create a lambda function. Put it behind a API gateway and access this API from a static website hosted from S3. So lets get started.


How to use Lambda function with API gateway

Let's start with a Lambda function. Go to Lambda service and create a new function. Let's call it MyTestFunction

Make changes so that your code looks like following -

exports.lambda_handler = (event, context, callback) => {
    // TODO implement
    callback(null, 'Hello from Lambda athakur!');
};


and change the Handler name to index.lambda_handler.

NOTE : Make sure string after index. in your handler name is same as the method name in the code.


 All we are doing here is when this Lambda function is invoked we are returning string - "Hello from Lambda athakur!"


Now before we add a trigger to Lambda to execute on API gateway call we need to first create an API from API gateway. So go to API gateway service and create an API.  Let's call it MyTestAPI.

You can create a resource if you want under this API. I am going to leave it as blank. Next go to Actions -> Create Method and create a GET request. It should look like below -


NOTE : Make sure your turn in CORS from Actions menu so that there are no issues while invoking this API from java script. CORS is Cross-origin resource sharing and turning it on allows invoking APIs from javascript with different domain/hostname than that from the site from which it is invoked. Since we are using S3 here it will have a different domain than this. So you need to turn it on.

Else you will get an error something like below -
Cross-Origin Request Blocked: The Same Origin Policy disallows reading the remote resource at https://test123.ap-south-1.amazonaws.com/dev. (Reason: CORS header ‘Access-Control-Allow-Origin’ missing).


 Once your API is ready you can test it using the test button on the screen.


 Once test is successful you can go to Action and deploy this API. You need to select a stage to deploy. If you don't have it already just create a new one called dev and deploy. Once you do that you should be able to go to stages section and see your endpoint i.e url to be invoked.


Note this URL down we will use it shortly from our javascript.

Now go back to triggers section of Lambda you created and select "API gateway" from the dropdown and link this API from there. Your screen should look like below -


 Our API and lambda is all setup. All we need to do now is call it from our static website. So now go to S3. Enable static website and give main file as index.html and upload index.html to the bucket with following content -

<html>
    <head>
<script>
    function callAwsLambdaFunction() {
        var xhttp = new XMLHttpRequest();
        xhttp.onreadystatechange = function() {
            if (this.readyState == 4 && this.status == 200) {
                document.getElementById("myDiv").innerHTML = this.responseText;
            }
        };
        xhttp.open("GET", "https://qqzgu3j545.execute-api.ap-south-1.amazonaws.com/dev", true);
        xhttp.send();

    }
    </script>    
        <title>Hello World!</title>
    </head>
    <body>
        <h1>Hello world!</h1>
        <h1>Click below button to call API gatway and display result below!</h1>
        <h1><div id="myDiv"></div></h1>
        <button onclick="callAwsLambdaFunction()">Click me!</button><br>
        Regards,<br/>
        Aniket
    </body>
</html>


NOTE :  Make sure the index.html is publicly accessible . If not make it from permissions section.


Now open your index.html by opening it in a browser tab -


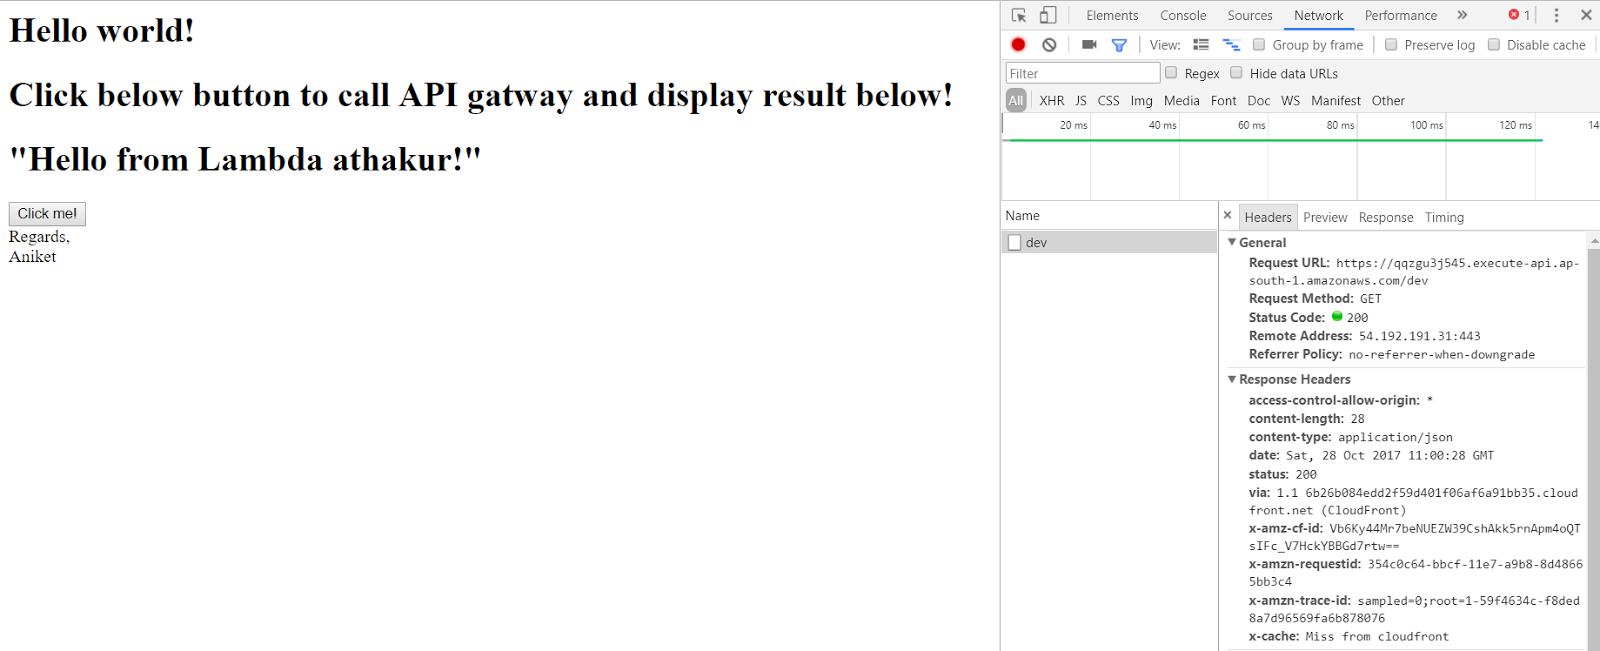
After you click on the "Click me" button it should make a call to API gateway and get result from our Lambda. This looks as follows -


Related Links

Sunday, 22 October 2017

How to enable hidden night mode setting on your Android N device

Background

Everyone likes the night mode settings. It puts less strain on your eye. You must have used f.lux on your PC or laptop. Google's Pixel phones have this feature where you can just toggle night mode. However other models don't. There might be vendor specific feature as well. Like some Samsung models might offer this. 

Night mode was provided in hidden System UI tuner section in the beta build of Android N and was completely removed in the final build. However code still resides in the build and can be turned on. It is not that easy though. And this is exactly what we will see. 

NOTE : This feature was altogether removed on Android 7.1 so below workaround will only work with android 7.0 Android N.


How to check if I have Android N 7.0?

Go to Settings -> About Phone -> Android Version

You should see 7.0 there. You can also tap it 3 time to see a nice Animation of Android N.


How to enable hidden night mode setting on your Android N device

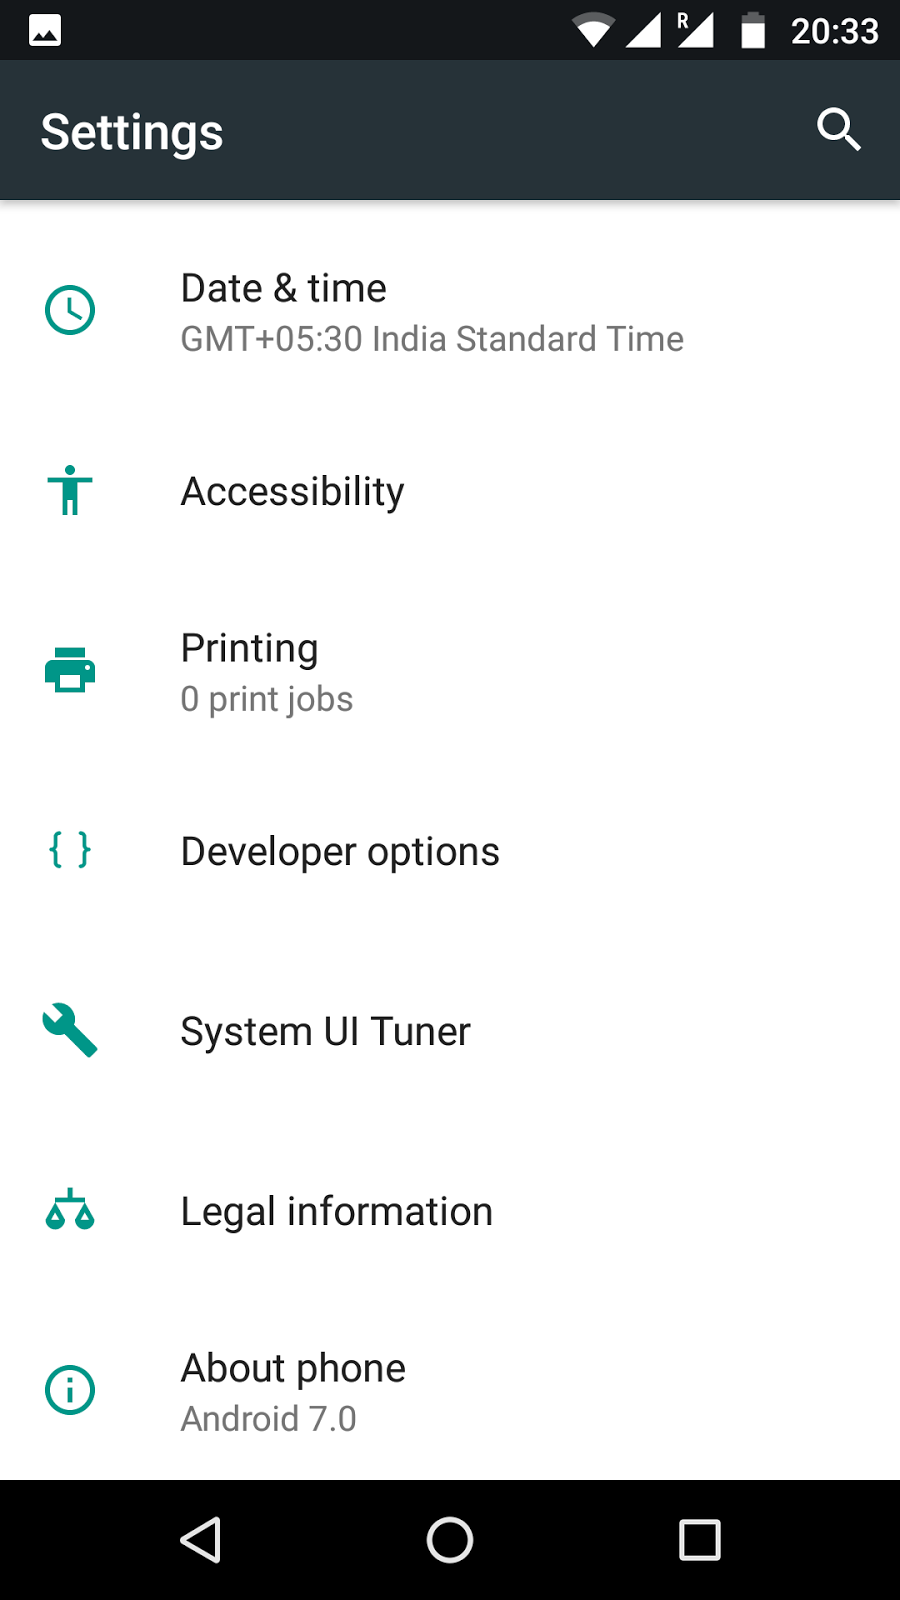
First we need to turn on the hidden System UI tuner.
  • Pull down the notification tray twice and you should see the settings shortcut (cog icon). Long press it and release. You should see a toast message saying System UI Tuner has been added to settings. You should also start seeing wrench icon beside the cog icon indicated the UI Tuner has been enabled.


  • You can now simply toggle to set night mode automatically based on device time.  You can also optionally allow to change brightness as well.


  •  Lastly night mode setting should now be present in your notification tray as well for quick access and toggle.


 This approach worked fine for me. Let me know if you face issues.

t> UA-39527780-1 back to top