Monday, 20 June 2016

Unprotected private key file error while connecting to AWS via SSH

Background

In one of the previous posts, we saw how to connect to your AWS instance.
In that post, we saw how you can remotely connect to your instance using ssh (putty on windows). Recently I migrated to Mac and got following error for connecting.

@@@@@@@@@@@@@@@@@@@@@@@@@@@@@@@@@@@@@@@@@@@@@@@@@@@@@@@@@@@
@         WARNING: UNPROTECTED PRIVATE KEY FILE!          @
@@@@@@@@@@@@@@@@@@@@@@@@@@@@@@@@@@@@@@@@@@@@@@@@@@@@@@@@@@@
Permissions 0777 for 'Documents/Softwares/athakur-securekey.pem' are too open.
It is required that your private key files are NOT accessible by others.
This private key will be ignored.
bad permissions: ignore key: Documents/Softwares/athakur-securekey.pem
Permission denied (publickey).


See screenshot below -

So how do you resolve this?


Solution

You need to give read/write permission just to that user (no groups or other users). So running following command should suffice -
  • chmod 600 athakur-securekey.pem
OR alternatively
  • chmod u=rw athakur-securekey.pem 
  • chmod go=  athakur-securekey.pem


Quoting from AWS documentation -
  • Use the chmod command to make sure your private key file isn't publicly viewable. For example, if the name of your private key file is my-key-pair.pem, use the following command:
    • chmod 400 /path/my-key-pair.pem 
    •  

Related Links

Saturday, 18 June 2016

Use of final local variables in Java

Background

We know why we declare a instance variable or class or a method as final. So that it cannot be extended or modified or overridden. But there are instances when we declare final local variables i.e declare variables inside method as final. Why would we do that? Let's see that.

To understand the usage I had asked this very question on Stack Overflow and Jon Skeet had answered it which made sense - 

There's one important "feature" of final local variables: they can be used in local (typically anonymous) inner classes. Non-final local variables can't be. That's the primary use of final for local variables, in my experience.

public void foo() {
    final String x = "hello";
    String y = "there";

    Runnable runnable = new Runnable() {
        @Override public void run() {
            System.out.println(x); // This is valid
            System.out.println(y); // This is not
        }
    };
    runnable.run();
}


Note that as a matter of style, some people like to use final even when they're not capturing the variable in a local inner class. I'd certainly be comfortable with final being the default, but a different modifier for "non-final", but I find that adding the modifier explicitly everywhere is too distracting.

NOTE : Well behind the scenes, the compiler generates an instance variable in the anonymous inner class and copies the value of the original variable when the instance is created. 

Java 8 Changes

The compiler is generating a class file from your inner class. A separate class has no way to refer to local variables. If the local variable is final ,Java can handle it by passing it to the constructor of the inner class or by storing it in the class file. If it weren’t effectively final, these tricks wouldn’t work because the value could change after the copy was made. 

Up until Java 7, the programmer actually had to type the final keyword. In Java 8, the “effectively final” concept was introduced. If the code could still compile with the keyword final inserted before the local variable, the variable is effectively final. 

Note same applies for Lambda expressions. To use a local variable in a lambda expression it needed to be final or effectively final.

As far as performance is considered there should not be much difference as JVM does it's own optimizations depending on the usage in code.

Nested classes in Java Summary


Related Links

Friday, 17 June 2016

Iterator Design Pattern

Background

In one of the previous posts we saw Introduction to Design Patterns. In that we learned how different design patterns solve some pre identified design concerns and provide a good solution. Above post also states types of design patterns and links to design patterns we have already covered. In this post we will see another design patter - Iterator pattern. Is it same as the iterator I use to iterate over collections? Yes it is! And that a design pattern? What problem does that solve? Hold on to that we will come there in some time :)


Problem

Lets say there are two companies - Company A and company B. They both maintain employee records for their respective employees and their implementation is something like below - 

Company A Employee records - 

/**
 * 
 * @author athakur
 *
 */
public class CompanyAEmpRecords {

    private Employee[] companyEmployees = new Employee[10];
    private int index = -1;

    public void addEmployee(Employee newEmployee) {
        if (index == 10) {
            throw new RuntimeException("Maximum employee limit reached");
        }
        companyEmployees[index++] = newEmployee;
    }

    public void removeEmployee(String name) {
        // implementation to remove employee
    }

    public int getNoOfEmployees() {
        return index + 1;
    }
    
    public Employee[] getEmployees() {
        return companyEmployees;
    }

}

Company B Employee records - 

/**
 * 
 * @author athakur
 *
 */
public class CompanyBEmpRecords {
    private List<Employee> companyEmployees = new ArrayList<>();

    public void addEmployee(Employee newEmployee) {
        companyEmployees.add(newEmployee);
    }

    public void removeEmployee(String name) {
        // implementation to remove an employee based on name
    }

    public int getNoOfEmployees() {
        return companyEmployees.size();
    }
    
    public List<Employee> getEmployees() {
        return companyEmployees;
    }

}

Life was all good when they were working independently. Company A was small and sufficient with less than 10 employees where as Company B did not really care how many employees joined. But then one day they decided to merge and expand their business. Employees of both the companies will now be under one entity and the task to create code that lists down both company's employees now rests on you. You know both Employee record implementation of companies. So you start writing code using it.


/**
 * 
 * @author athakur
 *
 */
public class CompanyRecordsPrinter {
    
    public void pringCompanyEMployeeRecords(CompanyAEmpRecords companyAEmpRecords, CompanyBEmpRecords companyBEmpRecords) {
        
        Employee[] companyAEmployees = companyAEmpRecords.getEmployees();
        for(int i=0; i< companyAEmpRecords.getNoOfEmployees();i++) {
            System.out.println(companyAEmployees[i]);
        }
        
        List<Employee> companyBEmployees= companyBEmpRecords.getEmployees();
        for(Employee emp : companyBEmployees) {
            System.out.println(emp);
        }
        
    }

}

Well that serves the purpose. We are printing employees in both companies using their records. But is it a good design. Two loops for two different types of data structures. What if Company C is merged with this later. Add a new loop to handle it? Naah. Something does not feel right. This is where iterator pattern comes into picture.

Iterator Pattern defined

The Iterator pattern provides a way to access the elements of an aggregate object sequentially without exposing it's underlying representation.

Solution

You will basically have a common interface called Iterator which will have methods like -
  • boolean hasNext()
  • Object next()
Each Employee Record class will have a method called getIterator() that will basically return corresponding new instance of Iterator. Lets call it -
  • CompanyAEmpRecordsIterator
  • CompanyBEmpRecordsIterator
Then you can have a common method that take an Object of type Iterator and iterate over it using hasNext() method and get the actual data using next() method.

Sample code -

public class CompanyAEmpRecords implements CompanyEmpRecords {

    private Employee[] companyEmployees = new Employee[10];
    private int index = -1;

    @Override
    public void addEmployee(Employee newEmployee) {
        if (index == 9) {
            throw new RuntimeException("Employees limit reached");
        }
        companyEmployees[++index] = newEmployee;
    }

    @Override
    public void removeEmployee(Employee oldEmployee) {
        int i = 0;
        for (; i <= index; i++) {
            if (companyEmployees[i].equals(oldEmployee)) {
                break;
            }
        }
        for (int j = i; j <= index - 1; j++) {
            companyEmployees[j] = companyEmployees[j + 1];
        }
        companyEmployees[index] = null;
        index--;

    }

    @Override
    public int getNoOfEmployees() {
        return index + 1;
    }

    @Override
    public Iterator getIterator() {
        return new CompanyAEmpRecordsIterator();
    }

    private class CompanyAEmpRecordsIterator implements Iterator {

        int currIndex = -1;

        @Override
        public boolean hasNext() {
            if (currIndex + 1 <= index)
                return true;
            else
                return false;
        }

        @Override
        public Object next() {
            if (currIndex + 1 <= index)
                return companyEmployees[++currIndex];
            else
                return null;
        }

    }

}


You get the point.  And your printing logic will be as simple as  -

    public void pringCompanyEMployeeRecords(CompanyAEmpRecords companyAEmpRecords, CompanyBEmpRecords companyBEmpRecords) {
        
        printRecord(companyAEmpRecords.getIterator());
        printRecord(companyBEmpRecords.getIterator());
    }
    
    private void printRecord(Iterator recordIterator) {
        while(recordIterator.hasNext()) {
            System.out.println(recordIterator.next());
        }
    }


This is just the snippet I have provided. You can download the complete code from my git repository -
NOTE : Instead of defining your own iterator interface you can use java.util.Iterator interface instead.

NOTE :  we have not added remove() method in the Iterator interface. Neither are we handling multi threading scenarios like what happens when the collection gets modified when you are iterating using that iterator. The way this is handled is that when iterator is created we copy the modcount (modification count) and at any point during the iteration this is different than the original count we throw java.util.ConcurrentModificationException.

For sample code you can refer to Iterator provided by ArrayList class in Java -

    private class Itr implements Iterator<E> {
        int cursor;       // index of next element to return
        int lastRet = -1; // index of last element returned; -1 if no such
        int expectedModCount = modCount;

        public boolean hasNext() {
            return cursor != size;
        }

        @SuppressWarnings("unchecked")
        public E next() {
            checkForComodification();
            int i = cursor;
            if (i >= size)
                throw new NoSuchElementException();
            Object[] elementData = ArrayList.this.elementData;
            if (i >= elementData.length)
                throw new ConcurrentModificationException();
            cursor = i + 1;
            return (E) elementData[lastRet = i];
        }

        public void remove() {
            if (lastRet < 0)
                throw new IllegalStateException();
            checkForComodification();

            try {
                ArrayList.this.remove(lastRet);
                cursor = lastRet;
                lastRet = -1;
                expectedModCount = modCount;
            } catch (IndexOutOfBoundsException ex) {
                throw new ConcurrentModificationException();
            }
        }

        final void checkForComodification() {
            if (modCount != expectedModCount)
                throw new ConcurrentModificationException();
        }
    }


Modification count and ConcurrentModificationException


Lets try to understand modcount we just discussed above in a better way. Now a collection when initialized has a variable called

protected transient int modCount = 0;

This keeps track of modifications made to the collection. Now when you create an iterator for your collection this modcount gets copied over to your iterator as expectedModCount -

int expectedModCount = modCount;

Now during each iterator of iterator checkForComodification() method is called which does following -

        final void checkForComodification() {
            if (modCount != expectedModCount)
                throw new ConcurrentModificationException();
        }

So if modCount of the collection is not same as what was copied over to it's iterator during it's creation (stored as expectedModCount) then it throws ConcurrentModificationException.

Exception for this is when you use iterators remove method in which case iterator updates it's expectedModCount accordingly.

Class Diagram


Related Links

Tips and Tricks for your MacBook


  • Keyboard shortcut to lock your screen
    • Control+Shift+Eject is the keystroke for Macs with an Eject key, and for external keyboards.Control+Shift+Eject is the keystroke for Macs with an Eject key, and for external keyboards.
    • Control+Shift+Power is the keystroke for Macs without the eject key, like the MacBook Air and MacBook Pro Retina.
  • set host name in mac
    • sudo scutil --set HostName name-you-want
  • Take screenshot
    • Press Command + Shift +3 (for whole screen)
    • Press Command + Shift + 4
    • Move the crosshair pointer to where you want to start the screenshot.
    • (for window screenshot) Press the Space bar. The pointer changes to a camera pointer
    • Drag to select an area. ...
    • When you've selected the area you want, release your mouse or trackpad button. ... 
    • NOTE : screenshots will be saved on your desktop 
  • Install  Homebrew - Package manager for OS X.Homebrew installs the stuff you need that Apple didn’t.
  • Install gradle -  brew install gradle
    • To upgrade any brew module do following -
      • brew update
      • brew upgrade gradle 
     
     
  • Install nodejs and npm - brew install node  
  • Install wget - brew install wget
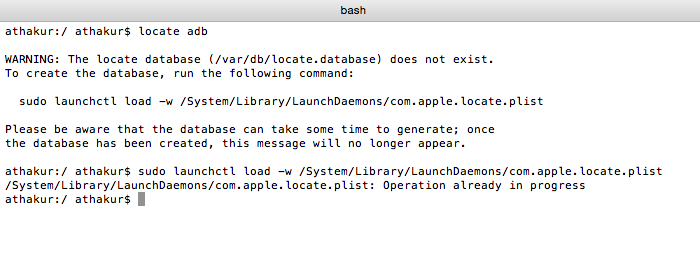
  • Enable and Use the ‘locate’ Command in the Mac OS X Terminal - Run following in console
    •  sudo launchctl load -w /System/Library/LaunchDaemons/com.apple.locate.plist 
    • NOTE :  It will take time for database to build
  • Show Desktop : The default is F11. On a MacBook you will have to press fn + F11, as the keys are used for controlling volume by default. OR Use ⌘ + F3 on Mavericks and newer Macbook Pros. You can find more keyboard mappings in System Preferences -> Keyboard -> Shortcuts
  • To set environment variable for your user you can add it in ~/.bash_profile file. If it is not present you can create one. You can also set aliases here
    • vi  ~/.bash_profile
    • -------file content start-------
    • export ANDROID_HOME=/Users/athakur/Library/Android/sdk
    • export JAVA_HOME=/Library/Java/JavaVirtualMachines/1.6.0.jdk/Contents/Home/
    • export DYLD_LIBRARY_PATH=/Users/athakur/Documents/Softwares/instantclient_12_1
    • export PATH=$PATH:$ANDROID_HOME/platform-tools/:$DYLD_LIBRARY_PATH/:/usr/local/Cellar/subversion/1.9.4/bin/
    • alias ll='ls -la'
    • ------- file content end-------
    • Lastly don't forget source ~/.bash_profile to reload profile.
    • To verify you can execute echo $PATH
  • If you are not able to see external drives in your Finder go to Finder -> Preferences -> Sidebar and make sure External Disks are ticked under Devices section.
  • If you want to change default applications your  files open with you can follow my separate post - How to change default apps to open files with on the Mac(OSFG)  
  • If you are not able to access links while converting doc to pdf in mac refer - Resolving issue of losing links when saving word document to PDF in Mac (OSFG) 
  • There are multiple ways you can arrange and sort files in your Finder. You can right click and select "Show View options" and customize as per your wish -


  • Unlike the ZIP files, Apple’s MAC OS X does NOT include a built-in archive utility tool that you can easily use to open RAR files. Apple’s archive utility upports a number of file formats like ZIP, TAR and GZIP. It does not support RAR files.
    • You can use unrar utility for this. To install it using homebrew type following commands 
    • install : brew install unrar
    • unrar : unrar x <filename>
    • list files : unrar l archive.rar
  • Cider : TransGaming Technologies has developed a product called Cider which is a popular method among publishers to port games to Mac[citation needed]. Cider's engine enables publishers and developers to target Mac OS X. It shares much of the same core technology as TransGaming's Linux Portability Engine, Cedega. Public reception of games ported with Cider is mixed, due to inconsistency of performance between titles; because of this, “Ciderized” games are neither seen as the work of cross-platform development, nor as native, optimized ports. Both Cider and Cedega are based on Wine. Electronic Arts announced their return to the Mac, publishing various titles simultaneously on both Windows and Mac, using Cider. 
  • To Show hidden files and folders in Finder (Youtube)
    • run 'defaults write com.apple.finder AppleShowAllFiles YES' in command prompt 
    • relaunch Finder (Hold option button + right click on Finder and select relaunch)
  •  Soundflower : This is an Inter-application Audio Driver. Soundflower is a virtual audio device that provides an easy and simple way for Max/MSP and other applications
    to send and receive audio to and from any other application.  Running with very low latency and cpu usage, Soundflower allows each client application to use its usual buffer size.
    • You can get it here.
  • TBC...

Videos


Related Links

Saturday, 11 June 2016

Greasemonkey script to replay Youtube videos once they finish

Background

In one of the previous post we saw a Greasemonkey script to block Game of thrones spoiler on facebook.  In this post we will see Greasemonkey script to replay Youtube videos once they finish. And we will see how to do this from very beginning including installing the plugin.


Setup

First step is to install the  Greasemonkey  plugin in firefox. There is a similar plugin in chrome called Tampermonkey. For demo purposes we will use firefox. So go ahead and install the plugin. URL is -


Once installed you can see it's icon besides navigation bar. There you can click to create a new user script -


Then you should see a window where you can create your script.


You can find the actual script on my github account - 

Related Links

t> UA-39527780-1 back to top