Saturday, 25 October 2014

Automating a web page button click using HtmlUnit

Background

HtmlUnit is a "GUI-Less browser for Java programs". It models HTML documents and provides an API that allows you to invoke pages, fill out forms, click links, etc... just like you do in your "normal" browser.

It has fairly good JavaScript support (which is constantly improving) and is able to work even with quite complex AJAX libraries, simulating either Firefox or Internet Explorer depending on the configuration you want to use. 


So in this post I am going to host a simple HTML page on a server and use HtmlUnit to get that page and perform click action on the button on that fetched page.


Setting up the server

I am going to use NodeJS to setup the server that renders our simple page with a button. It's a simple fastest way to host a server. You need to have NodeJS installed on your machine for it. I had written a post earlier on it - installation and printing response on server request. You can go through that to setup and go through the basic workflow -


In a directory create two file index.html and server.js and put in the following contents in it.


index.html - 

<html>
<head>
<title>Hello World!</title>
<script>
function displayHelloWorld()
{
    alert("Hello World");
}
</script>
</head>
<body>
<center>
<h3>Hello World Demo by Open Source for Geeks</h3>
<button type="button" id="buttonId" onclick="alert('Hello world!')">Click Me!</button>
</center>
</body>
</html>


server.js -

var http = require('http'),
fs = require('fs');

fs.readFile('./index.html', function (err, html) {
    if (err) {
        throw err; 
    }       
    http.createServer(function(request, response) {  
        response.writeHeader(200, {"Content-Type": "text/html"});  
        response.write(html);  
        response.end();  
    }).listen(8000);
    console.log('Server running at http://127.0.0.1:8000/');
});


and that's it you can start the server by executing node server.js


you can then view the page from your browser - http://localhost:8000/


Go ahead click on the button. You should be able to see "Hello World" alert.


Our server is now ready. We are basically trying to automate this click by using HtmlUnit.

Getting Started with HtmlUnit

As usual I am going to use Ivy as my dependency manager and Eclipse as my IDE. You are free to choose yours. I am using 2.15 version (latest) of HtmlUnit [ Link To Maven Repo ].

My Ivy file structure looks something like - 

<ivy-module version="2.0" xmlns:xsi="http://www.w3.org/2001/XMLSchema-instance"
       xsi:noNamespaceSchemaLocation="http://ant.apache.org/ivy/schemas/ivy.xsd">
    <info
        organisation="OpenSourceForGeeks"
        module="HtmlUnitDemo"
        status="integration">
    </info>
    
    <dependencies>
        <dependency org="net.sourceforge.htmlunit" name="htmlunit" rev="2.15"/>        
    </dependencies>
</ivy-module>

Lets get to the code now - 

Lets create a class called WebpageButtonClicker.java and add our code in it.

import java.io.IOException;
import java.net.MalformedURLException;

import com.gargoylesoftware.htmlunit.AlertHandler;
import com.gargoylesoftware.htmlunit.FailingHttpStatusCodeException;
import com.gargoylesoftware.htmlunit.Page;
import com.gargoylesoftware.htmlunit.WebClient;
import com.gargoylesoftware.htmlunit.html.HtmlButton;
import com.gargoylesoftware.htmlunit.html.HtmlPage;


public class WebpageButtonClicker {
    
    public static void main(String args[]) throws FailingHttpStatusCodeException, MalformedURLException, IOException {
        WebClient webClient = new WebClient();
        webClient.setAlertHandler(new AlertHandler() {
            
            @Override
            public void handleAlert(Page page, String message) {
                System.out.println("Alert was : " + message);
                
            }
        });
        HtmlPage currentPage = webClient.getPage("http://localhost:8000/");
        HtmlButton button = (HtmlButton) currentPage.getElementById("buttonId");
        button.click();
    }
    

}


that's it. Now run the Java code. You should see the following output.

Alert was : Hello world!

For the reference project structure looks like
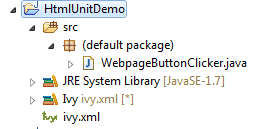
Note : See how we have registered a Alert handler in above code. It is a callback that is received on any alert that is triggered. Similarly you can have handlers registered for multiple events like prompt and refresh.

Related Links


Wednesday, 22 October 2014

understanding Zipalign command in Android SDK

Documentation

Documentation states it clearly

zipalign is an archive alignment tool that provides important optimization to Android application (.apk) files. The purpose is to ensure that all uncompressed data starts with a particular alignment relative to the start of the file. Specifically, it causes all uncompressed data within the .apk, such as images or raw files, to be aligned on 4-byte boundaries. This allows all portions to be accessed directly with mmap() even if they contain binary data with alignment restrictions. The benefit is a reduction in the amount of RAM consumed when running the application.

This tool should always be used to align your .apk file before distributing it to end-users. The Android build tools can handle this for you. When using Eclipse with the ADT plugin, the Export Wizard will automatically zipalign your .apk after it signs it with your private key . The build scripts used when compiling your application with Ant will also zipalign your .apk, as long as you have provided the path to your keystore and the key alias in your project ant.properties file, so that the build tools can sign the package first.

Cautious Note: zipalign must only be performed after the .apk file has been signed with your private key. If you perform zipalign before signing, then the signing procedure will undo the alignment. Also, do not make alterations to the aligned package. Alterations to the archive, such as renaming or deleting entries, will potentially disrupt the alignment of the modified entry and all later entries. And any files added to an "aligned" archive will not be aligned.


Command Syntax / Usage

To align your apk file (HelloWorld.apk in my case) we can use following comment -

zipalign -f -v 4 HelloWorld.apk HelloWorldOut.apk

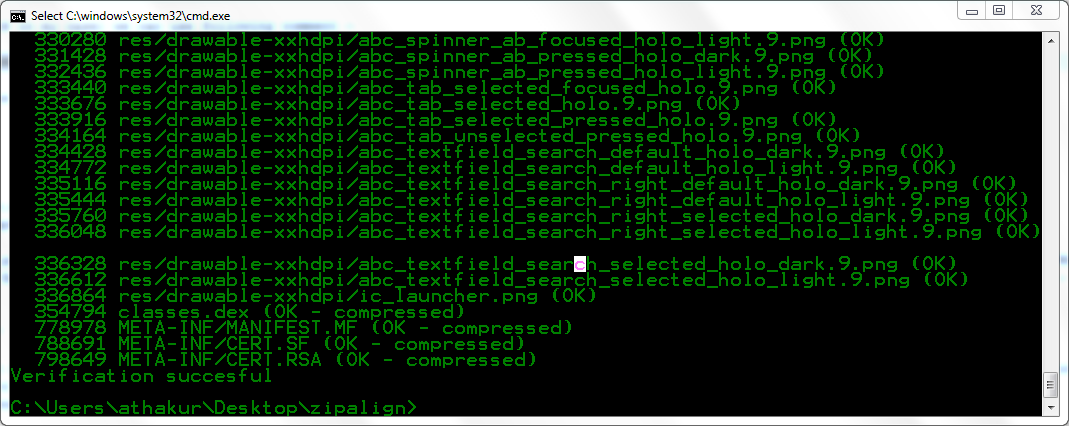
To conform that the alignment is done we can use

zipalign -c -v 4 HelloWorldOut.apk

General syntax is

zipalign [-f] [-v] <alignment> infile.apk outfile.apk
zipalign -c -v <alignment> existing.apk

The <alignment> is an integer that defines the byte-alignment boundaries. This must always be 4 (which provides 32-bit alignment) or else it effectively does nothing.

Flags:

    -f : overwrite existing outfile.zip
    -v : verbose output
    -c : confirm the alignment of the given file


Note : In my case if you had see the previous post on exporting the apk from Eclipse by signing it then the apk exported is already aligned. Quoting from documentation "When using Eclipse with the ADT plugin, the Export Wizard will automatically zipalign your .apk after it signs it with your private key". you can easily verify that by running -
zipalign -c -v 4 HelloWorldOut.apk


Not able to find zipalign command?

I could not find zipalign.exe file in sdk/tools. I had to copy the file from sdk\build-tools\android-4.4W\zipalign.exe to sdk\tools. I have not tried it but upgrading your SDK Build-tools to version 20 seems to fix this issue. Refer cannot find zip-align when publishing app.


Understanding why memory alignment is so important

Aligned access is faster because the external bus to memory is not a single byte wide - it is typically 4 or 8 bytes wide (or even wider). This means that the CPU doesn't fetch a single byte at a time - it fetches 4 or 8 bytes starting at the requested address. As a consequence of this, the 2 or 3 least significant bits of the memory address are not actually sent by the CPU - the external memory can only be read or written at addresses that are a multiple of the bus width. If you requested a byte at address "9", the CPU would actually ask the memory for the block of bytes beginning at address 8, and load the second one into your register (discarding the others).

This implies that a misaligned access can require two reads from memory: If you ask for 8 bytes beginning at address 9, the CPU must fetch the 8 bytes beginning at address 8 as well as the 8 bytes beginning at address 16, then mask out the bytes you wanted. On the other hand, if you ask for the 8 bytes beginning at address 8, then only a single fetch is needed. Some CPUs will not even perform such a misaligned load - they will simply raise an exception (or even silently load the wrong data!).

Reference - what is mean by “memory is 8 bytes aligned”?

In general cases (bus size) it is 4 bytes (32 bits). So we use 4 as the value in zipalign command. So when we do zipalign on an apk some padding is added so that each data is 4 bytes aligned. In this case data can be accessed directly by memory map and no redundant data needs to be loaded into the memory thereby saving RAM.

Related Links

Building APK file from Android application in Eclipse

Background

In last post we saw how can we create a simple "Hello World" Androd Application. In this post we will see how can we sign the application with your own private key and export apk.

Exporting APK of your Android Application

  1.  Right click on the project and select Export. In the list options select Android Application.

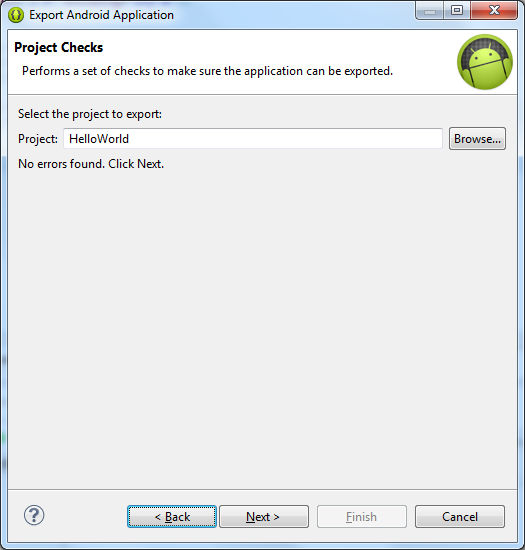
  2. Next you may get a Project check window in which you will have to choose  your project. "Hello World" project in this case.

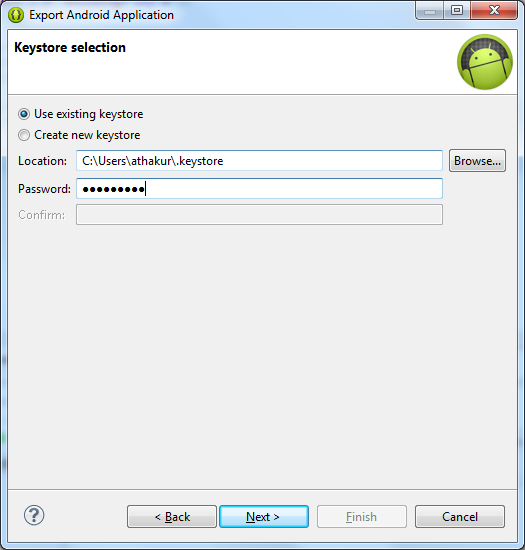
  3. Next window that you would get is to choose the keystore and provide it's password. I have already create a keystore and have also explained it an a previous post. Follow it to create your own keystore - Creating a self signed certificate for SSL using java keytool

  4. Now you can choose to use an existing key or create a new one. I had create a key previously for running SSL on my tomcat which is why you may see it in the below screenshot. But lets  create a new key for this android application.

  5. Go ahead add your details to create a new key. Also you will have to provide a password for it. Recommended value for validity years is 35 but you can put your own value.

  6. That should be it. Next screen will ask to to choose location for exporting your APK. Select the location you wish you apk to be exported and click Finish.

  7. And you have your apk signed with your private key whose password only you know.

Related Links

Sunday, 19 October 2014

Android "Hello World" Application development tutorial

Goal

In this post I will show how can we make an Android application. The aim would be very simple - Create an App (.apk file). Install it on my Moto E running Kitkat , run the app. The App will have a button which on click will show "Hello World" text for some time [Also called toast].


Hoping you have already downloaded and installed Android ADT bundle. My Moto E android device is running Kitkat (Android 4.4/ API 19). So that's what I am going to target. You may choose your own target OS versions. Before proceeding with Android project read my previous posts on some Android Basics


Creating Project


  • Open your Eclipse. Go to File -> New -> Android Application Project.
  • Fill in project details. I am naming it "HelloWorld". Also as stated earlier I am going to target Kitkat as target OS. Minimum can be set to Froyo.

  • Leave the options in the next screen to default.Click Next.

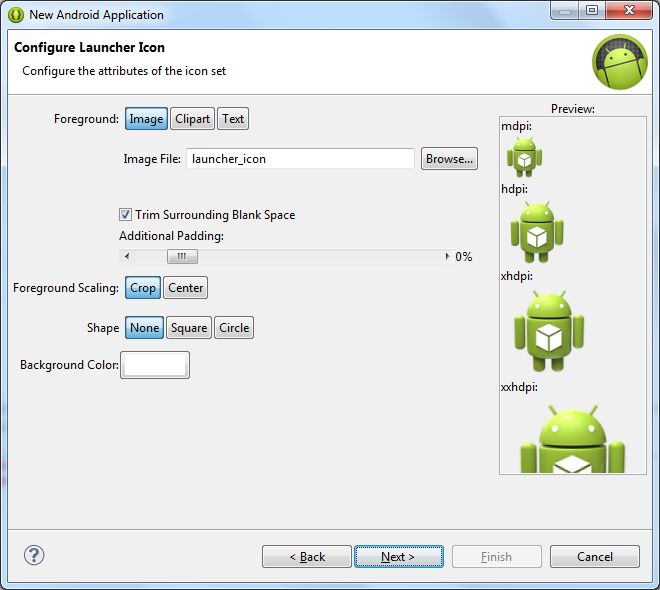
  •  If you want your own icon for the App go ahead provide one. For this project I am going to keep everything default.So click on next.

  • Select to create a black Activity. We will edit this activity so suit our requirements. Select Next.

  • Give the name you wish to your Activity. I am giving it "HelloWorldMainActivity". You will automatically get a corresponding name for the activity layout.

  •  Click on Finish to finish creating your project.


  • After creating your project, the project structure would be as below -


    To the Code.....


    First lets modify the layout to suit our requirements.

    Modify activity_hello_world_main.xml file in your layout folder to below. Replace whatever content it has by the following content -

    activity_hello_world_main.xml


    <?xml version="1.0" encoding="UTF-8"?>
    
    <LinearLayout xmlns:android="http://schemas.android.com/apk/res/android"
    
        android:layout_width="fill_parent"
    
        android:layout_height="fill_parent"
    
        android:layout_gravity="center"
    
        android:orientation="vertical"
    
        android:padding="35dip" >


        <TextView
    
            android:layout_width="fill_parent"
    
            android:layout_height="wrap_content"
    
            android:layout_marginBottom="20dip"
    
            android:gravity="center"
    
            android:text="@string/author"
    
            android:textSize="24.5sp" />


        <Button
    
            android:id="@+id/helloworld_button"
    
            android:layout_width="fill_parent"
    
            android:layout_height="wrap_content"
    
            android:text="@string/click_here" />


    </LinearLayout>


    Explanation :

    Basically we are defining a linear layout. There are various layouts in Android - linear layout being one of them. In this we are creating a normal text view to render some text and a button below that. Now lets create our Activity and provide this layout to it. You would already have file HelloWorldMainActivity.java. Replace/Add content in the file to be same as below -

    HelloWorldMainActivity.java


    package com.example.helloworld;


    import android.support.v7.app.ActionBarActivity;
    
    import android.os.Bundle;
    
    import android.view.Menu;
    
    import android.view.MenuItem;
    
    import android.view.View;
    
    import android.view.View.OnClickListener;
    
    import android.widget.Toast;


    /**
    
     * 
    
     * @author athakur
    
     *
    
     */
    
    public class HelloWorldMainActivity extends ActionBarActivity implements OnClickListener {


        @Override
    
        protected void onCreate(Bundle savedInstanceState) {
    
            super.onCreate(savedInstanceState);
    
            setContentView(R.layout.activity_hello_world_main);


            View continueButton  = findViewById(R.id.helloworld_button);
    
            continueButton.setOnClickListener(this);
    
        }


        @Override
    
        public boolean onCreateOptionsMenu(Menu menu) {
    
            // Inflate the menu; this adds items to the action bar if it is present.
    
            getMenuInflater().inflate(R.menu.hello_world_main, menu);
    
            return true;
    
        }


        @Override
    
        public boolean onOptionsItemSelected(MenuItem item) {
    
            // Handle action bar item clicks here. The action bar will
    
            // automatically handle clicks on the Home/Up button, so long
    
            // as you specify a parent activity in AndroidManifest.xml.
    
            int id = item.getItemId();
    
            if (id == R.id.action_settings) {
    
                return true;
    
            }
    
            return super.onOptionsItemSelected(item);
    
        }


        @Override
    
        public void onClick(View v) {
    
            switch(v.getId()) {
    
            case R.id.helloworld_button : 
    
                Toast.makeText(getApplicationContext(), R.string.hello_world, Toast.LENGTH_LONG).show();
    
                break;


            }


        }
    
    }


    Explanation :

    Most of the method should already be generated by Eclipse for you. Some changes that I have done is make the Activity class implement android.view.View.OnClickListener and have overridden the onClick() method.

    To set view for a Activity we use setContentView(R.layout.activity_hello_world_main); method. As mentioned in one of  my earlier posts

    "Resources can be your icons/images that your Application uses, the localized Strings, layouts etc. Android resource compiler compresses and packs the resources and then generates a class named R that contains references or identifiers that you can use your code to reference the resources. "

    So you can reference your resources Strings, layouts, icons using R class. 

    Also if you notice in onCreate() method I am getting a reference of the button we had created in our layout xml and assigning a onClickListener to it. What it means is when user presses this button it should invoke a callback method onClick() of the OnClickListener instance the button is registered with. In our case it is the Activity itself as it is implementing OnClickListener and we have registered button for OnClickListener using this keyword.

    If you notice the xml you have something like android:text="@string/click_here"  and also in your
    Activity wile creating Toast we have R.string.hello_world. So we need to define all these resources. So we have to modify the strings.xml file in res/values folder. Replace/add content to match the following -

    strings.xml

     
    <?xml version="1.0" encoding="utf-8"?>
    
    <resources>


        <string name="app_name">HelloWorld</string>
    
        <string name="hello_world">Hello world!</string>
    
        <string name="action_settings">Settings</string>


        <string name="author">OpenSourceForGeeks</string>
    
        <string name="click_here">Click Here</string>


    </resources>


    Explanation :

    Content is quite self explanatory. We define String resources in this file. It has a name and a value. We can reference the String resource using R.string.StringName. Eg. R.string.hello_world.


    Toasts in Android

    Toasts are basically flash messages that are displayed on the screen/Activity for some duration of time. Toasts can be created as 

    //Toast shown for  short period of time
    
    Toast.makeText(getApplicationContext(), "Toast Message", Toast.LENGTH_SHORT).show();


    //Toast shown for long period of time
    
    Toast.makeText(getApplicationContext(), "Toast Message", Toast.LENGTH_LONG).show();
    

    We can also create a custom Toast by providing a custom Layout to it. Eg.

    Toast myToast = new Toast(getApplicationContext());
    
    myToast.setGravity(Gravity.CENTER_VERTICAL, 0, 0);
    
    myToast.setDuration(Toast.LENGTH_LONG);
    
    myToast.setView(myLayout);
    
    myToast.show();


     That's it for the code part of it. Let's see the demonstration.


    Demonstration

    Right click the project in Eclipse -> Select Run as -> Android Application. You should see following screen. Choose your device. If you don't have one you can create virtual device. I have my own device so I am going to use that. If you have problems recognizing your devices go through the following posts I have written before.


    Device selection screen is as follows -


    After you select Ok then the app should get installed in your device and open the app on it's own.


    Go ahead click on the button and you should see "Hello World!" toast message on the screen.


    That's it for creating an Android hello World Application!

    Related Links

    Activities in Android

    Background

    An Activity in Android represents an User Interface that is rendered on a Single screen. It is what an user sees on Android devices and user interacts. Activity as an entity in Android has it's own set of APIs and life cycle. We will see that in this post.

    Activity Lifecycle

    Each Activity that you write will ultimately extend the class android.app.Activity.

    Android Activity lifecycle is as follows -


    As per the documentation an activity has essentially four states:

    1. If an activity in the foreground of the screen (at the top of the stack), it is active or running.
    2. If an activity has lost focus but is still visible (that is, a new non-full-sized or transparent activity has focus on top of your activity), it is paused. A paused activity is completely alive (it maintains all state and member information and remains attached to the window manager), but can be killed by the system in extreme low memory situations.
    3. If an activity is completely obscured by another activity, it is stopped. It still retains all state and member information, however, it is no longer visible to the user so its window is hidden and it will often be killed by the system when memory is needed elsewhere.
    4. If an activity is paused or stopped, the system can drop the activity from memory by either asking it to finish, or simply killing its process. When it is displayed again to the user, it must be completely restarted and restored to its previous state.

    Sample Activity

    public class HelloWorldMainActivity extends ActionBarActivity {


        @Override
    
        protected void onCreate(Bundle savedInstanceState) {
    
            super.onCreate(savedInstanceState);
    
            setContentView(R.layout.activity_hello_world_main);
    
        }


        @Override
    
        public boolean onCreateOptionsMenu(Menu menu) {
    
            // Inflate the menu; this adds items to the action bar if it is present.
    
            getMenuInflater().inflate(R.menu.hello_world_main, menu);
    
            return true;
    
        }


        @Override
    
        public boolean onOptionsItemSelected(MenuItem item) {
    
            // Handle action bar item clicks here. The action bar will
    
            // automatically handle clicks on the Home/Up button, so long
    
            // as you specify a parent activity in AndroidManifest.xml.
    
            int id = item.getItemId();
    
            if (id == R.id.action_settings) {
    
                return true;
    
            }
    
            return super.onOptionsItemSelected(item);
    
        }
    
    }
    

    Declaring the activity in the manifest

            <activity
    
                android:name=".HelloWorldMainActivity"
    
                android:label="@string/app_name" >
    
                <intent-filter>
    
                    <action android:name="android.intent.action.MAIN" />


                    <category android:name="android.intent.category.LAUNCHER" />
    
                </intent-filter>
    
            </activity>
    

    Starting an Activity

    Intent intent = new Intent(this, HelloWorldMainActivity.class);
    
    intent.putExtra("Key", "Value");
    
    startActivity(intent);
    

    Terminating an Activity

    public class TicTacToe extends Activity implements OnClickListener {


        @Override
    
        protected void onCreate(Bundle savedInstanceState) {
    
            super.onCreate(savedInstanceState);
    
            setContentView(R.layout.activity_tic_tac_toe);
    
            setVolumeControlStream(AudioManager.STREAM_MUSIC);


            View exitButton = findViewById(R.id.exit_button);
    
            exitButton.setOnClickListener(this);
    
        }


        @Override
    
        public void onClick(View v) {


            switch(v.getId()) {
    
            case R.id.exit_button:
    
                finish();
    
                break;
    
            }


        }


    }
    

    Handling Runtime Changes

    Some device configurations can change during runtime (such as screen orientation, keyboard availability, and language). When such a change occurs, Android restarts the running Activity (onDestroy() is called, followed by onCreate()). The restart behavior is designed to help your application adapt to new configurations by automatically reloading your application with alternative resources that match the new device configuration.

    To properly handle a restart, it is important that your activity restores its previous state through the normal Activity lifecycle, in which Android calls onSaveInstanceState() before it destroys your activity so that you can save data about the application state. You can then restore the state during onCreate() or onRestoreInstanceState().

    Note :  Prefer using the onRestoreInstanceState() method than onCreate()  for restoring the instance state. Also the onSaveInstanceState() method is not called back button is pressed.

    Handling the Configuration Change Yourself

    If your application doesn't need to update resources during a specific configuration change and you have a performance limitation that requires you to avoid the activity restart, then you can declare that your activity handles the configuration change itself, which prevents the system from restarting your activity.
    Note: Handling the configuration change yourself can make it much more difficult to use alternative resources, because the system does not automatically apply them for you. This technique should be considered a last resort when you must avoid restarts due to a configuration change and is not recommended for most applications.

    For example, the following manifest code declares an activity that handles both the screen orientation change and keyboard availability change:

    <activity android:name=".HelloWorldMainActivity"
              android:configChanges="orientation|keyboardHidden"
              android:label="@string/app_name">
    

    Now, when one of these configurations change, MyActivity does not restart. Instead, the MyActivity receives a call to onConfigurationChanged(). This method is passed a Configuration object that specifies the new device configuration. By reading fields in the Configuration, you can determine the new configuration and make appropriate changes by updating the resources used in your interface. At the time this method is called, your activity's Resources object is updated to return resources based on the new configuration, so you can easily reset elements of your UI without the system restarting your activity.

    Notes  

    • To be of use with Context.startActivity(), all activity classes must have a corresponding <activity> declaration in their package's AndroidManifest.xml.
    • Activities in the system are managed as an activity stack. When a new activity is started, it is placed on the top of the stack and becomes the running activity -- the previous activity always remains below it in the stack, and will not come to the foreground again until the new activity exits.
    • We can call finish() in an Activity to terminate it and return all the resources to OS.
    • When you rotate your Screen on Android device Activity is actually destroyed and recreated. However you can change this behavior by handling such configuration changes in your activity.

    Some time back I had create a demo Tic-Tac-Toe Android Application covering most of the basic concepts and if you are new you can give it a glance. Should be pretty easy to understand. I have put it up on the git. Clone it on you local machine, import it in your Eclipse and go through it.

    • https://github.com/aniket91/TicTacToe


    Note : Most of the above information is taken up from the documentation pages and combined to add all info about Activities that I find useful from programming point of view. Documentation pages liks are provided in Related links section below.

    Related Links

    t> UA-39527780-1 back to top